
Salmon Sushi Bake transforms sushi night into a shareable, creamy casserole without rolling.
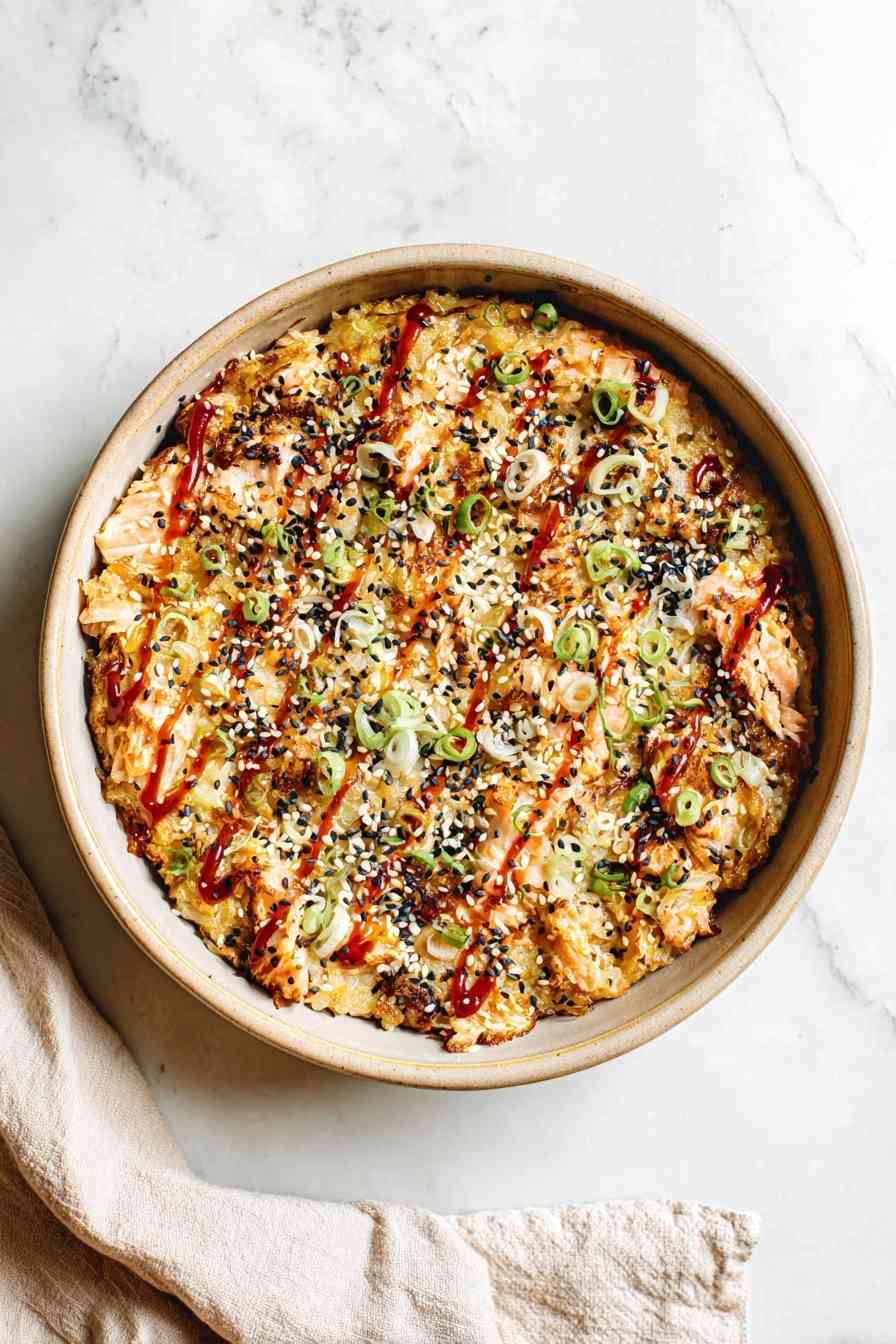
This is what happens when sushi night meets casserole logic. You get seasoned sushi rice pressed into a baking dish, a creamy mix of flaked salmon, imitation crab, and cream cheese spread over the top, then the whole thing baked and briefly broiled until the edges bubble and the surface turns golden. Finish with zigzags of Kewpie mayo, sriracha, and eel sauce, then scoop onto crispy seaweed snacks and suddenly dinner feels like a deconstructed California roll that decided the casserole format was superior.
It is messy, shareable, and dangerously simple to demolish. The internet went wild for sushi bake, and after one round in the oven, you will understand why.
What Goes Into a Salmon Sushi Bake
The ingredient lineup here is short, purposeful, and built around delivering big sushi-bar flavor without any rolling.
- Sushi rice – the foundation, seasoned with rice vinegar, sugar, and salt for that tangy, slightly sweet base you expect in every good sushi roll.
- Rice vinegar, sugar, and kosher salt – the classic seasoning trio that turns plain rice into proper sushi rice.
- Furikake – a savory Japanese seasoning blend that adds umami, sesame, and a little seaweed crunch to the rice layer and the final garnish.
- Imitation crab sticks – shredded and chopped into a mix of strands and small pieces, mimicking the texture of spicy crab rolls.
- Cooked salmon – flaked and folded into the topping for richness and a deeper seafood flavor.
- Cream cheese – softened and mixed in to create that creamy, luscious texture you find in Philadelphia rolls.
- Kewpie mayo – tangier and richer than standard mayo, it binds the topping and adds a signature sushi-bar creaminess.
- Sriracha – brings heat and a touch of sweetness to the topping mix and the final drizzle.
- Soy sauce and sesame oil – deepen the savory backbone and add a nutty, toasted aroma.
- Green onions – sliced thin and mixed into the topping for brightness, plus extra for garnish.
- Eel sauce – a sweet, glossy finishing sauce that adds caramelized depth.
- Seaweed sheets or seaweed snacks – the vehicle for scooping, turning each bite into a handheld sushi experience.
How to Assemble and Bake Salmon Sushi Bake
STEP 1: Heat the oven to 400°F and lightly grease a 9 x 9 baking dish.
STEP 2: Whisk the rice vinegar, sugar, and kosher salt in a small bowl until the sugar dissolves completely, then pour the mixture over the freshly cooked sushi rice and fold gently until the rice is evenly seasoned.
STEP 3: Press the seasoned rice into the prepared baking dish in an even, compact layer, then sprinkle furikake over the surface to add umami and texture.
STEP 4: Shred the imitation crab sticks into thin strands, then chop them so you have a mix of shreds and small pieces for better texture distribution.
STEP 5: Combine the chopped crab with the flaked salmon, softened cream cheese, Kewpie mayo, sriracha, soy sauce, sesame oil, and sliced green onions in a bowl, mixing until the topping looks evenly blended and creamy.
STEP 6: Spread the salmon-crab mixture over the rice layer, working it all the way to the edges so every scoop gets topping.
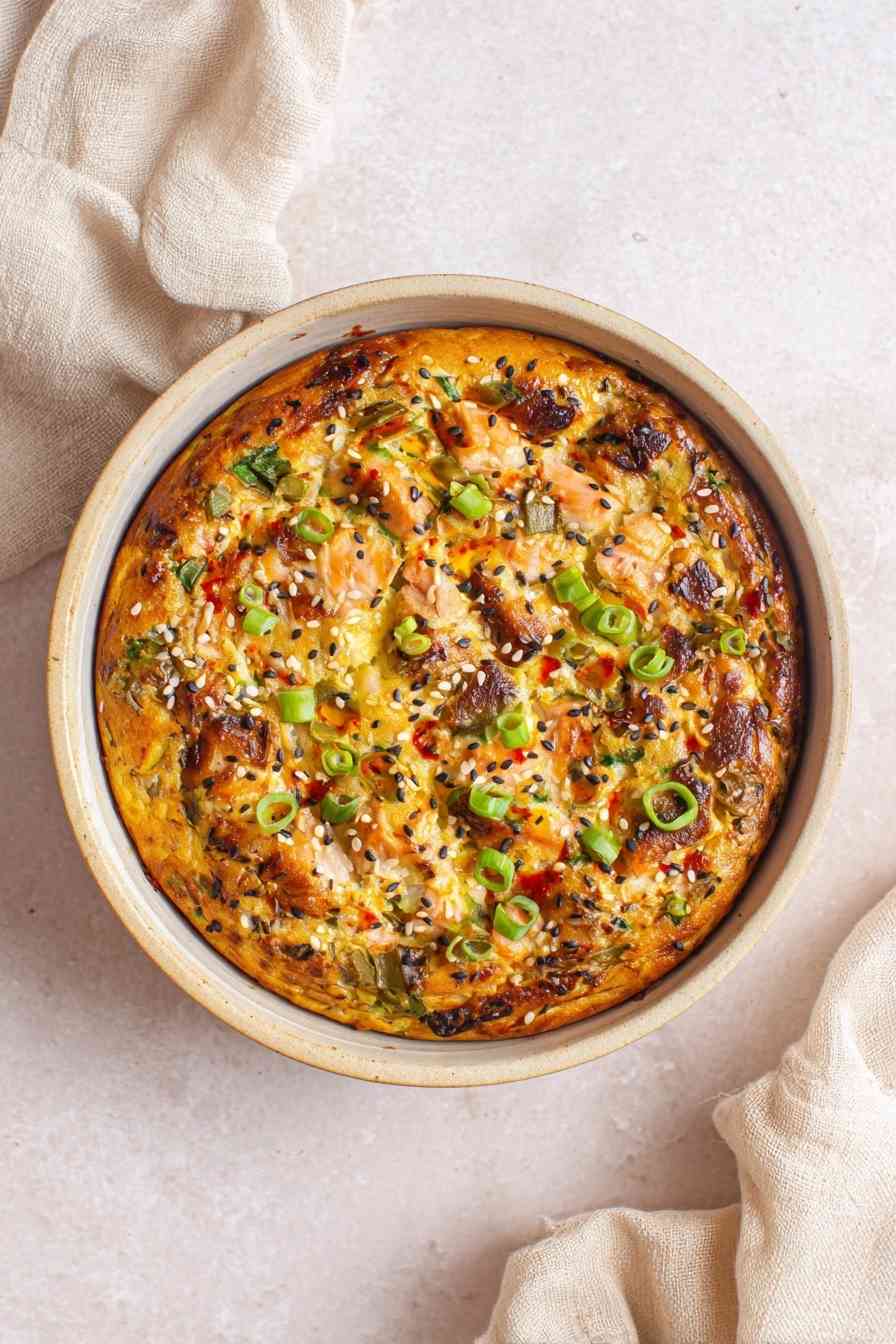
STEP 7: Bake for 12 to 15 minutes until the topping is hot and the edges start to bubble, then switch to broil and cook for 2 to 4 minutes until the surface turns lightly golden and caramelized.
STEP 8: Let the pan rest for 5 minutes so the layers firm up and hold together when you scoop, then drizzle with Kewpie mayo, sriracha, and eel sauce, sprinkle with furikake, and garnish with sliced green onion before serving warm with seaweed sheets.
Getting the Most Out of Your Sushi Bake
- Press the rice layer firmly into the dish so it holds together when you scoop. Loose rice means the whole thing falls apart on the seaweed.
- Do not skip the broil step. Those caramelized edges and the lightly browned top are what separate this from a lukewarm casserole.
- Let the bake rest for a full 5 minutes after broiling. The topping needs time to set, or you will end up with a soupy mess on your seaweed snack.
- Drizzle sauces in thin zigzags instead of flooding the surface. Too much liquid makes the topping soggy and the seaweed limp.
Perfect Pairings for Salmon Sushi Bake
A cool cucumber salad dressed in rice vinegar and sesame seeds provides a crisp contrast to the warm, creamy bake. Miso soup rounds out the meal with a savory warmth, while edamame on the side adds a light, protein-rich element without competing for attention. These sides keep the focus on the bake itself while building out a full sushi-night experience.
Your Salmon Sushi Bake Questions, Answered
Can I use real crab or another protein instead of imitation crab?
Yes, real crab works beautifully and adds a sweeter, more delicate flavor. You can also swap in cooked shrimp, extra salmon, or even diced seared tuna. Just keep the total protein amount similar so the topping stays creamy and spreadable without turning dry or too loose.
Is it possible to prep Salmon Sushi Bake ahead of time?
You can assemble the rice layer and the topping separately, then refrigerate both for up to a day. Spread the topping over the rice just before baking. Baking from cold may add a few extra minutes to the oven time, so check that the center is hot before broiling the top.
What’s the best way to reheat leftovers without drying them out?
Reheat individual portions in the oven at 350°F, covered loosely with foil, for about 10 minutes until warmed through. You can also microwave on medium power in short intervals, but the topping may lose some of its caramelized texture. A quick broil at the end helps restore the surface.
Do I have to use Kewpie mayo, or will regular mayo work?
Kewpie mayo is tangier and richer because it uses only egg yolks and includes rice vinegar, which makes it taste more like sushi-bar mayo. Regular mayo works in a pinch, but the topping will taste a little flatter. Add a squeeze of rice vinegar to regular mayo to get closer.
Can I make Salmon Sushi Bake less spicy for kids?
Leave the sriracha out of the topping mixture and drizzle it only on adult portions at the table. You can also use a mild sweet chili sauce instead, or skip the spicy element entirely and lean on the eel sauce and Kewpie mayo for flavor.
Keeping Leftover Salmon Sushi Bake Fresh
Store leftovers in an airtight container in the fridge for up to 3 days. The rice will firm up as it cools, but the topping stays creamy. Reheat gently in the oven at 350°F, covered loosely with foil, for about 10 minutes until warmed through. Add a fresh drizzle of sauce and a sprinkle of furikake before serving to restore texture and brightness.
Freezing is not recommended. The cream cheese and mayo in the topping can separate when thawed, and the rice texture suffers. This is a dish that rewards eating it fresh or within a couple of days.
For the best results, serve the bake warm and let guests scoop onto seaweed sheets at the table. The layers hold together best when eaten soon after broiling, and the sauces stay vibrant rather than soaking into the rice.
Salmon Sushi Bake
Ingredients
Equipment
Method
- Preheat the oven to 400°F (205°C). Grease a 9 x 9-inch baking dish lightly.
- In a small bowl, combine rice vinegar, sugar, and kosher salt, and whisk until the sugar has dissolved.
- Pour the vinegar mixture over the warm sushi rice and gently fold it in until the rice is evenly coated.
- Spread the seasoned rice out in the greased baking dish, pressing it into an even layer. Sprinkle furikake evenly over the rice.
- Pull the imitation crab into thin shreds, then chop it up so you have both small pieces and some strands.
- In a large bowl, combine the imitation crab, flaked salmon, softened cream cheese, Kewpie mayo, sriracha, soy sauce, sesame oil, and sliced green onions. Stir until everything is thoroughly blended.
- Gently spread the salmon and crab mixture evenly over the rice, all the way to the edges of the dish.
- Bake for 12 to 15 minutes, until the topping is hot and you see bubbly edges.
- Switch the oven to broil and cook 2 to 4 minutes more, until the top is lightly browned. Remove from the oven and let the bake rest for 5 minutes to allow the layers to set.
- Drizzle additional Kewpie mayo, sriracha, and eel sauce over the top, then sprinkle with extra furikake and green onions.
- Serve warm by scooping portions onto seaweed sheets or snacks.