Why You’ll Love these Spider Cookies
Whether you’re planning a Halloween party or just want to make snack time a little spookier, these Spider Cookies are guaranteed to be a hit.
I love how these cookies strike that perfect balance between cute and creepy—just scary enough for Halloween without terrifying the little ones.
The fudgy chocolate base with hints of peanut butter creates a rich, irresistible flavor that both kids and adults devour.
Plus, they’re surprisingly simple to make. The malted milk ball bodies give them a delightful crunch, while the piped chocolate legs transform ordinary cookies into crawly creatures.
Trust me, you’ll enjoy making these almost as much as eating them.
What Ingredients are in Spider Cookies?
These double chocolate spider cookies combine rich cocoa flavor with a hint of peanut butter to create the perfect spooky-sweet Halloween treat. What makes these cookies special is how the simple ingredient list transforms into something magical when decorated. The base is a soft, fudgy chocolate cookie that provides the perfect canvas for our creepy-crawly decorations. And don’t worry if you’re new to decorative baking—these are surprisingly forgiving for beginners.
- ½ cup unsalted butter, melted
- ½ cup unsweetened cocoa powder
- ¼ cup peanut butter
- ¾ cup brown sugar, packed
- 1 egg
- 1 teaspoon vanilla extract
- 1 cup all-purpose flour
- ½ teaspoon baking soda
- ¼ teaspoon salt
- ¼ cup granulated sugar (for rolling)
- 24 malted milk balls (for spider bodies)
- ½ cup melted chocolate (for legs)
- White/black icing or sprinkles (for eyes)
If you’re dealing with nut allergies, no problem—simply substitute the peanut butter with sunflower seed butter for a nut-free version that’s just as delicious. Alternatively, you can replace the peanut butter with 2 tablespoons of butter and a splash of milk. For chocolate lovers who want even more indulgence, try folding in some mini chocolate chips before rolling the dough. The versatility of these ingredients makes these spider cookies adaptable for almost any dietary need while keeping all the Halloween fun intact.
How to Make these Spider Cookies
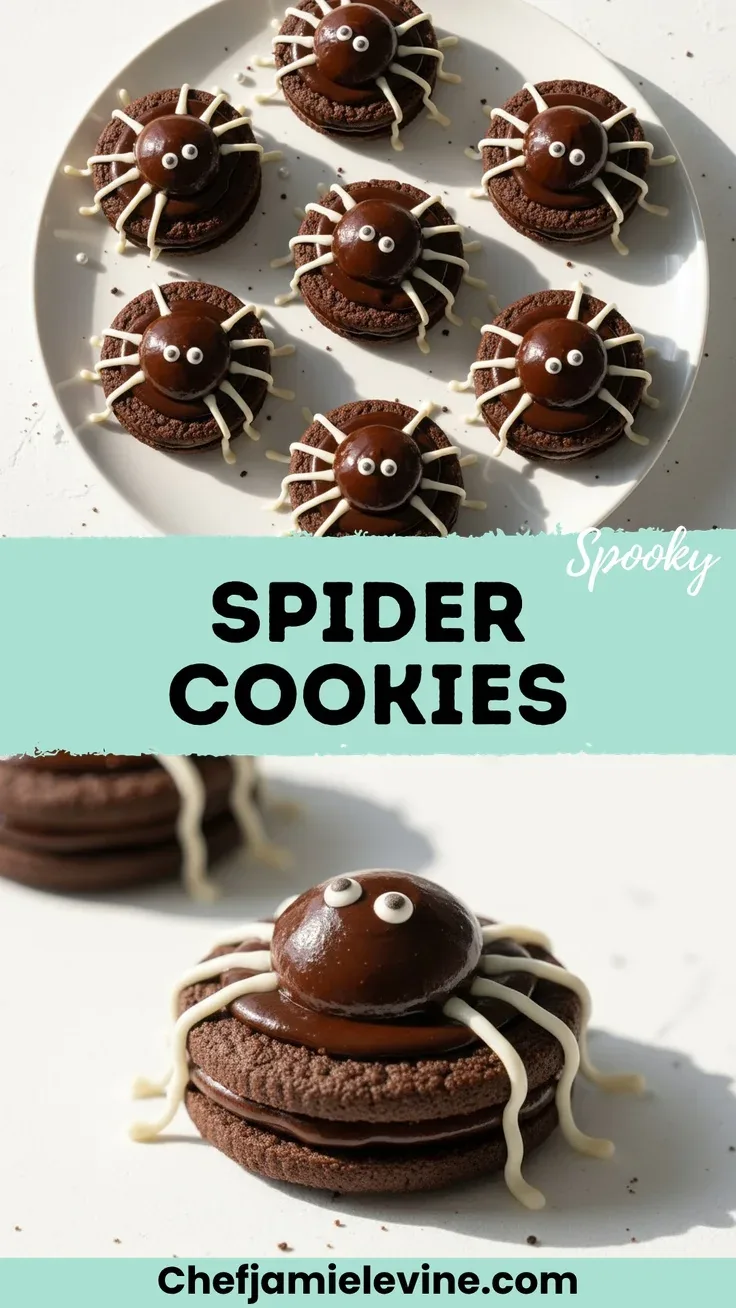
Making these adorable spider cookies is much easier than you might think, and the process is almost as fun as eating them. Start by preheating your oven to 350°F (175°C) and lining two baking sheets with parchment paper.
In a large bowl, whisk together ½ cup melted unsalted butter, ½ cup unsweetened cocoa powder, and ¼ cup peanut butter until you have a smooth, glossy mixture. This chocolate-peanut butter base gives these cookies their rich, fudgy character—and honestly, it’s tempting to just eat this mixture with a spoon right then and there.
Next, beat in ¾ cup packed brown sugar until well incorporated, followed by 1 egg and 1 teaspoon vanilla extract. In goes 1 cup all-purpose flour, ½ teaspoon baking soda, and ¼ teaspoon salt, stirring just until combined. Over-mixing at this stage can make your cookies tough, so channel your inner restraint.
Once your dough is ready, scoop out about 1 tablespoon portions, roll them into balls, and coat them in ¼ cup granulated sugar for that perfect sparkly exterior. Place these sugar-coated dough balls about 2 inches apart on your prepared baking sheets—they’ll need room to spread while maintaining their perfect round shape.
Bake for 8-10 minutes, looking for cookies that are set around the edges but still soft in the centers. This slight underbaking is the secret to their fudgy texture.
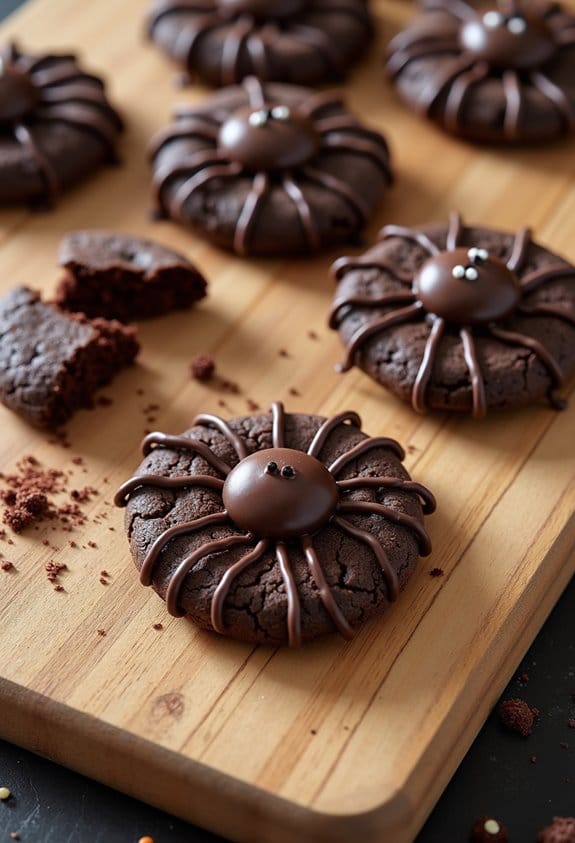
After removing from the oven, let them cool on the sheet for about 5 minutes—this is the perfect time to transform them into spiders! Press a malted milk ball onto each warm cookie to create the spider’s body, then pipe melted chocolate legs using a simple zip-top bag with a tiny corner snipped off.
Add tiny eyes with white and black icing or sprinkles, and let everything set. The legs are easiest to create when the chocolate is still warm but not too hot. What could be more satisfying than watching a batch of ordinary chocolate cookies transform into a creepy-crawly Halloween masterpiece right before your eyes?
Spider Cookies Substitutions and Variations
Anyone can adapt these spooky spider cookies to fit their taste preferences or pantry realities. Got a nut allergy in the house?
Simply swap the peanut butter for sunflower seed butter, or go with my no-nut option: replace it with 2 tablespoons of butter and a splash of milk.
Craving more chocolate? I mean, who isn’t?
Fold in some mini chocolate chips before rolling the dough into balls. The chips create little pockets of melty goodness that make these treats even more irresistible.
Trust me, these versatile cookies welcome your creative twists.
What to Serve with Spider Cookies
Three perfect pairings elevate these spider cookies from a simple treat to a memorable Halloween experience.
I love serving mine with warm spiced apple cider—the cinnamon notes complement the chocolate and peanut butter beautifully. Who doesn’t need something to wash down all that chocolatey goodness?
For a party spread, I arrange these creepy-crawlies around a bowl of vanilla ice cream. The cold, creamy contrast against the chewy cookies? Pure magic.
My secret weapon? A mug of pumpkin hot chocolate alongside.
Trust me, the combination of pumpkin spice and chocolate spider cookies creates the ultimate fall flavor experience. Cozy vibes guaranteed.
Final Thoughts
While these spooky spider cookies might seem intimidating at first glance, I’ve found they’re actually one of the most rewarding Halloween treats to make. The joy on kids’ faces when they spot these creepy-crawly treats is absolutely priceless.
What I love most about this recipe is its versatility. Can’t do nuts? The sunflower butter option works beautifully. Want extra chocolate? Throw in those mini chips.
The cookies themselves strike that perfect balance between chewy and crisp, with the rich chocolate-peanut butter base complementing the candy topping.
Trust me, you’ll be the hero of any Halloween gathering with these spider cookies.
Spooky Spider Cookies
Ingredients
Equipment
Method
- Preheat oven to 350°F (175°C) and line two baking sheets with parchment paper.
- In a large bowl, whisk together the melted butter, cocoa powder, and peanut butter until smooth and glossy.
- Beat in the brown sugar until well incorporated, then add the egg and vanilla extract.
- Add the flour, baking soda, and salt, stirring just until combined. Be careful not to overmix.
- Scoop out approximately 1 tablespoon portions of dough and roll into balls.
- Roll each ball in granulated sugar to coat completely.
- Place the sugar-coated dough balls about 2 inches apart on the prepared baking sheets.
- Bake for 8-10 minutes, until the cookies are set around the edges but still soft in the centers.
- Remove from oven and let cool on the baking sheet for 5 minutes.
- While cookies are still warm, press a malted milk ball onto the center of each cookie to create the spider’s body.
- Transfer melted chocolate to a zip-top bag and snip off a tiny corner. Pipe eight legs extending from each malted milk ball to create spiders.
- Add tiny eyes using white and black icing or sprinkles.
- Allow the chocolate to set completely before serving.

