Ingredients
Equipment
Method
- Crumble the cooled cake into very fine crumbs in a large bowl. Make sure there are no chunky pieces remaining.
- Add ⅓ cup of frosting to the cake crumbs and mix thoroughly with clean hands until the mixture holds together when squeezed but isn't sticky. Add 1-2 teaspoons more frosting if too dry, or more cake crumbs if too sticky.
- Scoop about 1 tablespoon portions of the cake mixture and roll into smooth balls approximately 1¼ inches in diameter.
- Place the cake balls on a parchment-lined tray and chill in the refrigerator for 20-30 minutes to firm up.
- While the cake balls are chilling, melt 2-3 tablespoons of candy melts to use as an adhesive for the sticks.
- Remove the chilled cake balls from the refrigerator. Dip the tip of each lollipop stick about ¼ inch into the melted candy, then insert it halfway into a cake ball.
- Return the cake pops to the refrigerator or freezer for 10 minutes to set the candy anchor.
- Melt the remaining candy melts in a deep cup or measuring glass, working in 20-second microwave intervals and stirring between each until smooth. If the melted candy is too thick, stir in ½-1 teaspoon of coconut oil or vegetable shortening to achieve a dippable consistency.
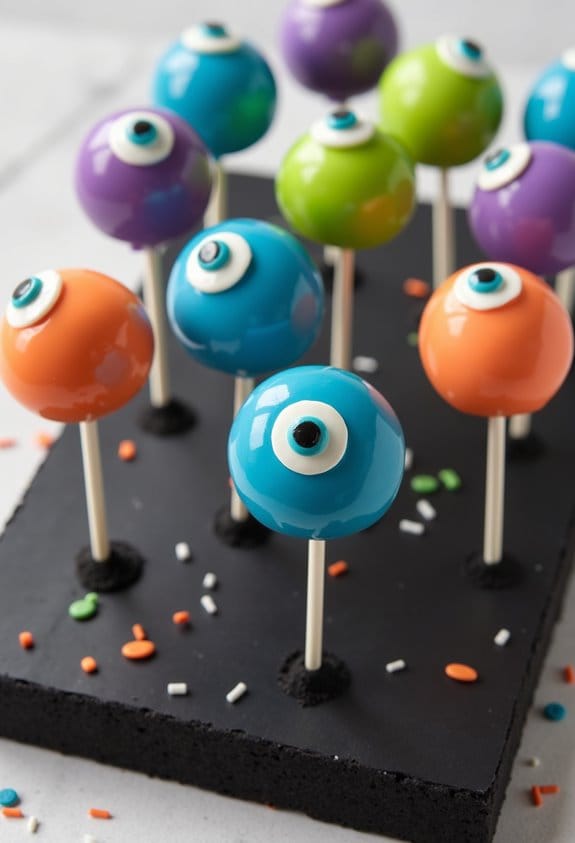
- Dip each cake pop straight down into the melted candy until fully coated. Lift and gently tap the stick against the cup's rim while rotating to remove excess coating and create a smooth finish.
- While the coating is still wet, press one candy eyeball onto the center of each pop.
- Stand the cake pops upright in a foam block or a jar filled with sugar or sprinkles to set completely, about 10-15 minutes.
Nutrition
Notes
For best results, use chocolate cake with chocolate frosting as this combination creates the easiest "dough" to work with. The moisture content of your cake matters—if using a particularly moist cake, you might need less frosting than the recipe calls for.
These cake pops can be made 3-4 days ahead and stored in an airtight container at room temperature. For longer storage, refrigerate for up to a week, but allow them to come to room temperature before serving for the best taste and texture.
If you don't have candy melts, white chocolate with food coloring works as an alternative. You can also make your own eyeballs with white chocolate discs and mini chocolate chips if store-bought ones aren't available.