
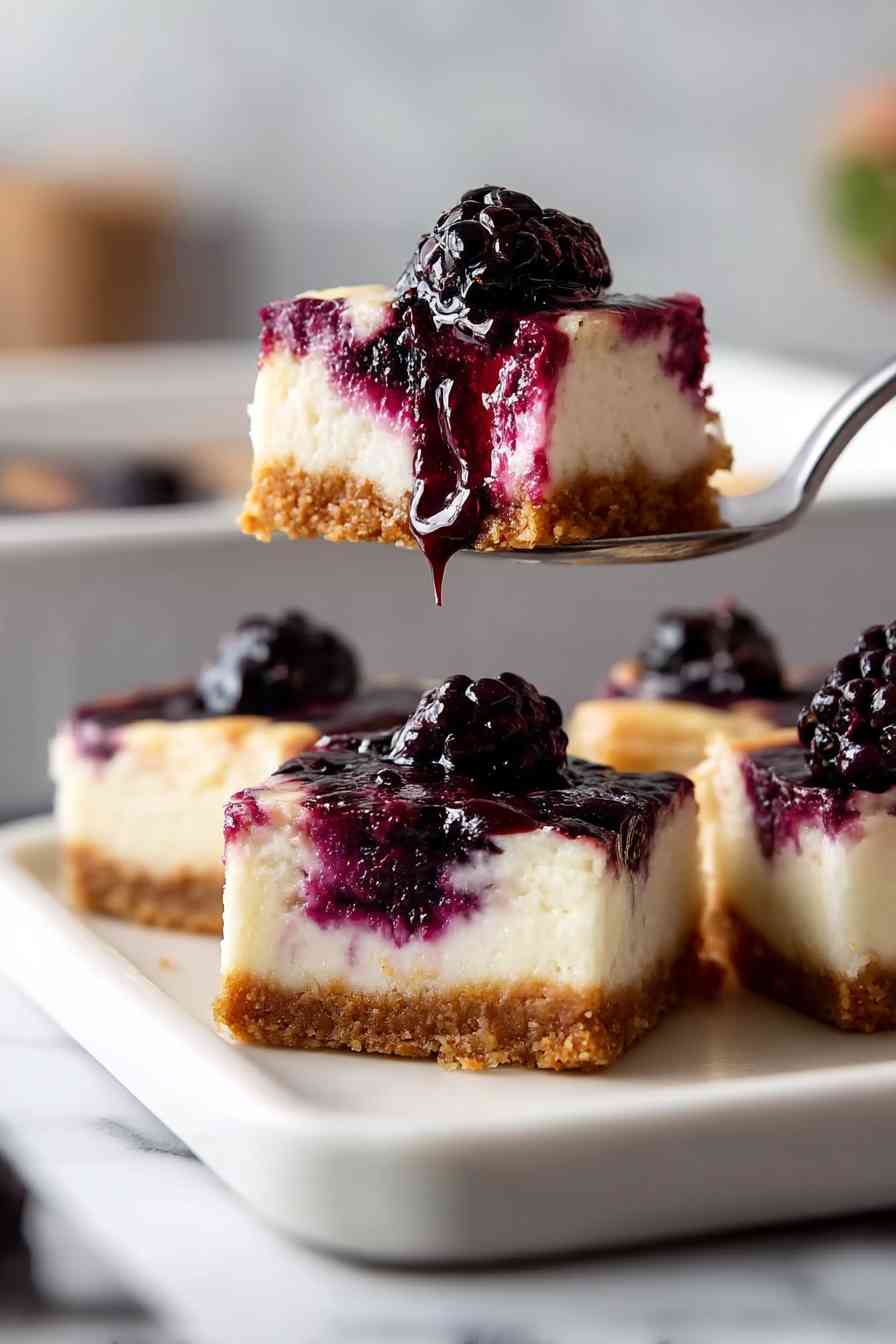
Tasty Black Raspberry Cheesecake Bars combine creamy filling with seedless berry swirls.
These bars feature a sturdy cracker crumb crust topped with rich, tangy cheesecake and smooth black raspberry sauce swirled through in gentle, marbled patterns. The berries get simmered and strained to remove seeds, creating a clean filling without texture disruption. A water bath ensures even baking, while overnight chilling develops flavor and makes slicing neat and easy.
Bar format means easier portioning and serving compared to a full cheesecake. The cracker crust packs down firmly enough to hold together when you lift each piece from the pan. The combination of bright berry tartness and creamy filling creates a balance that works well for gatherings, potlucks, or any time you want something polished but approachable.
What You’ll Need for Black Raspberry Cheesecake Bars
This recipe builds on classic cheesecake components with a few specific moves that make the bars work.
- Blackberries – the base for the seedless swirl sauce, simmered down and strained for smooth texture.
- Lemon juice and zest – brighten the berry sauce and cut through the richness of the cream cheese.
- Cracker crumbs – form the sturdy base that holds together when you slice the bars.
- Butter – binds the crumbs and adds richness to the crust.
- Cream cheese – the foundation of the filling, providing body and tang.
- Sour cream – adds moisture and a slight tang that balances the sweetness.
- Vanilla – rounds out the flavor without competing with the berry swirl.
- Sugar – sweetens both the filling and the berry sauce, with a touch of powdered sugar in the crust.
- Eggs – bind the filling and give it structure as it bakes.
- Salt – enhances the overall flavor and keeps the sweetness in check.
Pro Tips for Perfect Swirls and a Crack-Free Top
- Pack the crust firmly – Use a flat-bottomed measuring cup or glass to compress the crumb mixture before baking. A well-packed base prevents crumbling when you cut the bars.
- Swirl with a thin knife – A thin blade covers more area than a toothpick and creates cleaner, more visible patterns without overworking the batter.
- Watch for the jiggle – At the end of baking, the edges should be set but the center should still wobble slightly when you gently shake the pan. A two-inch circle of movement is ideal; full firmness means overbaking.
- Chill overnight before cutting – Cold cheesecake slices cleanly. Use a sharp knife dipped in hot water and wiped between cuts for neat edges.
Step-by-Step: Swirling and Baking the Cheesecake Bars
STEP 1: Combine blackberries, sugar, and lemon juice in a saucepan over medium heat. Simmer for about 10 minutes, stirring occasionally, until the berries break down. Pour through a fine-mesh strainer, pressing gently to extract the sauce while removing seeds. Stir in lemon zest and set aside to cool.
STEP 2: Preheat your oven to 350°F and line a 9×13 inch baking dish with parchment paper. Melt the butter and mix with cracker crumbs and powdered sugar until the texture resembles wet sand. Press firmly into the bottom of the pan, then bake for 10 minutes until lightly golden. Remove and let cool while you prepare the filling.
STEP 3: Reduce oven temperature to 325°F. Beat cream cheese, sour cream, vanilla, salt, and sugar together until completely smooth, about 2 to 3 minutes. Add eggs one at a time on low speed, beating just until combined after each addition.
STEP 4: Pour half the cheesecake filling over the cooled crust. Drizzle half the berry sauce on top, then use a thin knife to swirl it through the filling with gentle back-and-forth motions. Add the remaining filling, spread gently to even it out, then drizzle and swirl the remaining sauce to create a marbled pattern.
STEP 5: Place the baking dish inside a larger roasting pan and pour hot water into the outer pan until it reaches halfway up the sides of the cheesecake pan. Bake at 325°F for 45 to 60 minutes, until the edges are set but the center still jiggles slightly when you shake the pan.
STEP 6: Turn off the oven and crack the door open about 4 inches. Let the cheesecake sit in the warm oven for 1 hour, then remove and cool completely at room temperature for another hour. Transfer to the refrigerator and chill overnight or at least 8 hours before cutting.
Serving Ideas: What Goes Well with Cheesecake Bars
Serve with a small dollop of whipped cream or a few fresh blackberries on top for a simple garnish. Pair with strong black coffee or espresso to cut through the richness and balance the sweetness. For a polished presentation at gatherings, arrange on a platter with a light dusting of powdered sugar.
Frequently Asked Questions About Black Raspberry Cheesecake Bars
Can I use frozen blackberries instead of fresh?
Frozen blackberries work well for the sauce. Thaw them first and drain any excess liquid before simmering, as frozen berries release more moisture. The straining step removes seeds either way, so texture stays smooth and the flavor remains bright.
Do I really need a water bath for cheesecake bars?
The water bath provides gentle, even heat that prevents the edges from overcooking while the center sets. Without it, you risk a dry, cracked top and uneven texture. Wrapping the pan in foil before placing it in the water bath adds extra insurance against leaks.
How do I tell when the cheesecake bars are done baking?
Look for set edges and a slight jiggle in the center, about a two-inch circle. The surface should look matte rather than wet or glossy. If the entire pan is firm, the bars are likely overbaked and may turn out dry or grainy once cooled.
Is it possible to make these bars gluten-free?
Substitute gluten-free graham crackers or cookies for the cracker crumbs in the crust. The rest of the recipe is naturally gluten-free. Make sure the crumbs are finely ground so the crust packs down firmly and holds together when sliced.
What’s the best way to get clean slices?
Chill the bars overnight before cutting. Use a sharp knife dipped in hot water, wiping it clean between each cut. The cold cheesecake slices cleanly, while a warm blade glides through without dragging or tearing the filling.
How to Store and Make Ahead
Store the bars in an airtight container in the refrigerator for up to five days. The flavor actually improves after a day or two as the berry swirl mellows and the filling firms up. For longer storage, wrap individual bars tightly in plastic wrap and place in a freezer-safe container for up to two months. Thaw in the refrigerator overnight before serving.
These bars are ideal for make-ahead planning. Bake and chill them a day or two before you need them, then cut and serve straight from the fridge. The overnight chill is essential for both texture and clean slicing, so build that time into your schedule.
Cheesecake bars reward patience more than speed, but the payoff is a dessert that slices neatly, tastes balanced, and holds up well whether you’re serving two people or twenty. The marbled berry swirl looks deliberate without requiring precision, and the sturdy crust means each piece lifts cleanly from the pan. Make them once, and you’ll have a reliable template for any time you want something creamy, tangy, and just a little bit showy.
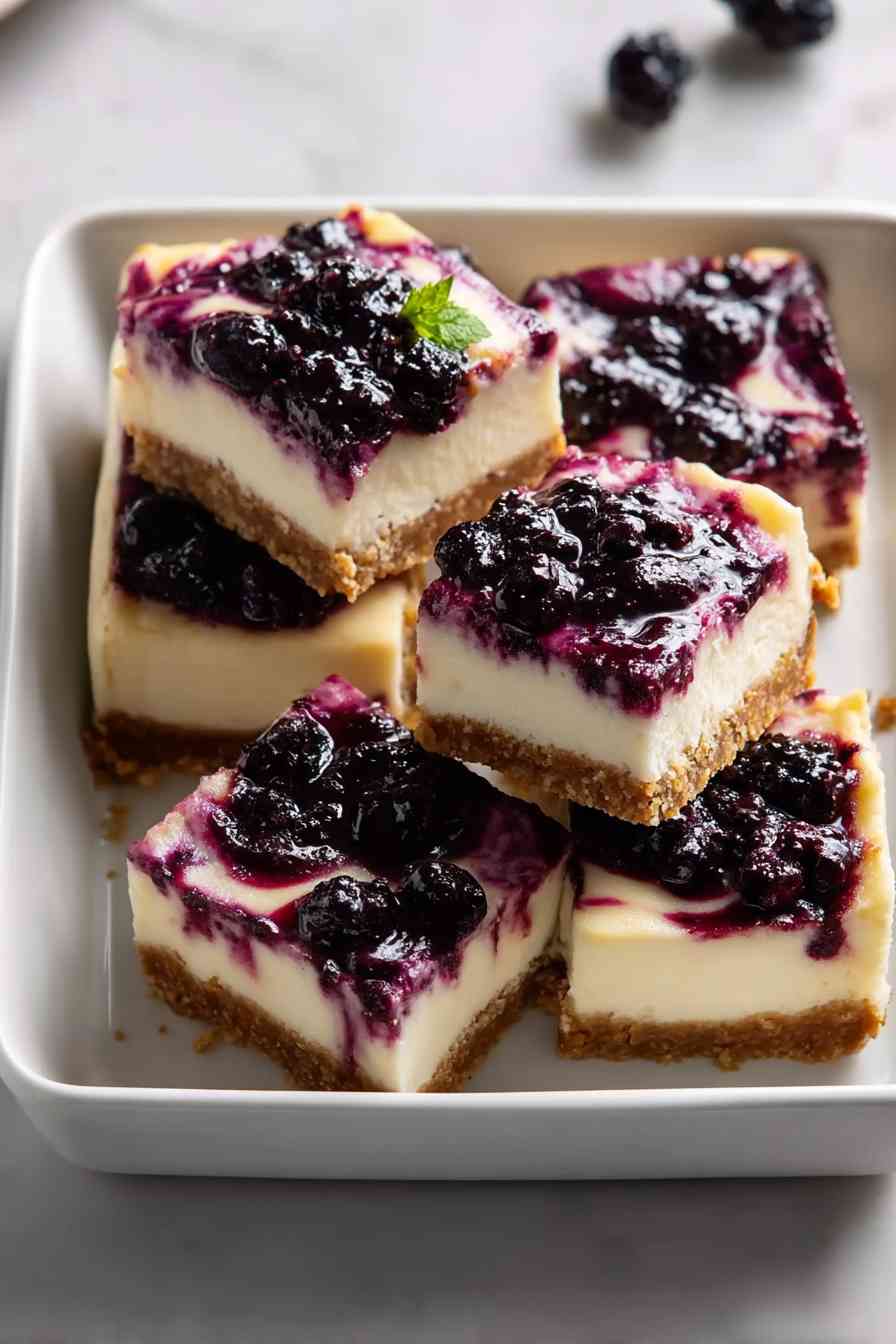
Tasty Black Raspberry Cheesecake Bars
Ingredients
Equipment
Method
- Add the blackberries, sugar, and lemon juice to a saucepan over medium heat. Let the mixture simmer for about 10 minutes, stirring occasionally, until the berries have broken down and released their juices. Strain the mixture through a fine-mesh strainer, pressing on the solids to extract all the sauce while leaving the seeds behind. Stir the lemon zest into the strained sauce and set it aside to cool slightly.
- Preheat your oven to 350°F (175°C) and line a 9x13 inch baking dish with parchment paper. Combine the melted butter, cracker crumbs, and powdered sugar, stirring until the mixture resembles wet sand. Press the crumb mixture firmly and evenly into the bottom of the prepared pan — a flat-bottomed measuring cup works well for this. Bake for 10 minutes until lightly golden and set, then remove from the oven and allow to cool while you prepare the filling.
- Reduce the oven temperature to 325°F (165°C). In a large bowl, beat together the cream cheese, sour cream, vanilla, salt, and sugar until the mixture is completely smooth and creamy, about 2–3 minutes. Add the eggs one at a time, beating on low speed after each addition just until incorporated — overmixing after adding the eggs can introduce too much air. The finished filling should be smooth and thick but still pourable.
- Pour half of the cheesecake filling evenly over the cooled crust. Drizzle half of the berry sauce over the filling, then use a thin knife or skewer to swirl it through with gentle back-and-forth motions. Spread the remaining cheesecake filling carefully on top, then drizzle the rest of the berry sauce over it and swirl again to create a marbled pattern across the surface.
- Set the baking dish inside a larger roasting pan and pour hot water into the outer pan until it reaches about halfway up the sides of the cheesecake dish. Bake at 325°F (165°C) for 45–60 minutes, until the edges are set and firm but the center still has a slight jiggle of about a 2-inch circle when you gently shake the pan. Slightly underbaked is preferable to overbaked, as the cheesecake continues to set as it cools.
- Turn the oven off and open the door about 4 inches. Allow the cheesecake to rest in the warm oven for 1 hour to cool gradually and prevent cracking. Remove it from the oven and let it cool completely at room temperature for another hour, then transfer to the refrigerator and chill overnight, or for at least 8 hours.
- Once fully chilled, lift the cheesecake out of the pan using the parchment paper overhang and place it on a cutting board. Slice into 12–16 bars using a sharp knife dipped in hot water and wiped clean between each cut for neat, clean edges.