
Learn how to make a Barbie cake that transforms simple layers and buttercream into a nostalgic, show-stopping centerpiece.
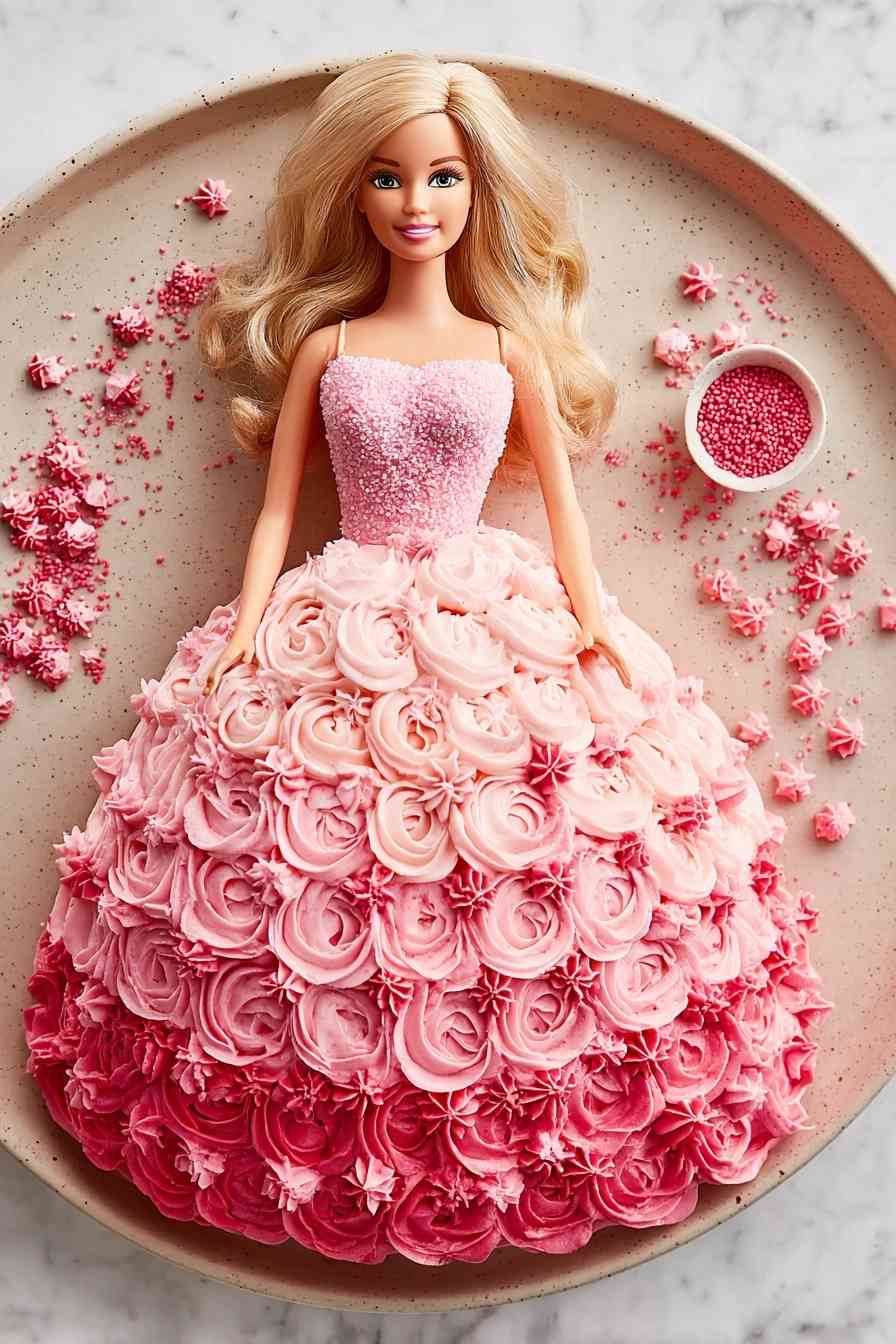
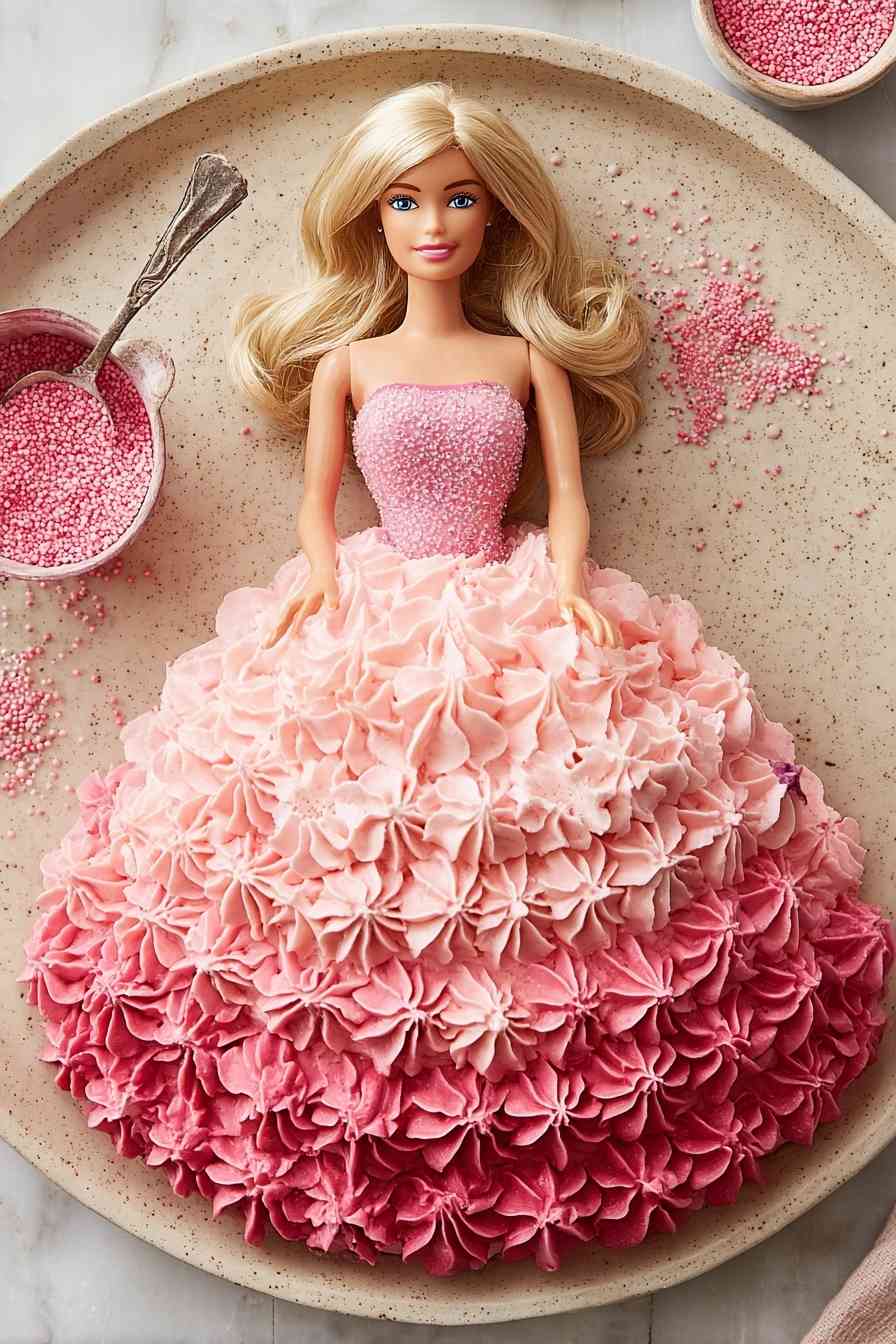
This playful project brings together a bundt pan, two 6-inch rounds, and pink ombre buttercream rosettes piped with a #1M tip. You’ll carve a center hole for the doll, stack the layers, and pipe gradual color shifts from dark pink at the hem to pale pink at the bodice. The result feels fancy, but the method stays accessible. No specialty doll pan required, no advanced piping skills demanded.
Wrapping Barbie’s legs in plastic keeps frosting off her permanently, and filling gaps with pink sugar pearls or a piped corset using a #18 star tip solves the common problem of visible seams around her waist. The cake works with any flavor, any doll, and any color palette you choose. Strawberry batter gives you that signature Barbie-pink crumb, but vanilla, chocolate, or funfetti all deliver the same structural success.
Whether you’re celebrating a birthday, hosting a movie-night party, or simply leaning into nostalgia, this guide walks you through the full assembly and decoration process with clarity and a little bit of humor.
What You’ll Need for a Show-Stopping Barbie Cake
The ingredient lineup balances structure, color, and decoration, giving you everything required to build a stable, vibrant, and visually striking cake.
- Cake batter for a 3-layer cake – provides the height and volume needed to cover the doll from hips to hem.
- Strawberry or buttercream frosting (4 cups) – acts as the crumb coat and structural glue between layers.
- Buttercream frosting (8 cups) – forms the dress through piped rosettes and ombre color gradients.
- Barbie doll – becomes the cake’s centerpiece, inserted into the carved center hole.
- Plastic wrap – keeps frosting off the doll’s legs during assembly and decoration.
- Pink sugar pearls – fills small gaps between rosettes and adds polished detail.
Building and Decorating Your Barbie Cake: Step-by-Step
STEP 1: Prepare enough cake batter for a 3-layer cake. Coat a 9-inch bundt pan with melted butter or shortening, then grease and line two 6-inch round pans with parchment paper. Fill each pan about 2/3 full with batter.
STEP 2: Bake until the cakes turn golden at the edges and a toothpick inserted into the center comes out clean. Let the rounds cool briefly in the pans, then transfer them to a wire rack to cool completely.
STEP 3: Using a biscuit cutter or measuring cup and knife, remove the center of each 6-inch cake to create a hole where the doll will slide in. Level off the bottom of the bundt cake and place it on your cake stand or cardboard round.
STEP 4: Frost the top and inside hole of the bundt cake with strawberry or buttercream frosting. Frost the inner hole and top of the first 6-inch cake, then stack the second 6-inch round on top. Use a serrated knife to shave the sides of the stacked rounds until they form a bell shape.
STEP 5: Apply a thin crumb coat around the entire cake. Chill for at least an hour before piping rosettes, allowing the frosting to firm up and the structure to stabilize.
STEP 6: Prepare your buttercream frosting. Reserve about 2 cups in white. Divide the remaining frosting into two bowls, coloring one dark pink and one light pink. Transfer the dark pink frosting into a piping bag fitted with a #1M tip.
STEP 7: Wrap Barbie’s legs in plastic wrap to keep her clean. Style her hair before inserting her into the cake, and clip it up while you work. Pipe a row of dark pink rosettes along the bottom edge of the cake, then gradually lighten the shade by combining small amounts of dark pink with light pink and white frosting for each subsequent layer as you work your way up.
STEP 8: Slide Barbie into the center hole and pipe the final layer of rosettes around her waist, touching both the doll and the center hole. Use a #18 star tip to fill gaps around her waist and pipe a corset on her torso. Add stars and pink sugar pearls to fill any remaining gaps between rosettes.
Barbie Cake Decorating Tips and Shortcuts
- Chill the crumb coat thoroughly – a firm base prevents rosettes from sliding or melting as you pipe, especially if your kitchen runs warm.
- Mix ombre shades gradually – add white or light pink frosting in small increments to avoid jumping from dark to pale too quickly, which creates harsh color bands instead of smooth transitions.
- Level your bundt cake flat – an uneven base causes the entire structure to lean, making stacking and decorating frustrating.
What to Serve with Barbie Cake (Party Pairings)
Pink lemonade or strawberry punch keeps the color theme cohesive and adds refreshing contrast to the rich buttercream. Fresh strawberries or raspberries balance the sweetness and cut through frosting, while vanilla or strawberry ice cream pairs naturally with the cake’s flavor profile.
Barbie Cake FAQs and Troubleshooting
Can I use any doll for a Barbie cake, or does it have to be Barbie brand?
Any doll works as long as it’s roughly the same size and proportions. Some dolls come with painted corsets or tops, which makes decorating easier since you only need to cover from the hips down. Just confirm your cake is tall enough to reach the doll’s waist.
What if my cake isn’t tall enough for the doll’s legs?
Add an extra 6-inch cake layer to increase height, or trim the doll’s legs slightly if you’re comfortable doing so. You can also place the doll on a small cardboard platform inside the cake to raise her up without adding more batter.
How can I get smooth, vibrant buttercream colors for the ombre effect?
Use gel food coloring instead of liquid, which delivers stronger pigment without thinning the frosting. Mix colors in separate bowls and lighten each shade gradually by adding small amounts of white frosting, testing the color on parchment before piping.
Do I need a special cake pan for this, or can I improvise?
No specialty pan required. A bundt pan plus two 6-inch rounds work perfectly, but you can also use three 8-inch rounds and carve the center yourself. The key is creating enough height and a stable base for the doll.
Can I make the Barbie cake a day ahead of time?
Absolutely. Assemble and decorate the cake, then chill it overnight. The buttercream will firm up nicely, making transport and serving easier. Just keep it refrigerated until about an hour before serving to let the frosting soften slightly.
Storing and Saving Your Barbie Cake
Store the finished cake in the refrigerator, loosely covered with plastic wrap or in a large cake dome. The buttercream stays fresh for up to three days. If you need to remove the doll before storing, gently lift her out and cover the center hole with a small piece of plastic wrap to prevent the frosting from drying out.
Leftover slices can be wrapped individually in plastic wrap and refrigerated for up to four days. Bring slices to room temperature for about 20 minutes before serving to restore the frosting’s soft texture. Freezing is possible but not ideal, as the rosettes may lose some definition when thawed.
How to Make a Barbie Cake
Ingredients
Equipment
Method
- Mix enough cake batter for three layers, preparing according to your recipe or cake mix instructions.
- Grease a 9-inch bundt pan thoroughly with melted butter or shortening and fill it two-thirds with batter. Prepare two 6-inch round cake pans by greasing and lining the bottoms with parchment, then fill each round pan two-thirds full with batter.
- Bake the cakes until the edges are golden and a toothpick inserted in the center comes out clean. Allow the cakes to cool slightly in their pans before turning them out onto a wire rack to cool completely.
- Use a biscuit cutter or measuring cup along with a knife to cut the center out of the two 6-inch cakes, making an opening large enough for the Barbie doll.
- Prepare the strawberry or buttercream frosting for assembling and crumb-coating the cake.
- Trim the bottom of the bundt cake to level it. Place it on a cake stand or cardboard cake round as the bottom layer.
- Spread frosting over the top and inside of the bundt cake’s hole. Frost both the inside hole and top of the first 6-inch cake, then lay the second 6-inch round on top.
- With a serrated knife, shape the stacked cakes by shaving down the sides until they resemble a bell-shaped dress.
- Cover the entire cake in a thin layer of frosting for the crumb coat. Chill for at least 1 hour to set the frosting before piping rosettes.
- Make the buttercream frosting for decorating. Set aside about 2 cups as plain white; divide the rest into two bowls and tint one dark pink and the other light pink. Add the dark pink to a piping bag fitted with a #1M tip.
- Wrap the Barbie doll’s legs securely in plastic wrap to keep them clean. Style and pin up her hair before inserting her into the cake.
- Pipe a row of dark pink rosettes along the bottom edge of the cake using the prepared piping bag.
- Gradually blend the remaining dark pink frosting with the light pink and then the white frosting to create lighter shades. Continue piping rows of rosettes in increasingly lighter shades as you move up the cake.
- Gently insert Barbie into the center opening of the cake. Pipe the last row of rosettes around the top, making sure they meet the doll and fill the center hole.
- Fit a #18 star tip to a piping bag and use it to fill in any gaps around Barbie’s waist and pipe a ‘corset’ on her bodice. Add small stars and place pink sugar pearls as needed to fill spaces between rosettes.
- If you’d like, use a #5 piping tip to add details such as a pearl necklace onto the doll. Keep the decorated cake chilled until serving.