
Peanut Butter and Jelly Cookies deliver nostalgic PB&J flavors in a soft, chewy cookie.
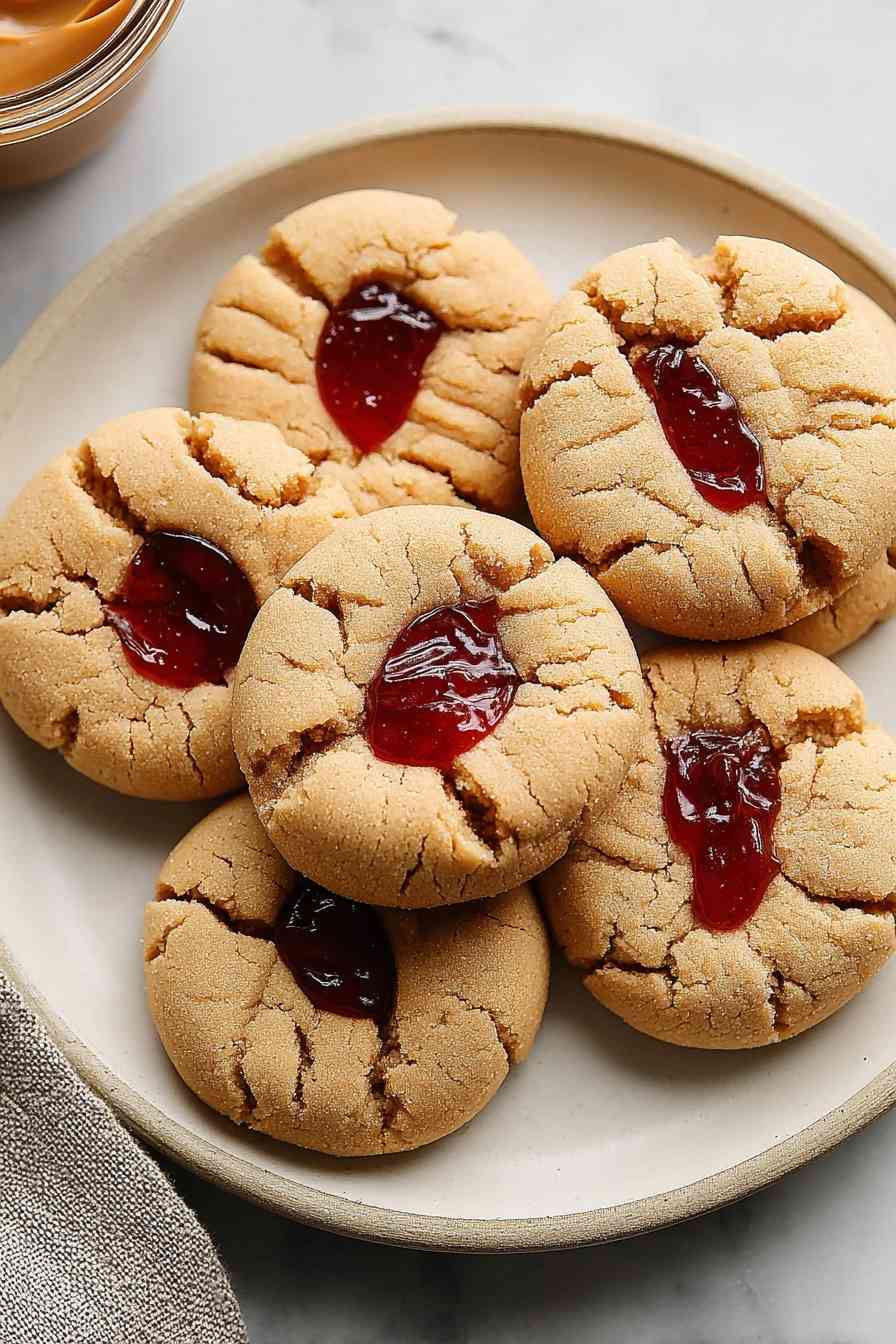
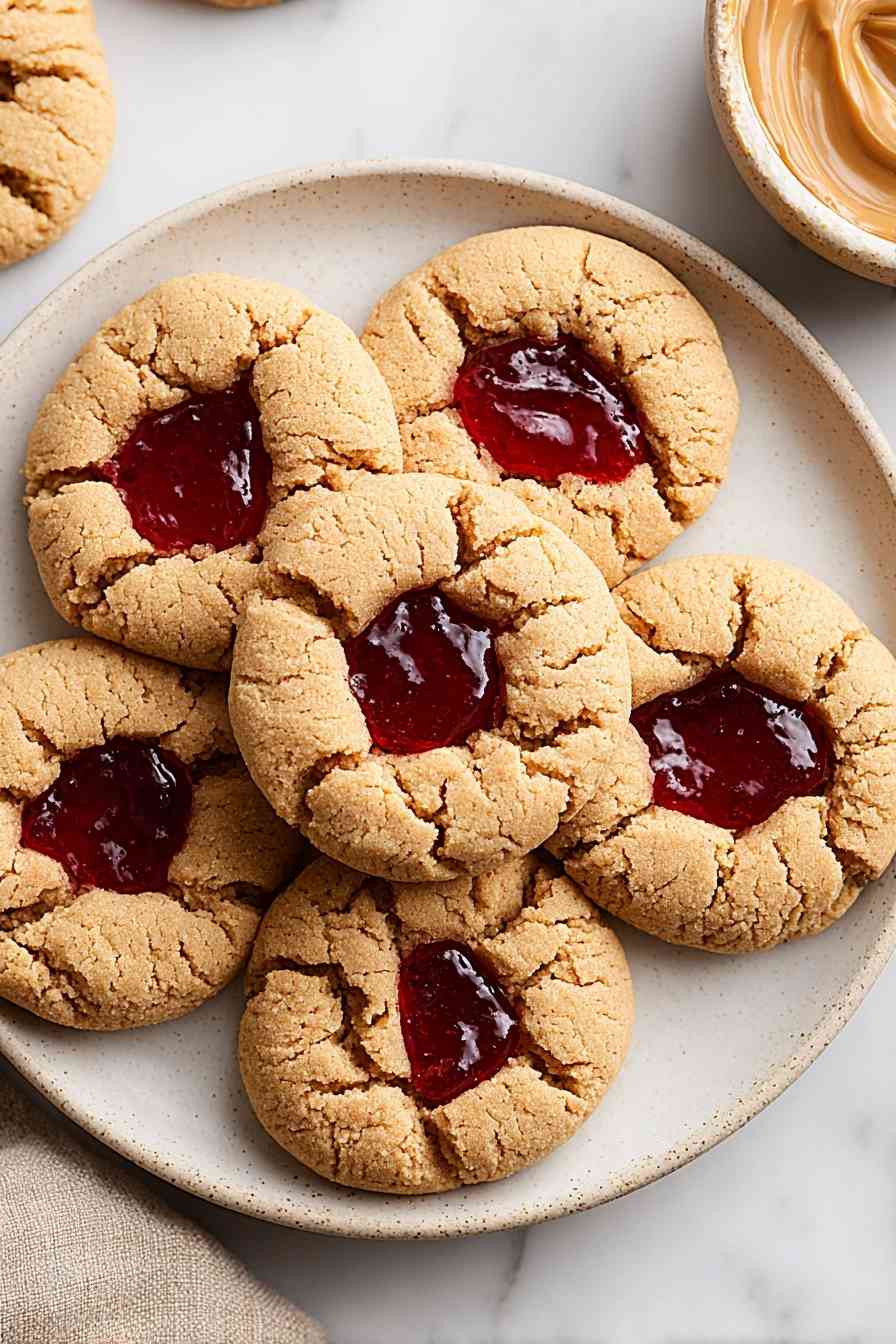
These cookies capture everything you love about PB&J, from the nutty richness of creamy peanut butter to the sweet, fruity burst of seedless jam. Each cookie gets those iconic crosshatch fork marks pressed into the top before baking, then a dollop of jam nestled right in the center. The result is a soft, bakery-style cookie with a set edge and a gooey middle that stays tender for days.
The dough itself is straightforward, mixing butter, sugars, and peanut butter into a fluffy base before folding in just enough flour to hold everything together. You shape the dough into balls, flatten them with a fork dipped in sugar, and carefully spoon jam into each center. After baking, you can dress them up with an extra drizzle of melted peanut butter and a sprinkle of chopped peanuts, or leave them simple and let the jam shine. Either way, they taste like childhood in cookie form, minus the soggy bread.
Step-by-Step: Making PB&J Cookies
STEP 1: Preheat your oven to 350 degrees F and line two baking sheets with parchment paper or silicone mats.
STEP 2: Beat the butter in a large bowl or stand mixer until smooth and creamy, scraping down the sides. Add the granulated sugar and packed brown sugar, then beat until fluffy with no butter chunks remaining.
STEP 3: Add the peanut butter and beat until fully combined, then mix in the egg and vanilla until the batter is smooth.
STEP 4: Add the flour on top without stirring, then sprinkle the baking soda and salt over the flour. Stir the dry ingredients together briefly with a spoon, then turn the mixer on low to combine. Stop mixing as soon as flour streaks disappear to avoid tough, overmixed dough.
STEP 5: Shape the dough into 1 and 1/2 inch balls and place them on the prepared baking sheets with a couple inches of space between each cookie. Dip a fork in sugar or flour to prevent sticking, then press into the top of each cookie. Turn the fork perpendicular and press again to create the crosshatch pattern, flattening each cookie to about 1/2 inch thick.
STEP 6: Stir the jam in a bowl to smooth out lumps, then carefully spoon about 1 teaspoon of jam into the center of each cookie. Keep the jam centered and away from the edges to prevent it from spreading onto the pan and turning gummy during baking.
STEP 7: Bake for 13 to 15 minutes, until the edges are set and show a slight browning. Let the cookies rest on the pan for 5 to 10 minutes before transferring to a wire rack. Once cooled, add extra jam on top for presentation, or drizzle with melted peanut butter and chopped peanuts.
Everything for Peanut Butter and Jelly Cookies
This dough relies on pantry staples and a good jar of creamy peanut butter to deliver that classic PB&J flavor in every bite.
- Butter – adds richness and helps create a tender, melt-in-your-mouth texture.
- Granulated sugar and brown sugar – provide sweetness and moisture, with the brown sugar adding a hint of caramel depth.
- Creamy peanut butter – the star ingredient that delivers nutty flavor and a soft, chewy crumb.
- Egg – binds the dough and adds structure without making the cookies cakey.
- Vanilla – rounds out the sweetness and enhances the peanut butter flavor.
- All-purpose flour – gives the cookies just enough structure to hold their shape while staying soft.
- Baking soda – provides a slight lift and helps the cookies spread evenly.
- Kosher salt – balances the sweetness and brings out the peanut butter’s natural flavor.
- Seedless jam – adds fruity sweetness and a gooey center, with grape or strawberry being the most classic choices.
- Melted peanut butter and chopped peanuts – optional garnishes that add visual appeal and extra peanut flavor.
Tricks for Soft, Jammy Cookies
- Stop mixing the dough as soon as the flour disappears. Overworking the dough develops too much gluten, which leads to dense, tough cookies instead of the soft, tender texture you want.
- Keep the jam centered on each cookie and away from the edges. If it touches the pan, it will spread during baking and turn sticky or gummy, which is harder to clean and affects the cookie’s appearance.
- Bake until the edges are set and show a slight browning. These cookies are covered in moist jam, so underbaking leaves them too fragile to move without breaking. You want a firm enough edge to support the gooey center.
- Let the cookies rest on the pan for at least 5 to 10 minutes before transferring. Moving them too soon can cause the jam to slide off or the cookies to crack, especially while they are still warm and delicate.
What Goes Great with Peanut Butter and Jelly Cookies
These cookies pair naturally with cold milk, which cuts through the sweetness and complements the nutty, fruity flavors. A cup of black coffee or a latte also works well, especially if you want something less sweet to balance the jam. For a fun twist, serve them alongside vanilla ice cream or a peanut butter milkshake for a dessert that leans fully into the nostalgic PB&J theme.
Frequently Asked Questions about PB&J Cookies
Can I use crunchy peanut butter instead of creamy?
Yes, crunchy peanut butter works well and adds extra texture to the cookies. The small peanut pieces will bake into the dough, giving you little bursts of crunch in every bite. Just keep in mind that the texture will be slightly less uniform than with creamy peanut butter, but the flavor stays just as rich and nutty.
What type of jam works best for these cookies?
Seedless grape or strawberry jam are the most classic choices, but any seedless jam you enjoy will work. Raspberry, apricot, or even mixed berry can add a different flavor profile while keeping the same gooey center. Just make sure the jam is smooth and seedless so it spreads evenly and does not interfere with the cookie’s texture.
How do I keep the jam from spreading too much during baking?
Spoon the jam carefully into the center of each flattened cookie, keeping it away from the edges. If the jam touches the pan, it will spread and caramelize, turning sticky and gummy. Stirring the jam before adding it also helps remove lumps, making it easier to control the placement and ensuring it stays put during baking.
Can I freeze the dough or baked cookies?
The dough freezes beautifully. Shape the dough into balls, flatten them with a fork, then transfer to a ziplock bag and freeze. You can bake them straight from frozen by adding the jam and baking for an extra 1 to 3 minutes. Baked cookies also freeze well in an airtight container for up to 3 months, though the jam may soften slightly after thawing.
Why shouldn’t I underbake these cookies?
The jam on top stays moist even after baking, so underbaking leaves the cookies too soft and fragile to move without breaking. You need the edges to set and show a slight browning to provide enough structure to support the gooey center. Fully baked cookies are easier to handle and have a better texture once cooled.
Storing and Freezing Peanut Butter and Jelly Cookies
Store baked cookies in a tightly sealed container at room temperature for up to 3 days. The jam keeps the cookies soft, but they may lose some of their texture after that. For longer storage, freeze the baked cookies in an airtight container or ziplock bag for up to 3 months. Thaw at room temperature for about 30 minutes before serving.
If you prefer to freeze the dough, shape and flatten the cookies as directed, then freeze them on a baking sheet until solid. Transfer to a ziplock bag and store for up to 3 months. You can add the jam before freezing if you flash freeze the cookies first, or add it just before baking. Bake from frozen, adding 1 to 3 minutes to the bake time.
To reheat baked cookies, warm them in a 300-degree oven for 5 to 8 minutes to restore softness. Avoid the microwave, which can make the jam overly hot and the cookie tough. These cookies bring back all the best parts of a peanut butter and jelly sandwich without the sticky fingers or soggy bread. They are soft, chewy, and just sweet enough to feel like a treat without being overwhelming. Whether you dress them up with extra jam and a peanut butter drizzle or keep them simple, they deliver that nostalgic flavor combination in every bite.
Peanut Butter and Jelly Cookies
Ingredients
Equipment
Method
- Preheat your oven to 350°F (175°C) and line two baking sheets with parchment paper or silicone baking mats.
- In a large bowl or stand mixer, beat the butter until smooth and creamy. Scrape down the sides as needed.
- Add the granulated sugar and packed brown sugar and beat until fully combined and fluffy. Make sure there are no lumps of butter.
- Mix in the peanut butter until well incorporated. You can use creamy or crunchy peanut butter if you prefer.
- Blend in the egg and vanilla extract and continue mixing until just combined.
- Add the flour to the bowl, but do not mix yet. Sprinkle the baking soda and kosher salt over the flour. Briefly stir these dry ingredients into the flour with a spoon or teaspoon.
- Turn the mixer on low and blend until most of the flour is incorporated. Stop mixing as soon as the dough forms and there are no visible streaks of flour. Do not overmix.
- Form the dough into 1½-inch balls. Arrange the balls on the prepared baking sheets with a couple inches of space between each to allow for spreading.
- Dip a fork in sugar or flour to prevent sticking, then gently press it onto the top of each dough ball. Rotate the fork and press again to make the crosshatch pattern, flattening each ball to about ½-inch thick. Re-dip the fork as needed.
- Stir the seedless jam in a small bowl until smooth. Carefully spoon about 1 teaspoon (or less) of jam into the center of each flattened cookie, keeping it away from the edges so it stays on top while baking.
- Bake the cookies for 13 to 15 minutes, until the edges are set and just starting to brown slightly.
- Let the cookies cool on the baking sheets for 5 to 10 minutes before moving them to a wire rack to cool completely.
- For presentation, you can spread a bit more jam on top after baking, and drizzle with melted peanut butter or sprinkle chopped peanuts as desired.
- Store leftovers in an airtight container for up to 3 days. Recipe makes about 28 cookies.
- The dough can be frozen after shaping and flattening with a fork. Freeze the dough balls in a ziplock bag, and bake from frozen after adding the jam, increasing baking time by 1 to 3 minutes if needed. You can also freeze with jam by flash-freezing shaped cookies before transferring to a bag.