

Homemade Nutter Butter Cookies recreate the nostalgic peanut butter sandwich cookie with soft, chewy layers and thick peanut butter filling.
There’s something genuinely fun about making a store-bought favorite from scratch, especially when it means double-stuffed peanut butter filling between two thick, soft cookies. These sandwich cookies start with a simple peanut butter dough that you roll into logs, coat in sugar, and pinch into that distinctive peanut shape before baking. The result is a cookie that’s tender in the center with just enough crunch on the edges, then sandwiched around a creamy peanut butter filling that rivals anything you’d find in a package.
The shaping process is hands-on but oddly satisfying. You’ll roll each portion of dough into a log, drag it through sugar for texture, press fork tines across the top for that classic crosshatch, then pinch the middle to create the peanut silhouette. It’s not about perfection, it’s about capturing that familiar shape and loading up on peanut butter flavor at every layer.
Step-by-Step: Shaping and Baking Your Nutter Butter Cookies
STEP 1: Preheat your oven to 350°F and line a baking sheet with parchment paper or a silicone mat. Pour half a cup of granulated sugar into a small bowl and set it within reach.
STEP 2: Whisk together the flour, baking soda, and salt in a medium bowl, then set aside. In a separate large bowl or stand mixer, cream the softened butter, brown sugar, and peanut butter until smooth and fluffy.
STEP 3: Add the egg and vanilla extract to the butter mixture and beat until fully incorporated. Gradually add the dry ingredients, mixing just until the dough comes together without overworking it.
STEP 4: Scoop about 1½ tablespoons of dough per cookie and roll each portion into a log shape. Roll each log in the bowl of sugar to coat all sides, then place on the prepared baking sheet about 2 inches apart.
STEP 5: Press the tines of a fork across each log in a criss-cross pattern, then use your fingers to gently pinch the center of each cookie to create that iconic peanut shape. Bake for 10 to 12 minutes, until the edges are lightly golden but the centers still look soft.
STEP 6: Let the cookies rest on the baking sheet for 5 minutes before transferring to a wire rack to cool completely. While they cool, beat softened butter and peanut butter together until fluffy, then mix in powdered sugar, a splash of milk, and vanilla extract until the filling is smooth and spreadable.
STEP 7: Pair up your cooled cookies by size, then spoon about 1 tablespoon of filling onto the flat side of one cookie in each pair. Press a second cookie gently on top to create a sandwich, letting the filling spread to the edges.
What You’ll Need for Homemade Nutter Butter Cookies
This recipe relies on pantry staples and a generous amount of peanut butter to deliver that signature flavor in both the cookie and the filling.
- All-purpose flour – provides structure without making the cookies too dense or cakey.
- Baking soda – helps the cookies spread slightly and develop a tender crumb.
- Kosher salt – balances the sweetness and amplifies the peanut butter flavor.
- Unsalted butter, softened – used in both the dough and the filling for richness and a smooth, creamy texture.
- Light brown sugar – adds moisture and a subtle molasses note that keeps the cookies soft.
- Creamy peanut butter – the star ingredient in both the cookie base and the filling, delivering deep peanut flavor and a chewy texture.
- Egg – binds the dough and contributes to the soft, tender crumb.
- Pure vanilla extract – rounds out the flavor in both the dough and the filling.
- Granulated sugar for rolling – coats the dough logs and adds a subtle crunch to the baked cookies.
- Powdered sugar – sweetens and thickens the peanut butter filling to a spreadable consistency.
- Milk – loosens the filling just enough to make it smooth and pipeable.
Tips for Getting That Iconic Peanut Shape and Perfect Texture

- Roll the dough logs evenly and pinch the center gently but firmly so the peanut shape holds during baking without cracking the dough.
- Pull the cookies from the oven when the edges are just set and lightly golden, even if the centers look underdone. They’ll firm up as they cool, and this timing prevents dry, crumbly cookies.
- If your filling is too thick to spread, add milk one teaspoon at a time. If it’s too runny, beat in more powdered sugar until it reaches a thick, frosting-like consistency.
- Let the cookies cool completely before assembling. Warm cookies will melt the filling and make the sandwiches slide apart.
Best Ways to Enjoy Nutter Butter Cookies
These sandwich cookies are rich enough to stand on their own, but pairing them with the right drink or dessert element can make them even more satisfying.
- Serve with a cold glass of whole milk or a strong cup of coffee to cut through the sweetness and complement the peanut butter.
- Crumble a cookie over vanilla ice cream for a quick sundae topping with texture and flavor.
- Pack them in lunchboxes or wrap individually for a portable treat that holds up well without refrigeration.
Nutter Butter Cookie Questions & Troubleshooting
Can I use crunchy peanut butter instead of creamy?
Crunchy peanut butter will add texture to the dough and filling, but it can also make the cookies slightly drier and the filling harder to spread smoothly. If you prefer a bit of crunch, use it in the dough and stick with creamy for the filling.
What’s the best way to make the cookies look like peanuts?
Roll the dough into an even log, press the fork tines across the surface for texture, then use your thumb and forefinger to pinch the center inward on both sides. The pinch should be firm enough to create an indentation that holds its shape during baking.
Can these cookies be made gluten-free?
Yes, substitute a 1-to-1 gluten-free baking flour blend for the all-purpose flour. The texture may be slightly more crumbly, but the flavor and shape will still work well. Avoid using almond flour or coconut flour without adjusting the recipe.
How long does the peanut butter filling last?
The filling stays fresh in an airtight container in the fridge for up to one week. Bring it to room temperature and re-whip it briefly before using if it firms up too much during storage.
Do I need a mixer for the dough and filling?
A stand mixer or hand mixer makes the job faster and ensures the butter and peanut butter blend smoothly, but you can mix both the dough and filling by hand with a sturdy wooden spoon if needed. Just expect a bit more arm work.
How to Store and Keep Nutter Butter Sandwich Cookies Fresh
Store assembled sandwich cookies in an airtight container at room temperature for up to 4 days. If your kitchen is warm or humid, refrigerate them to prevent the filling from softening too much, but bring them to room temperature before serving for the best texture.
You can freeze the baked cookies without filling for up to 2 months. Wrap them tightly in plastic wrap, then place in a freezer-safe bag. Thaw at room temperature, then make the filling fresh and assemble just before serving. Freezing assembled sandwiches works, but the filling can become grainy when thawed.
If you want to prep ahead, bake the cookies and store them unfilled, then whip up the filling and assemble the sandwiches the day you plan to serve them. This keeps the cookies from getting soggy and the filling at its creamiest.
These cookies deliver all the nostalgic charm of the original with a homemade softness and flavor that’s hard to beat. The hands-on shaping and generous filling make them feel a little more special than anything that comes out of a package, and the peanut butter intensity is exactly what you want in a sandwich cookie.
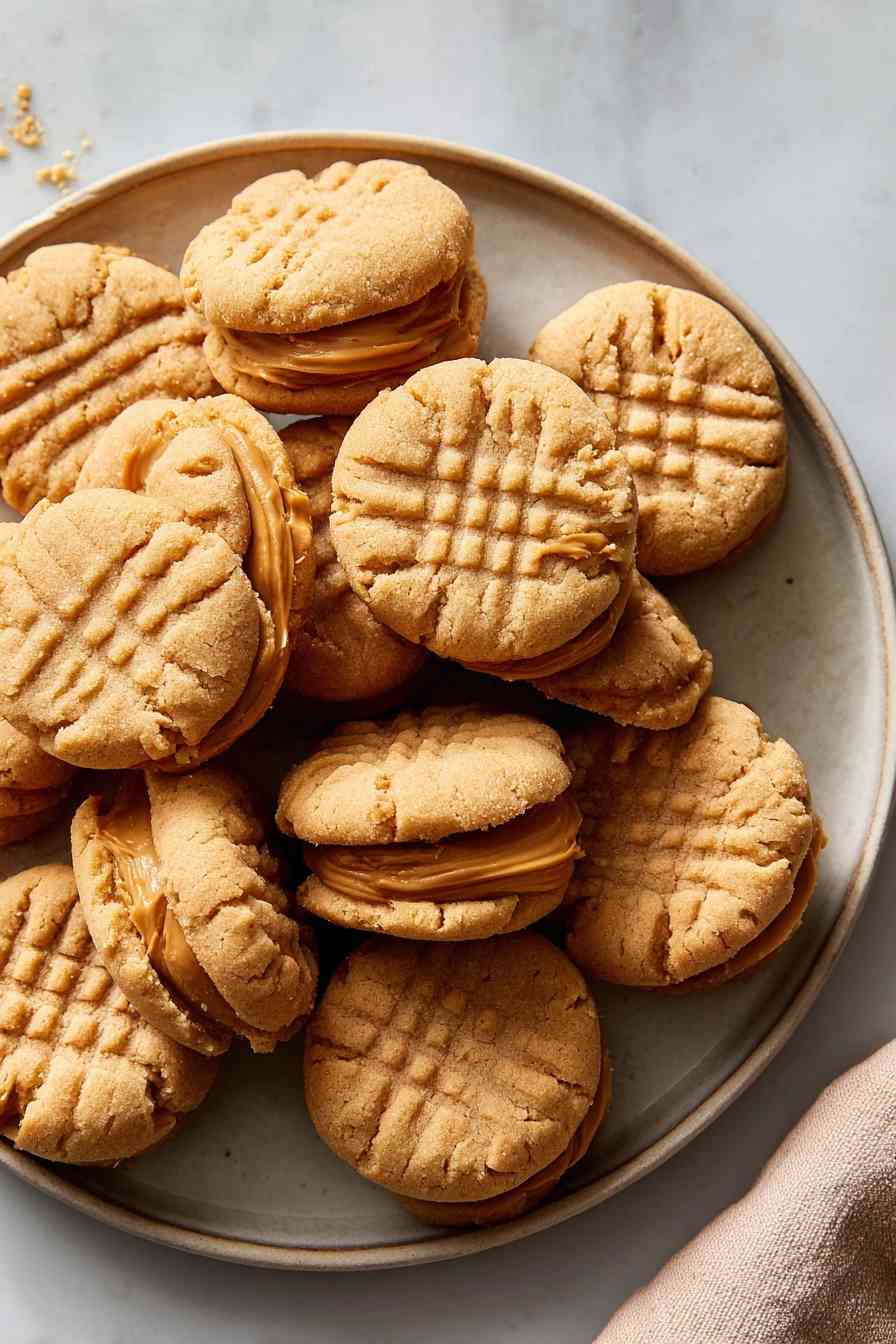
Homemade Nutter Butter Cookies
Ingredients
Equipment
Method
- Preheat the oven to 350°F (175°C) and line a baking sheet with parchment paper or a silicone baking mat. Place 1/2 cup of sugar in a small bowl for coating the dough.
- In a mixing bowl, whisk together flour, baking soda, and salt; set aside.
- With a stand mixer or hand mixer, blend together the softened butter, brown sugar, and peanut butter until smooth and creamy.
- Mix in the egg and vanilla extract until fully incorporated.
- Gradually add the dry ingredients to the wet mixture, blending just until all is combined.
- Divide the dough into portions about 1 1/2 tablespoons each and roll into balls.
- Shape each dough ball into a log, then roll each log in the prepared bowl of sugar until coated.
- Arrange the sugar-coated logs on the baking sheet, spacing them about 2 inches apart.
- Press the tines of a fork into each log to make a criss-cross pattern, then gently pinch the center of each log to form a peanut shape.
- Bake the cookies for 10–12 minutes, until the edges are lightly browned but centers remain soft.
- Let the cookies cool on the baking sheet for 5 minutes, then transfer to a wire rack to cool completely.
- To prepare the filling: In a stand mixer, whip together softened butter and peanut butter on medium speed until light and fluffy.
- Beat in powdered sugar, milk, and vanilla extract until the filling is smooth and spreadable.
- Pair up cooled cookies by size. Spread about 1 tablespoon of filling on the flat side of one cookie in each pair.
- Place the matching cookie on top of the filling to make a sandwich cookie.