

Pumpkin waffles with cream cheese filling pair spiced pumpkin batter with tangy-sweet cream cheese in every bite.
Picture this: spiced pumpkin batter crisped in your waffle iron, then sandwiched with a cloud of sweetened cream cheese filling. You slice the whole thing into wedges, and suddenly breakfast feels a little fancy without any real fuss. These waffle sandwiches work warm with syrup drizzled on top, or straight from the fridge as a grab-and-go snack. The filling stays creamy, the waffles hold their structure, and the cinnamon-ginger warmth makes every bite taste like October in the best way.
The beauty here is the contrast. You get tender pumpkin waffles with a hint of spice, paired with tangy cream cheese sweetened just enough to balance the earthy pumpkin. The filling doesn’t overpower, it complements. And because you’re making waffle sandwiches instead of stacking them with syrup, you can serve these cold, which means they travel well, pack easily, and don’t turn soggy after ten minutes on the counter.
What You’ll Need for Pumpkin Waffles with Cream Cheese Filling
This recipe splits into two simple parts: the brown sugar-cinnamon cream cheese spread and the spiced pumpkin waffle batter. Both come together quickly, and the ingredient list stays short.
- Cream cheese – softened fully so it whips into a smooth, spreadable filling without lumps.
- Brown sugar – adds molasses depth to the filling and a touch of caramel sweetness to the waffles.
- Ground cinnamon – used in both the filling and the batter for warm, cozy spice.
- Canned pumpkin puree – blends into the waffle batter for moisture, color, and subtle earthiness.
- Egg – binds the batter and gives the waffles structure.
- Milk – thins the batter to the right consistency for even cooking.
- Vegetable oil – keeps the waffles tender and prevents sticking in the iron.
- All-purpose flour – provides the base structure for the waffles.
- Baking powder and baking soda – work together to create lift and a light, airy texture.
- Ground ginger – adds a subtle bite that complements the pumpkin and cinnamon.
- Kosher salt – balances the sweetness and enhances the spices.
How to Make Pumpkin Waffle Sandwiches
STEP 1: Beat the softened cream cheese, brown sugar, and cinnamon with an electric mixer on medium speed until smooth and fluffy, about three minutes. Set aside.
STEP 2: Preheat your waffle iron according to the manufacturer’s instructions.
STEP 3: In a large bowl, whisk together the egg, brown sugar, pumpkin puree, milk, and vegetable oil until fully combined. Add the flour, baking powder, baking soda, cinnamon, ginger, and salt, then whisk until the batter is smooth with no dry streaks.
STEP 4: Pour about one-third cup of batter into the preheated waffle iron and cook according to your iron’s settings. Aim for a golden, crisp exterior with a uniform texture. You may need to adjust the heat or timing after the first waffle to get the texture just right.
STEP 5: Transfer the cooked waffles to a cutting board or sheet of wax paper in a single layer and let them cool completely. This prevents the filling from melting and keeps the waffles from steaming each other.
STEP 6: Once cool, spread the cream cheese mixture evenly over one side of half the waffles. Top each filled waffle with a plain waffle, aligning the edges carefully to create neat sandwiches.
STEP 7: Slice each waffle sandwich into wedges and serve immediately, or refrigerate until ready to enjoy.
Serving Ideas for Pumpkin Waffles
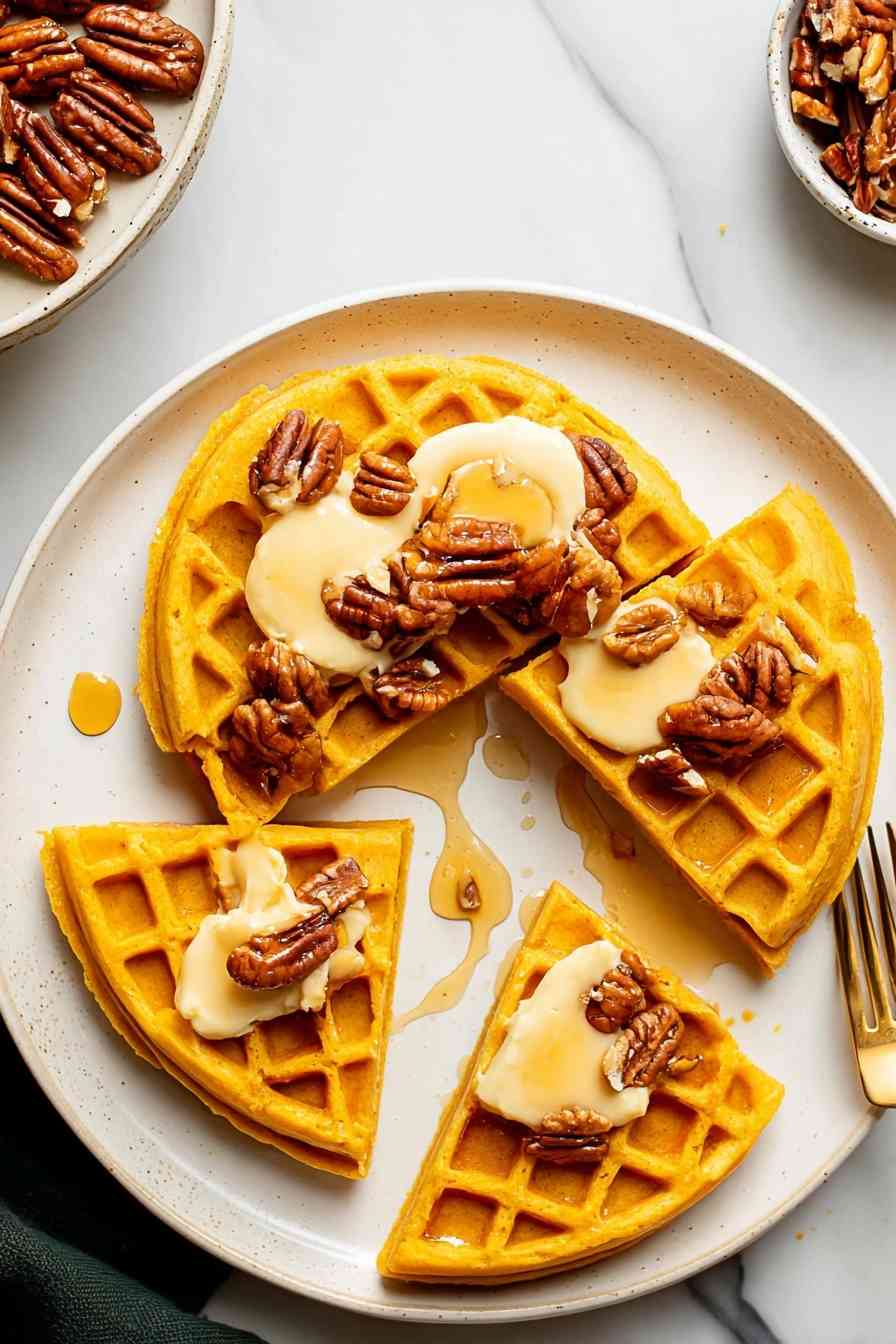
These waffle sandwiches work beautifully on their own, but a few simple additions can elevate the experience. Drizzle warm maple syrup over the top if you’re serving them fresh from the iron, or dust the wedges with powdered sugar for a light finish. A dollop of whipped cream on the side adds richness without overwhelming the filling. For a heartier breakfast, pair the waffles with crispy bacon or breakfast sausage to balance the sweetness with savory depth.
Pumpkin Waffle Success Tips
- Soften the cream cheese completely – Cold cream cheese won’t whip smoothly and will leave lumps in the filling. Leave it at room temperature for at least an hour before mixing.
- Let the waffles cool fully – Warm waffles will melt the cream cheese filling, turning the sandwiches messy and difficult to slice. Cool waffles create clean, sturdy wedges.
- Adjust your waffle iron settings – Every iron runs differently, so use the first waffle as a test. If it’s too soft, increase the heat or cook time. If it’s too dark, dial it back.
- Don’t overfill the sandwiches – A thin, even layer of cream cheese filling holds better than a thick dollop, which can squish out the sides when you press the waffles together.
Pumpkin Waffles with Cream Cheese Filling: Your Questions Answered
Can I make these pumpkin waffles ahead of time?
Yes, you can cook the waffles a day or two in advance and store them unfilled in the refrigerator. When you’re ready to serve, whip up the cream cheese filling, assemble the sandwiches, and slice them into wedges. This approach keeps the waffles from getting soggy and makes morning prep much faster.
Is it possible to freeze pumpkin waffles with the cream cheese filling?
Freezing the assembled sandwiches isn’t ideal because the cream cheese filling can separate and turn watery when thawed. Instead, freeze the plain waffles in a single layer, then transfer them to a freezer bag. Thaw and fill them fresh when you’re ready to eat.
Can I use homemade pumpkin puree instead of canned?
Homemade puree works, but make sure it’s thick and smooth. Watery puree will make the batter too thin, resulting in soggy waffles. If your homemade puree seems loose, strain it through cheesecloth or simmer it on the stove until it thickens before adding it to the batter.
How do I keep the waffles crisp after cooking?
Lay the cooked waffles in a single layer on a wire rack instead of stacking them. Stacking traps steam, which softens the exterior. If you’re making a large batch, keep finished waffles warm in a low oven on a baking sheet, but know they’ll lose some crispness over time.
What’s the best way to reheat filled pumpkin waffles?
Reheating filled waffles is tricky because the cream cheese can melt. For best results, eat them cold from the fridge, or warm the plain waffles before assembling. If you must reheat assembled sandwiches, use a low oven and watch closely to avoid melting the filling completely.
How to Store Leftover Pumpkin Waffles with Filling
Store assembled waffle sandwiches in an airtight container in the refrigerator for up to three days. Place a sheet of parchment paper between layers to prevent sticking. The waffles will soften slightly in the fridge, but the filling stays creamy and the flavors meld nicely.
If you prefer to keep the waffles and filling separate, store plain waffles in a sealed bag and the cream cheese mixture in a covered container, then assemble fresh servings as needed. For longer storage, freeze the plain waffles without filling for up to two months, then thaw and fill them when you’re ready to serve.

Pumpkin Waffles with Cream Cheese Filling
Ingredients
Equipment
Method
- In a bowl, use an electric mixer on medium speed to beat the softened cream cheese, brown sugar, and cinnamon until the mixture is fluffy and smooth, about 3 minutes.
- Preheat your waffle iron according to its manufacturer's instructions.
- In a large mixing bowl, whisk together the egg, brown sugar, pumpkin puree, milk, and vegetable oil until everything is fully blended.
- Add the flour, baking powder, baking soda, cinnamon, ginger, and salt to the wet ingredients, and whisk until you have a smooth batter.
- Cook the batter in your waffle iron according to its directions. For most irons, use about 1/3 cup of batter per waffle, and cook until the waffle is golden and evenly textured. Adjust the amount or settings if needed after the first waffle.
- Place finished waffles in a single layer on a cutting board or wax paper to cool completely.
- Spread the cream cheese filling evenly over one side of half of the cooled waffles. Top each with a second plain waffle, aligning the edges to form sandwiches.
- Cut each waffle sandwich into wedges. Serve right away or store in the refrigerator.