Why You’ll Love these Indulgent Million Dollar Cookies
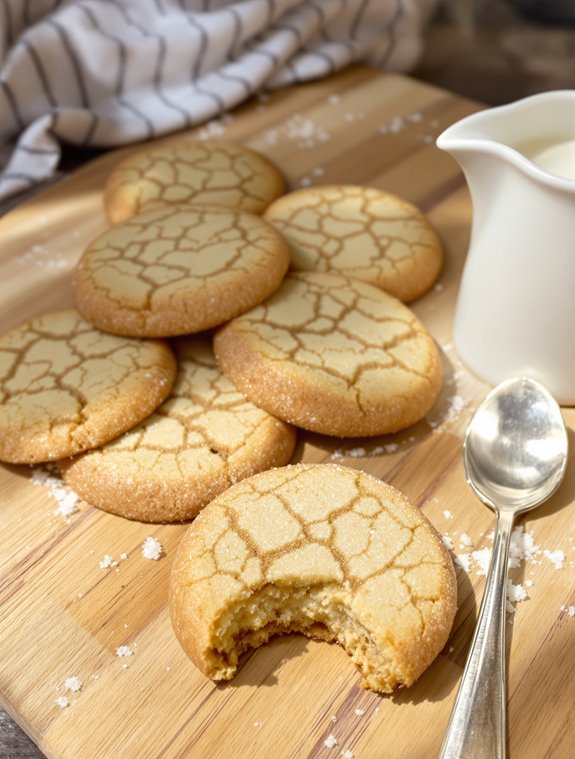
When you first bite into these Million Dollar Cookies, you’ll understand exactly why they earned their lavish name. The perfect balance of shortening and two types of sugar creates that irresistible crisp-yet-tender texture that makes them impossible to eat just one.
I love how the vanilla fragrance fills my kitchen while they bake.
These cookies don’t require fancy ingredients, just the classics working in perfect harmony. The overnight refrigeration? Worth every minute of waiting—trust me on this.
The sugar-coated glass pressing technique gives them those charming ridges that make each bite satisfying.
What Ingredients are in Indulgent Million Dollar Cookies?
These Million Dollar Cookies truly live up to their name without breaking the bank. They’re made with simple, pantry-staple ingredients that combine to create something utterly magical. The combination of regular and brown sugar gives these cookies their perfect sweetness and that slightly caramelized flavor that makes them so addictive. I’m always amazed how such basic ingredients can transform into something so delicious.
- 2 cups shortening
- 1/2 cup sugar
- 1 cup brown sugar
- 2 eggs
- 2 teaspoons vanilla
- 4 cups flour
- 1 teaspoon baking soda
- 1 teaspoon salt
When shopping for these ingredients, quality matters—especially for the vanilla, which provides much of the aromatic quality these cookies are known for. Pure vanilla extract rather than imitation will make a noticeable difference.
And while the recipe calls for shortening, some bakers might wonder about substituting butter. You certainly could, but the texture would change; shortening creates that distinctive tender crumb that makes Million Dollar Cookies special. The cookies might spread a bit more with butter, but they’d still be delicious. Just a different kind of million-dollar experience.
How to Make these Indulgent Million Dollar Cookies
Making Million Dollar Cookies is delightfully straightforward, which might be part of why they’re so beloved. Start by mixing together 2 cups of shortening with 1/2 cup of sugar and 1 cup of brown sugar until you achieve a light, fluffy texture. This creaming process creates tiny air pockets that help give the cookies their perfect texture.
Next, beat in 2 eggs one at a time, making sure each is fully incorporated before adding the next. Then stir in 2 teaspoons of vanilla extract, which infuses the dough with that heavenly aroma we all associate with homemade cookies.
In a separate bowl, whisk together 4 cups of flour, 1 teaspoon of baking soda, and 1 teaspoon of salt. Gradually add this dry mixture to your wet ingredients, stirring just until combined. Over-mixing at this stage can develop too much gluten, making your cookies tough rather than tender.
Once your dough comes together, patience becomes the secret ingredient—refrigerate it for at least an hour or, even better, overnight. This resting period allows the flavors to meld and the flour to fully hydrate, resulting in cookies with perfect texture.
When you’re ready to bake, preheat your oven to 350°F and roll the chilled dough into 1-inch balls. Place them on a cookie sheet with enough space between each (about 2 inches) to allow for spreading.
Here comes the fun part: flatten each ball with the bottom of a glass that’s been dipped in sugar. This creates that signature flat cookie with a sparkly top. Bake for 10-12 minutes, watching carefully toward the end—they’re done when the edges are just beginning to turn golden brown while the centers remain soft. The cookies will firm up as they cool, giving you that perfect balance of crisp edges and tender centers.
Sometimes I find myself hovering near the oven during those final minutes, the sweet vanilla aroma filling my kitchen, hardly able to wait until they’re cool enough to enjoy.
Indulgent Million Dollar Cookies Substitutions and Variations
The beauty of Million Dollar Cookies lies in their adaptability—you can easily transform this classic recipe to suit your personal taste or whatever ingredients you have on hand.
I’ve swapped butter for shortening countless times, giving them a richer flavor profile. Who doesn’t love options?
Try mixing in chocolate chips, butterscotch morsels, or crushed candy bars for a sweet twist.
Nuts work wonders too; walnuts and pecans are my go-to additions.
For a holiday spin, cinnamon and nutmeg create warmth that pairs perfectly with afternoon tea.
What to Serve with Indulgent Million Dollar Cookies
Although Million Dollar Cookies shine perfectly on their own, pairing them with complementary beverages and treats elevates the entire dessert experience.
I love serving these buttery delights with a cold glass of milk—whole milk if we’re feeling indulgent, oat milk for my dairy-free friends.
Hot beverages work beautifully too; think vanilla chai tea or a robust coffee with a splash of cream.
Can you imagine these cookies alongside a scoop of vanilla bean ice cream? Divine.
For a dessert board that’ll impress guests, I arrange my Million Dollar Cookies with fresh berries, dark chocolate squares, and perhaps a small dish of caramel dip.
Final Thoughts
After baking countless batches of these Million Dollar Cookies over the years, I’m convinced they’re worth every penny of their name.
Their perfect balance of sweetness from both white and brown sugars creates that irresistible flavor that keeps everyone reaching for more.
What makes these cookies truly special is their versatility. You can make the dough ahead and refrigerate overnight, perfect for busy schedules or unexpected guests.
The simple sugar-coated press gives them that classic homemade touch.
Indulgent Million Dollar Cookies
Ingredients
Equipment
Method
- In a large bowl, cream together the shortening, sugar, and brown sugar until light and fluffy. This creates tiny air pockets for perfect texture.
- Beat in eggs one at a time, ensuring each is fully incorporated before adding the next.
- Stir in the vanilla extract until well combined.
- In a separate bowl, whisk together the flour, baking soda, and salt.
- Gradually add the dry ingredients to the wet mixture, stirring just until combined. Avoid over-mixing to prevent tough cookies.
- Cover the dough and refrigerate for at least one hour or preferably overnight to allow flavors to meld and flour to hydrate.
- When ready to bake, preheat oven to 350°F (175°C).
- Roll the chilled dough into 1-inch balls and place them on cookie sheets, spacing them about 2 inches apart.
- Dip the bottom of a glass in sugar, then use it to flatten each cookie ball, creating the signature ridged top.
- Bake for 10-12 minutes, until the edges just begin to turn golden while centers remain soft.
- Allow cookies to cool on the baking sheet for a few minutes before transferring to a wire rack to cool completely.