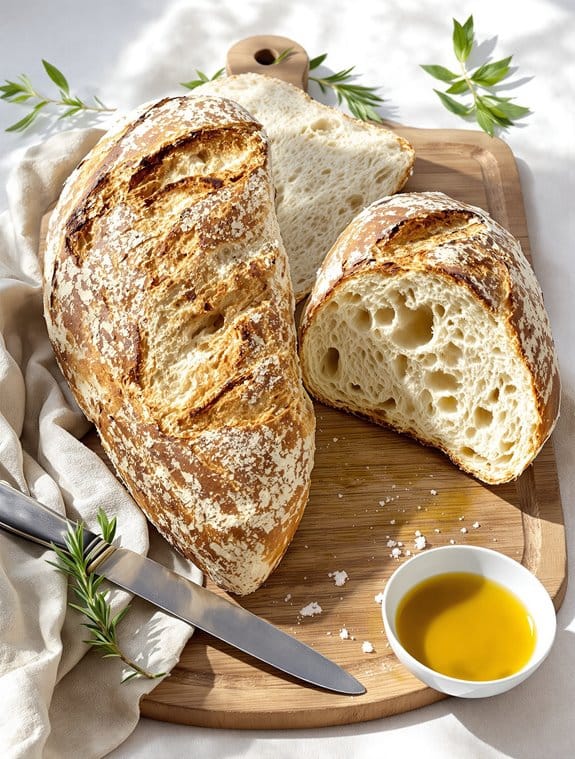
Why You’ll Love this Artisan Ciabatta
Every home baker should try making this artisan ciabatta at least once.
I’m convinced there’s nothing quite like pulling your own rustic loaf from the oven, with its crackly crust and those signature airy holes inside. The dough is wonderfully sticky—a bit challenging, yes, but so worth it.
What I adore about ciabatta is its versatility.
Need a vehicle for your favorite sandwich? Perfect.
Want something to soak up that homemade soup? Done.
The crisp exterior with chewy interior creates texture magic that store-bought bread simply can’t match.
What Ingredients are in Artisan Ciabatta?
Making authentic ciabatta requires simple ingredients, but each plays a vital role in developing that characteristic texture we all love. The magic of this Italian bread lies in its high hydration dough, which creates those beautiful air pockets throughout the loaf. I’m always amazed how flour, water, yeast, and a bit of patience transform into something so spectacular.
- 5 cups bread flour (divided between sponge and dough)
- 2 teaspoons sugar
- 5 teaspoons dry yeast (divided)
- 1 cup warm water (¾ cup very warm water for sponge, ¼ cup warm water for dough)
- 2 teaspoons nonfat dry milk powder
- 1 teaspoon salt
- 2 tablespoons cornmeal (for dusting)
- 2 tablespoons additional bread flour (for sprinkling)
The quality of your ingredients really matters here. Bread flour, with its higher protein content, gives ciabatta its structure and chew—don’t try substituting all-purpose flour unless you’re prepared for a different result. And notice how we’re creating a sponge first? This pre-fermentation process develops complex flavors that make artisan bread so much more interesting than quick-rise versions. The cornmeal isn’t technically in the bread but prevents sticking and adds a pleasant textural element to the bottom crust.
How to Make this Artisan Ciabatta
How to Make this Artisan Ciabatta

Making ciabatta starts with creating a flavorful sponge. In a food processor, combine 1 cup of bread flour, 2 teaspoons of sugar, 2½ teaspoons of dry yeast, and ¾ cup of very warm water (120-130°F). Process for about a minute until well blended, then transfer this mixture to a bowl, cover it, and let it develop in the refrigerator. This pre-fermentation can last anywhere from 2 to 24 hours—I tend to leave mine overnight, which really lets those complex flavors develop. The longer it sits, the more character your bread will have.
Once your sponge is ready, it’s time to make the actual dough. In your food processor, combine the sponge with 4 cups of bread flour, ¼ cup of warm water (105-115°F), 2 teaspoons of nonfat dry milk powder, another 2½ teaspoons of dry yeast, and 1 teaspoon of salt. Process until the dough forms a ball, then give it another minute.
Don’t worry when you turn the dough out onto a floured surface and it seems sticky—that’s exactly what we want for those beautiful air pockets! Divide the dough in half and roll each portion into a 12×16-inch rectangle. Now here’s where it gets fun: shape each rectangle into a classic slipper shape (that’s what “ciabatta” means in Italian, after all) and place them on baking sheets lined with parchment paper and sprinkled with 2 tablespoons of cornmeal.
After shaping, dust the loaves with 2 tablespoons of flour, cover, and let rise for about 30 minutes until doubled in size. Meanwhile, preheat your oven to 425°F.
When the loaves are puffy and full of air pockets, pop them in the oven for 25 minutes, or until they sound hollow when tapped on the bottom—that’s my favorite way to test for doneness. The crust should be golden and crisp, while the inside remains airy and chewy.
Let the loaves cool on a wire rack before slicing, which might be the hardest part of this whole recipe. Who can resist the smell of freshly baked bread wafting through the kitchen?
Artisan Ciabatta Substitutions and Variations
While traditional ciabatta is delightful on its own, you can easily customize this recipe to suit your tastes or dietary needs.
I’ve found that substituting whole wheat flour for up to half the bread flour creates a nuttier, more rustic loaf.
Can’t do gluten? Unfortunately, ciabatta isn’t ideal for gluten-free adaptation due to its structure.
For flavor variations, try folding in roasted garlic, sun-dried tomatoes, or olives after the first rise.
My personal favorite? Adding a tablespoon of rosemary and a sprinkle of sea salt on top before baking. The aroma that fills my kitchen is absolutely worth the wait.
What to Serve with Artisan Ciabatta
Once you’ve perfected your homemade ciabatta, the question becomes what to pair with this delicious Italian bread.
I love serving mine alongside a bowl of hearty minestrone soup, where the bread’s airy pockets capture every drop of broth.
For a simple appetizer, try rubbing a sliced clove of garlic on toasted ciabatta, then drizzling with good olive oil and flaky sea salt. Divine.
Ciabatta makes incredible sandwiches too—layer with prosciutto, fresh mozzarella, and basil for an authentic Italian experience.
Or create bruschetta by topping with diced tomatoes, basil, and a splash of balsamic. The possibilities are endless.
Final Thoughts
This artisan ciabatta journey we’ve taken together represents one of the most rewarding baking experiences you’ll ever have in your home kitchen.
I find myself returning to this recipe whenever I need that perfect crusty exterior with those signature airy pockets inside.
Remember, patience is key. From preparing the sponge to that final hollow tap on the bottom of your loaf, each step builds flavor.
Don’t worry if your first attempt isn’t picture-perfect—mine certainly wasn’t. The beauty of ciabatta lies in its rustic, imperfect shape.
What will you serve with your homemade bread?
Whatever you choose, I guarantee it won’t last long.
Artisan Ciabatta Bread
Ingredients
Equipment
Method
- In a food processor, combine 1 cup of bread flour, 2 teaspoons of sugar, 2½ teaspoons of dry yeast, and ¾ cup of very warm water (120-130°F). Process for about 1 minute until well blended.
- Transfer this sponge mixture to a bowl, cover, and let it develop in the refrigerator for 2 to 24 hours (overnight is recommended for best flavor development).
- When the sponge is ready, return to the food processor and add the remaining 4 cups of bread flour, ¼ cup of warm water (105-115°F), 2 teaspoons of nonfat dry milk powder, the remaining 2½ teaspoons of dry yeast, and 1 teaspoon of salt.
- Process until the dough forms a ball, then continue processing for another minute to develop the gluten.
- Turn the sticky dough out onto a floured surface. Divide the dough in half.
- Roll each portion into a 12×16-inch rectangle, then shape each rectangle into a classic slipper shape (ciabatta).
- Line baking sheets with parchment paper and sprinkle with cornmeal. Place the shaped loaves on the prepared sheets.
- Dust the loaves with the additional 2 tablespoons of flour, cover, and let rise for about 30 minutes until doubled in size.
- Meanwhile, preheat your oven to 425°F.
- Bake the loaves for 25 minutes, or until they sound hollow when tapped on the bottom and the crust is golden and crisp.
- Transfer the baked ciabatta to a wire rack and allow to cool completely before slicing.