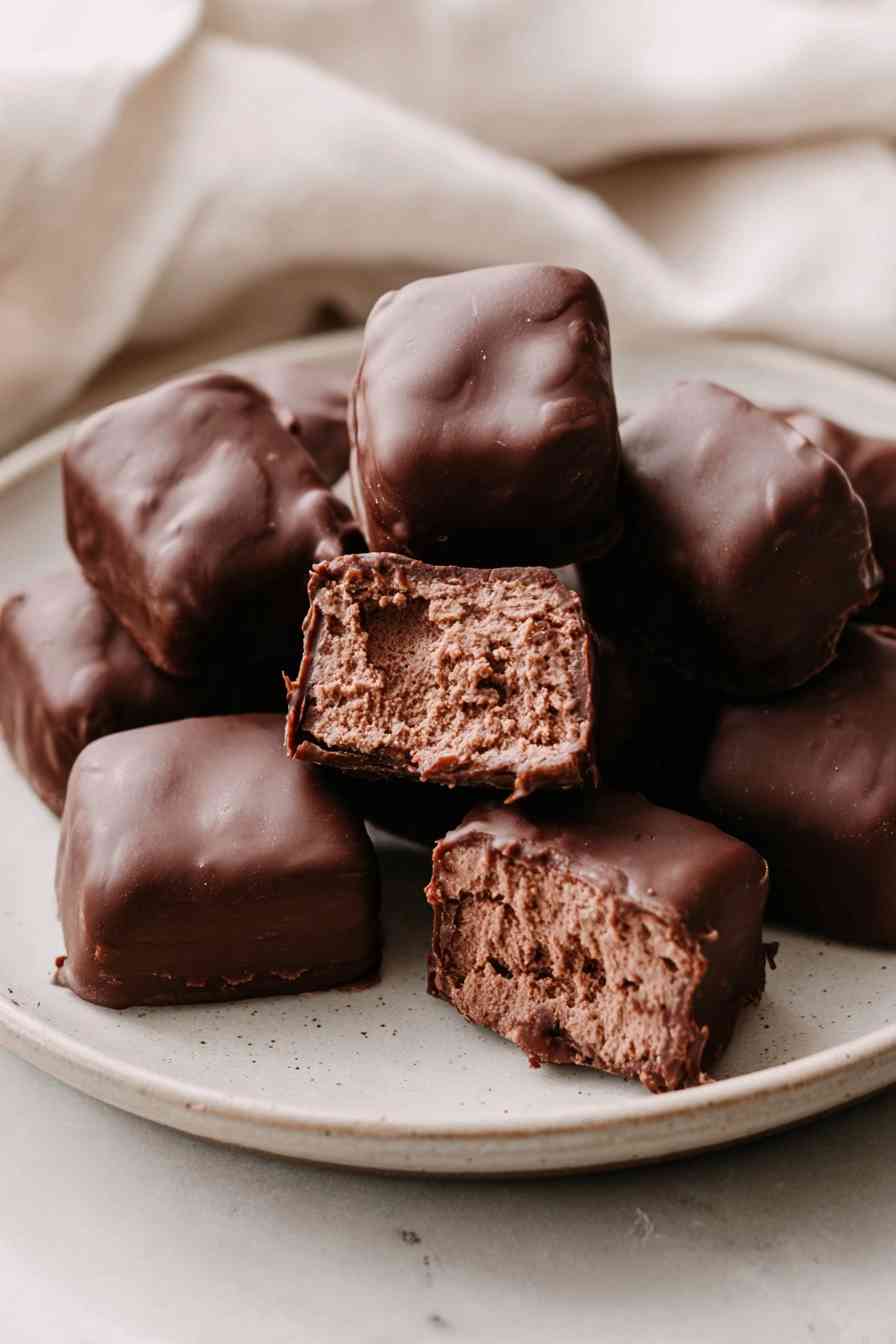

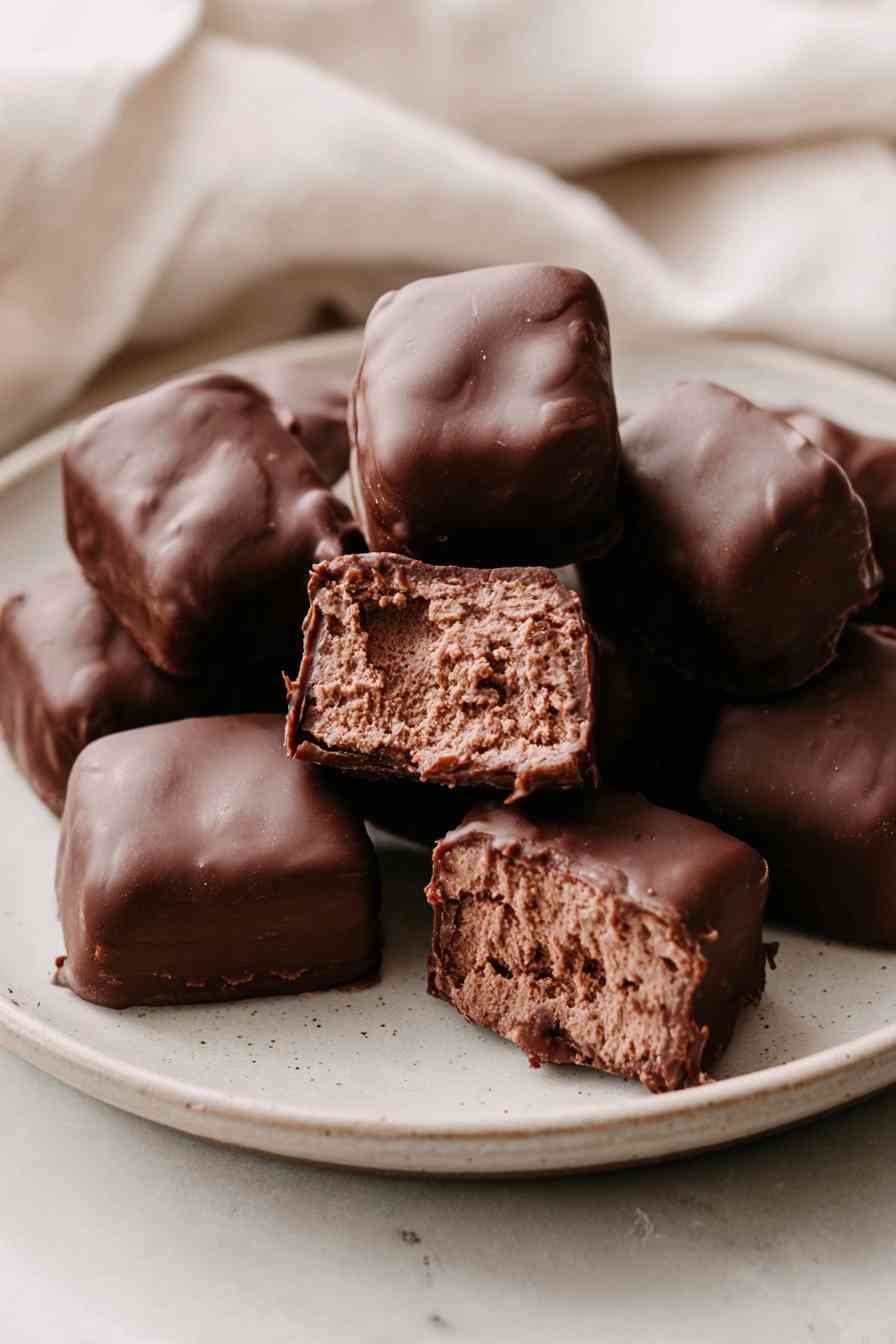
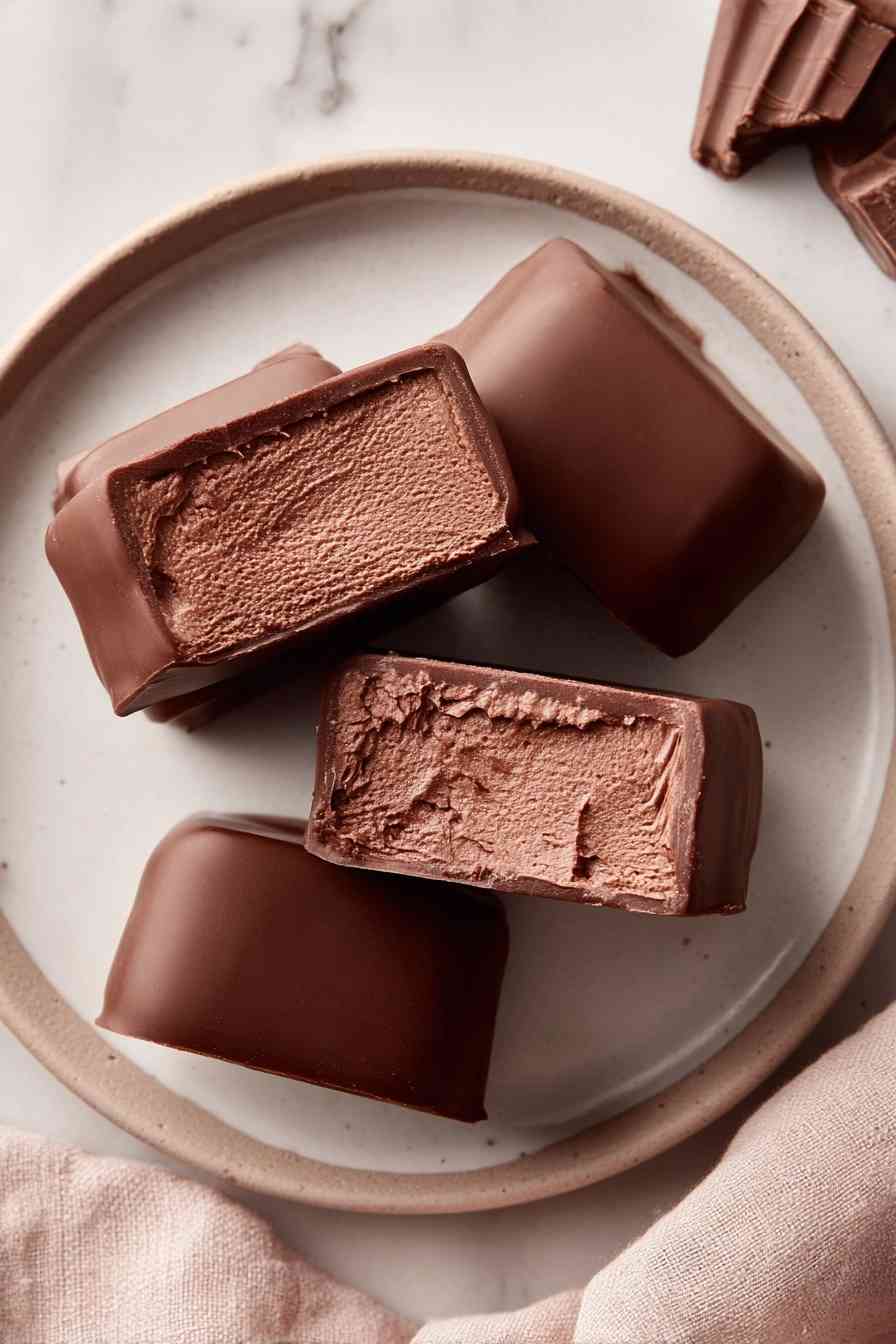
Cool Whip Candy is a nostalgic copycat for 3 Musketeers made with just three ingredients.
Milk chocolate chips form the fluffy filling, semi-sweet chocolate chips create the outer shell, and thawed Cool Whip adds the airy center that makes this candy so satisfying. You’ll freeze the mixture before cutting, then dip each piece into melted chocolate and finish with a drizzle for a polished look.
The process is straightforward: melt, mix, freeze, cut, and dip. The payoff is a batch of homemade candy bites that taste even better when served chilled. Whether you’re satisfying a late-night craving or prepping a batch for sharing, this recipe gives you control over texture and sweetness while keeping the steps minimal.
Gathering the Ingredients for Cool Whip Candy
You only need three components to pull this off, and each one plays a specific role in creating the signature texture and flavor.
- Milk chocolate chips – form the base of the fluffy filling, providing sweetness and a creamy melt that blends smoothly with the Cool Whip.
- Cool Whip (thawed) – adds airiness and lightness to the center, creating that signature fluffy texture that mimics the inside of a 3 Musketeers bar.
- Semi-sweet chocolate chips – create the outer shell and drizzle, offering a slightly less sweet contrast to the milk chocolate filling and a firm coating that holds up in the fridge.
How to Make Cool Whip Candy (Step by Step)
STEP 1: Melt the milk chocolate chips in a microwave-safe dish for 45 seconds, then stir until smooth. If needed, continue melting in 20-second intervals, stirring between each, until the chocolate is completely smooth. Let the melted chocolate cool for 10 minutes to avoid deflating the Cool Whip when you combine them.
STEP 2: In a mixing bowl, combine the thawed Cool Whip and the cooled melted milk chocolate. Use a wooden spoon or firm rubber spatula to fold the ingredients together until fully incorporated. Some small chunks are fine if you prefer a slightly textured filling, but work the mixture until it reaches your desired consistency.
STEP 3: Pour the mixture into a dish and press it out into an even layer, spreading it to your preferred thickness. A thinner layer will give you more pieces, while a thicker layer creates a more substantial bite.
STEP 4: Place the dish in the freezer for 20 minutes to firm up the filling. This step is essential for clean cutting and easier handling during the dipping process.
STEP 5: Remove the dish from the freezer and carefully lift the filling out in one piece. If it sticks, run a thin spatula around the edges to loosen it. Cut the filling into 16 pieces, wiping your knife between cuts if the filling starts to stick.
STEP 6: Melt the semi-sweet chocolate chips using the same method as the milk chocolate: 45 seconds, stir, then 20-second intervals until smooth. Let it cool slightly so it’s fluid but not scalding.
STEP 7: Dip each piece of filling into the melted semi-sweet chocolate, using a fork to lift it out and tap off the excess. Place each coated piece on a sheet of parchment paper, then drizzle any remaining chocolate over the tops for a finished look.
STEP 8: Allow the chocolate coating to solidify completely at room temperature or in the fridge before serving or transferring the candies to an airtight container.
Tips for Fluffy Centers and Smooth Chocolate Coating
- Cool the melted milk chocolate for the full 10 minutes before mixing with Cool Whip. Hot chocolate will melt the whipped topping and deflate the airy texture.
- Melt chocolate in 20-second intervals to avoid seizing or burning. Stir thoroughly between each interval and stop as soon as smooth.
- Line the dish with parchment paper before pressing in the mixture. This makes removal much easier and keeps the filling intact when you lift it out.
- Keep undipped filling in the fridge if your kitchen is warm. The filling softens quickly, making it harder to coat cleanly.
Serving and Pairing Ideas for Cool Whip Candy
Serve these candies chilled straight from the fridge, where the chocolate stays firm and the center remains soft and creamy. Pair them with hot coffee or cold milk for a simple treat, or arrange them on a dessert platter with other homemade candies for a party spread. They also make excellent homemade gifts packed in small boxes or tins.
Cool Whip Candy FAQs: Troubleshooting and Substitutions
Can I use whipped topping alternatives instead of Cool Whip?
Yes, you can substitute another stabilized whipped topping, but avoid fresh whipped cream. Fresh cream lacks the structure to hold up during mixing and freezing. Stick with a product that has stabilizers for the best fluffy texture.
Why is my chocolate coating not setting properly?
If the chocolate stays soft, your kitchen may be too warm. Move the candies to the fridge to help the coating firm up. Also check that you’re using real chocolate chips, not candy melts, which behave differently.
How should I cut the filling to keep it from sticking?
Use a sharp knife and wipe it clean between cuts. If the filling is too soft, return it to the freezer for a few more minutes. Lining the dish with parchment paper before pressing in the mixture also makes removal and cutting much easier.
Can I make Cool Whip Candy ahead of time for parties?
Yes. These candies hold up well in the fridge for several days and can be made a day or two in advance. Store them in an airtight container with parchment between layers to prevent sticking.
Are there any tips for dipping without making a mess?
Use a fork to lower each piece into the melted chocolate, then tap the fork gently on the edge of the bowl to remove excess coating. Work over parchment paper to catch drips and keep a damp towel nearby to wipe your hands between pieces.
Storing Your Homemade Cool Whip Candy
Store the finished candies in an airtight container in the fridge for up to one week. Place parchment paper between layers to prevent the chocolate from sticking. The cold temperature keeps the coating firm and the center soft.
For longer storage, freeze the candies for up to one month. Let them thaw in the fridge for about 30 minutes before serving to restore the ideal texture. Avoid leaving them at room temperature for extended periods, as the filling can soften and the chocolate may bloom.
Cool Whip Candy
Ingredients
Equipment
Method
-
Place the milk chocolate chips in a microwave-safe dish and microwave for 45 seconds. Stir until smooth, then continue heating in 20-second intervals, stirring between each, until completely melted and smooth. Allow to cool for 10 minutes.
-
Add the thawed Cool Whip to a mixing bowl along with the cooled melted milk chocolate. Using a wooden spoon or firm rubber spatula, fold and work the ingredients together until fully combined. Some chunks are acceptable; continue mixing until you reach your preferred consistency.
-
Transfer the mixture to a dish and press it into an even layer at your desired thickness.
-
Freeze the dish for 20 minutes to firm up the filling.
-
Take the dish out of the freezer and carefully lift the filling out in one solid piece.
-
Slice the filling into 16 equal pieces.
-
Melt the semi-sweet chocolate chips using the same method as the milk chocolate: 45 seconds, stir, then additional 20-second intervals until smooth.
-
Dip each piece of filling into the melted semi-sweet chocolate to coat.
-
Place the coated pieces flat on parchment paper and drizzle the remaining chocolate over each bar for a finished appearance.
-
Let the chocolate coating solidify completely before serving or placing in an airtight container.
Notes
Tried this recipe?
Let us know how it was!
Cool Whip Candy
Ingredients
Equipment
Method
-
Add the milk chocolate chips to a microwave-safe dish and microwave for 45 seconds. Stir until melted, then continue microwaving in 20-second bursts, stirring after each, until the chocolate is fully smooth. Let it cool for 10 minutes.
-
In a mixing bowl, combine the thawed Cool Whip and cooled milk chocolate. Gently fold with a wooden spoon or firm spatula until the mixture is fully blended; a few small lumps are OK if you like a bit of texture.
-
Press the mixture evenly into a dish, smoothing it to your preferred thickness.
-
Place the dish in the freezer and chill for 20 minutes to help the filling firm up.
-
Remove from the freezer and carefully lift out the filling in one piece.
-
Using a sharp knife, cut the filling into 16 equal squares or bars.
-
Melt the semi-sweet chocolate chips following the same microwave method: 45 seconds, stir, then 20-second intervals as needed until fully melted and smooth.
-
Dip each candy square into the melted semi-sweet chocolate to fully cover them.
-
Arrange the coated candies onto parchment paper and drizzle any remaining chocolate over the tops for decoration.
-
Allow the chocolate coating to set completely before serving or transferring to an airtight container for storage.
Notes
Tried this recipe?
Let us know how it was!
Cool Whip Candy
Ingredients
Equipment
Method
-
Place the milk chocolate chips in a microwave-safe dish and heat in the microwave for 45 seconds. Remove and stir until smooth, then continue microwaving in 20-second intervals, stirring after each time, until fully melted. Set aside to cool for 10 minutes.
-
In a mixing bowl, add the thawed Cool Whip and the cooled, melted milk chocolate. Gently fold the two together with a wooden spoon or stiff spatula until well combined. If you prefer a little texture, a few small lumps are fine.
-
Spread the mixture evenly into your prepared dish, adjusting to your preferred thickness.
-
Transfer the dish to the freezer and chill for 20 minutes, allowing the filling to firm up.
-
Remove the dish from the freezer. Carefully lift the filling out in one whole piece. If it sticks, use the parchment to help lift it out.
-
With a sharp knife, cut the filling into 16 equal squares or bars, wiping the blade between cuts if needed.
-
Add the semi-sweet chocolate chips to a microwave-safe dish and melt them using the same technique as before: 45 seconds in the microwave, then stir, and continue in 20-second intervals until smooth.
-
Dip each candy square into the melted semi-sweet chocolate to coat completely, using a fork to lift them out and tapping gently to remove excess chocolate.
-
Place the coated candies onto parchment paper and drizzle any remaining melted chocolate over the tops for decoration.
-
Let the chocolate coating set and harden fully before serving or transferring to an airtight container.
Notes
Tried this recipe?
Let us know how it was!
Easy Fried Cabbage
Ingredients
Equipment
Method
-
Heat a large skillet over medium heat. Add the chopped bacon and cook until crisp. Using a slotted spoon, transfer the bacon out of the skillet, leaving the rendered fat behind.
-
In the remaining bacon fat, add diced yellow onion and cook, stirring every so often, until the onion softens and turns translucent, about 5 minutes.
-
Add the chopped or shredded cabbage to the skillet with the onion. Sprinkle in the brown sugar, salt, black pepper, and smoked paprika. Stir to combine all ingredients.
-
Continue cooking, stirring occasionally, until the cabbage is tender, about 7–10 minutes.
-
Return the cooked bacon to the skillet and mix it in with the cabbage. Serve the dish hot.
Notes
Tried this recipe?
Let us know how it was!
Cool Whip Candy
Ingredients
Equipment
Method
-
Place the milk chocolate chips in a microwave-safe bowl and heat for 45 seconds. Stir, then microwave in additional 20-second intervals, stirring every time, until the chocolate is completely melted and smooth. Let cool for 10 minutes.
-
In a mixing bowl, add the thawed Cool Whip and cooled melted milk chocolate. Gently fold together with a wooden spoon or spatula until fully combined. It’s fine if a few small lumps remain.
-
Spread the chocolate mixture into an even layer in a dish lined with parchment paper, smoothing the top as needed.
-
Freeze for 20 minutes until the filling is firm.
-
Lift the chilled filling out of the dish in one piece using the edges of the parchment paper.
-
Cut the firm filling into 16 equal squares or bars using a sharp knife.
-
Melt the semi-sweet chocolate chips in a microwave-safe bowl using the same method: heat for 45 seconds, stir, then 20-second bursts until smooth.
-
Dip each square of filling into the melted semi-sweet chocolate to coat completely.
-
Place the coated candies on a parchment-lined tray and drizzle any remaining chocolate over the tops for garnish.
-
Allow the candies to set until the chocolate coating is firm before serving or transferring to an airtight container.
Notes
Tried this recipe?
Let us know how it was!
Baked Chicken Cordon Bleu
Ingredients
Equipment
Method
-
Spread the panko breadcrumbs evenly on a large baking tray, mist with oil spray, and toast in a 180°C/350°F oven for about 5 minutes or until lightly golden. Watch closely to prevent burning. Transfer breadcrumbs to a bowl to cool and raise the oven temperature to 200°C/400°F.
-
With a sharp knife, carefully cut a pocket into the side of each chicken breast, making it as wide and deep as possible without cutting all the way through. Layer two slices of cheese on two slices of ham, roll them up tightly, and tuck one roll into each chicken breast pocket, closing the chicken over the filling. Use toothpicks to secure each seam shut.
-
Mix the paprika, salt, onion powder, garlic powder, black pepper, and cayenne pepper in a small bowl.
-
Set up three bowls: one with the flour mixed with half of the seasoning, a second with the beaten eggs, and a third with the toasted breadcrumbs mixed with the remaining seasoning. Dredge each stuffed chicken breast first in the seasoned flour, then dip in egg, and finally coat thoroughly in the breadcrumb mixture.
-
Line a baking tray with foil and place a wire rack on top. Spray the rack with oil. Arrange the coated chicken breasts on the rack, mist the tops with oil spray, and bake at 200°C/400°F for 25–30 minutes. The crust should be deep golden and crispy, and the chicken should be hot and white all the way through, with cheese just beginning to melt out.
-
As the chicken bakes, make the sauce: Melt butter in a medium saucepan over medium heat. Add chicken stock, cream, Parmesan, mustard, and white pepper. Stir to blend, then simmer for 5–6 minutes, stirring often, until thickened. Adjust salt to taste, then take off the heat.
-
Once the chicken is baked, carefully remove the toothpicks, serve hot with the prepared sauce, and enjoy.
Notes
Tried this recipe?
Let us know how it was!
Cool Whip Candy
Ingredients
Equipment
Method
-
Add the milk chocolate chips to a microwave-safe bowl. Heat on high for 45 seconds, then stir. Continue microwaving in 20-second bursts, stirring after each, until the chocolate is fully melted and completely smooth. Let the chocolate cool for 10 minutes.
-
Put the thawed Cool Whip in a mixing bowl. Pour in the cooled, melted milk chocolate. Using a wooden spoon or sturdy rubber spatula, gently fold them together until combined; it’s fine if a few small lumps remain.
-
Spread the mixture into a dish, pressing it into an even layer at your desired thickness.
-
Freeze the dish for 20 minutes so the filling can firm up.
-
Take the dish out of the freezer. Carefully lift the filling out in one piece.
-
Cut the filling into 16 equal bars or squares using a sharp knife.
-
Melt the semi-sweet chocolate chips in a microwave-safe container, starting with 45 seconds. Stir, then continue microwaving in 20-second intervals, stirring between each, until thoroughly melted and smooth.
-
Dip each bar into the melted semi-sweet chocolate, coating it completely.
-
Lay the chocolate-coated bars onto parchment paper, then drizzle over any leftover melted chocolate for decoration.
-
Allow the coating to set fully at room temperature or in the fridge before serving or storing in an airtight container.
Notes
Tried this recipe?
Let us know how it was!
Baked Pumpkin Oatmeal
Ingredients
Equipment
Method
-
Preheat your oven to 350°F (175°C) and lightly grease an 8×8 inch baking pan.
-
In a medium bowl, whisk together the pumpkin, eggs, vanilla, maple syrup, and pumpkin pie spice until completely smooth.
-
Stir in the milk until everything is well mixed.
-
Add the oats and chia seeds, then fold everything together so the oats are evenly moistened.
-
Pour the mixture into your prepared baking pan, spreading evenly.
-
Bake for 55–65 minutes, or until the center is fully set. If using a metal pan, check toward the longer end of the baking range.
-
Allow to cool slightly before slicing and serving. Store leftovers in the refrigerator.
Notes
Tried this recipe?
Let us know how it was!
Cool Whip Candy
Ingredients
Equipment
Method
-
Place the milk chocolate chips in a microwave-safe dish. Heat them on high for 45 seconds, then stir until partially melted. Continue microwaving in 20-second increments, stirring after each, until the chocolate is completely smooth. Let the melted chocolate cool for 10 minutes before proceeding.
-
Put the thawed Cool Whip into a mixing bowl. Pour in the cooled melted milk chocolate. Gently fold the two together with a wooden spoon or sturdy spatula until fully incorporated, leaving a few small chunks if you like a bit of texture.
-
Spread the chocolate mixture into a dish, smoothing it to an even layer at your preferred thickness.
-
Freeze the dish for 20 minutes to firm up the filling.
-
Carefully remove the firmed filling from the dish in one whole piece. If necessary, run a thin spatula around the edges to help release it.
-
Using a sharp knife, cut the filling into 16 equal-sized pieces.
-
To make the chocolate coating, melt the semi-sweet chocolate chips using the same microwave method: heat for 45 seconds, stir, then continue with 20-second intervals until smooth.
-
Dip each candy piece into the melted semi-sweet chocolate to cover completely. Use a fork to lift them out, tapping off excess chocolate.
-
Place each coated candy on parchment paper. Drizzle any remaining chocolate over the tops for decoration.
-
Allow the chocolate coating to harden fully before serving or storing the candies in an airtight container.
Notes
Tried this recipe?
Let us know how it was!
Cool Whip Candy
Ingredients
Equipment
Method
-
Place milk chocolate chips in a microwave-safe dish and heat for 45 seconds. Stir, then continue microwaving in 20-second increments, stirring each time, until the chocolate is completely smooth. Allow to cool for 10 minutes.
-
Combine the thawed Cool Whip and cooled milk chocolate in a mixing bowl. Gently fold together with a wooden spoon or firm spatula until fully blended. Some small lumps are fine unless you prefer it completely smooth.
-
Press the chocolate mixture into a dish lined with parchment paper, spreading it to an even layer at your desired thickness.
-
Transfer the dish to the freezer for 20 minutes to help the filling firm up.
-
Remove the chilled filling from the freezer and lift it out of the dish in one piece.
-
Using a sharp knife, slice the filling into 16 even pieces.
-
Melt the semi-sweet chocolate chips in a microwave-safe dish using the same method: start with 45 seconds, stir, then microwave in 20-second bursts, stirring between each, until fully smooth.
-
Dip each candy piece into the melted semi-sweet chocolate to completely coat it, using a fork to help lift out each piece.
-
Arrange the coated candies on a parchment-lined surface and drizzle any leftover melted chocolate over the tops for decoration.
-
Let the chocolate shell harden completely before serving or storing the candies in an airtight container.
Notes
Tried this recipe?
Let us know how it was!
Homemade French Fries
Ingredients
Equipment
Method
-
Choose whether to peel the potatoes or keep the skins on. If keeping them on, wash thoroughly and peel a small section to check for green coloring under the skin. If removing the skins, use a vegetable peeler to peel all potatoes.
-
Slice a thin piece off one side of each potato to stabilize it on the cutting board. Lay the flat side down and cut the potato into slices about 1/4 inch thick. Then slice these into sticks to form fries, placing each fry into a bowl of cold water immediately to prevent them from browning.
-
Rinse the cut potatoes in a colander for one minute. Then, soak them in a bowl of cold water for 10 minutes. Drain, rinse again, and pat the potatoes as dry as possible with a kitchen towel.
-
Heat beef tallow or duck fat in a heavy-bottomed saucepan (at least 8 inches wide) or a deep fryer to 325°F (163°C). Fry about half of the potatoes for 5 minutes, stirring occasionally. Transfer to a plate lined with paper towels and let rest for 5 minutes. The fries should be barely colored and tender inside.
-
Increase the oil temperature to 375°F (190°C). Return the fries to the pot and fry for an additional 3 minutes, stirring frequently, until they are golden brown. Move the finished fries into a large bowl lined with paper towels.
-
While the fries are still hot, season with salt and toss to coat. Serve immediately with your favorite condiments or enjoy them plain.
Nutrition
Notes
Tried this recipe?
Let us know how it was!