
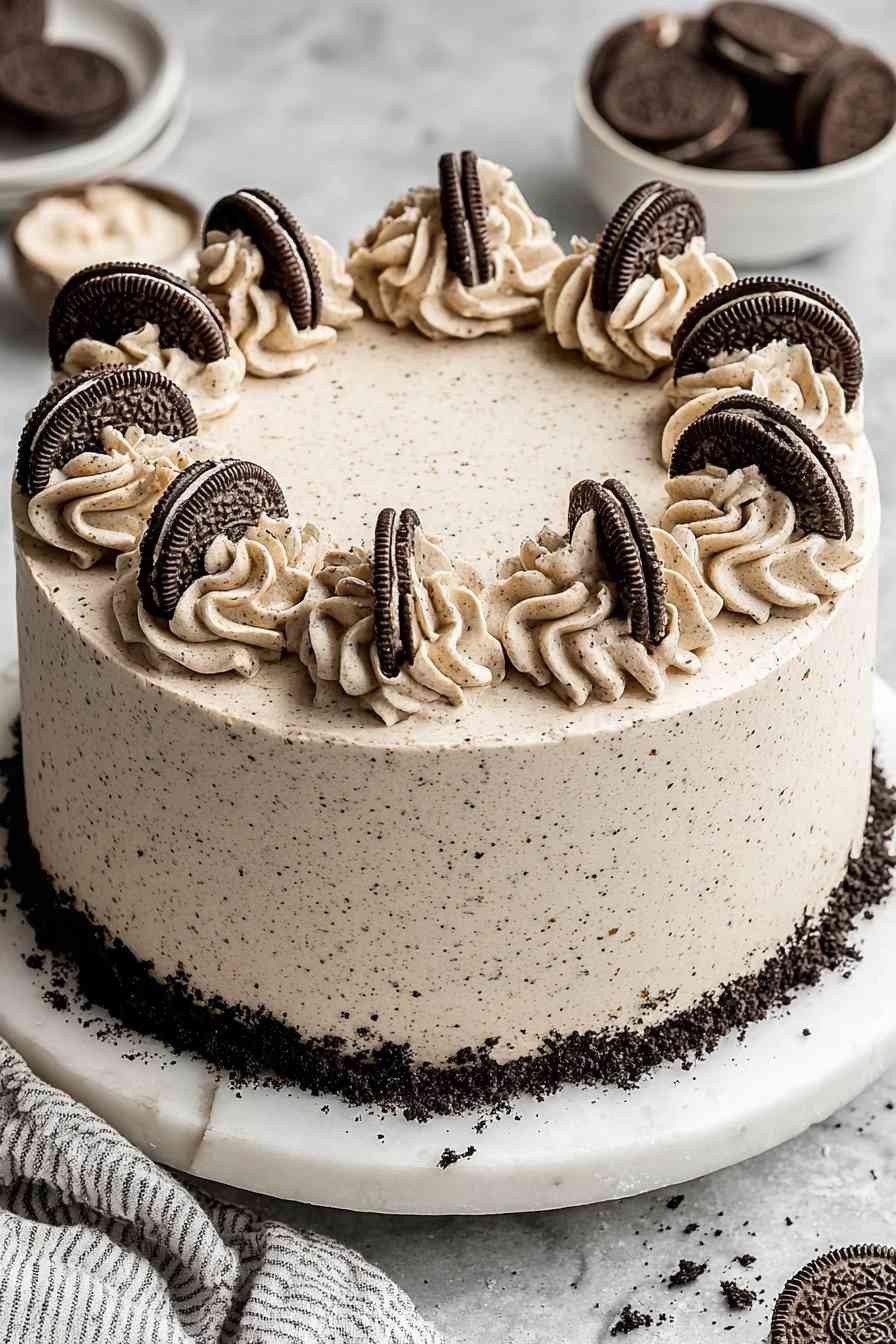
Make an Oreo Layer Cake with black velvet cake layers and cookies and cream buttercream for authentic Oreo flavor in every bite.
Turning a sleeve of Oreos into a towering celebration cake is one of those baking projects that feels a little bit ambitious and completely worth it. The secret to nailing that true Oreo taste lies in black cocoa powder, the same ingredient that gives those iconic cookies their deep color and signature flavor. Pair that with finely ground Oreo crumbs folded into buttercream, and you’ve got a cake that doesn’t just hint at cookies and cream, it delivers.
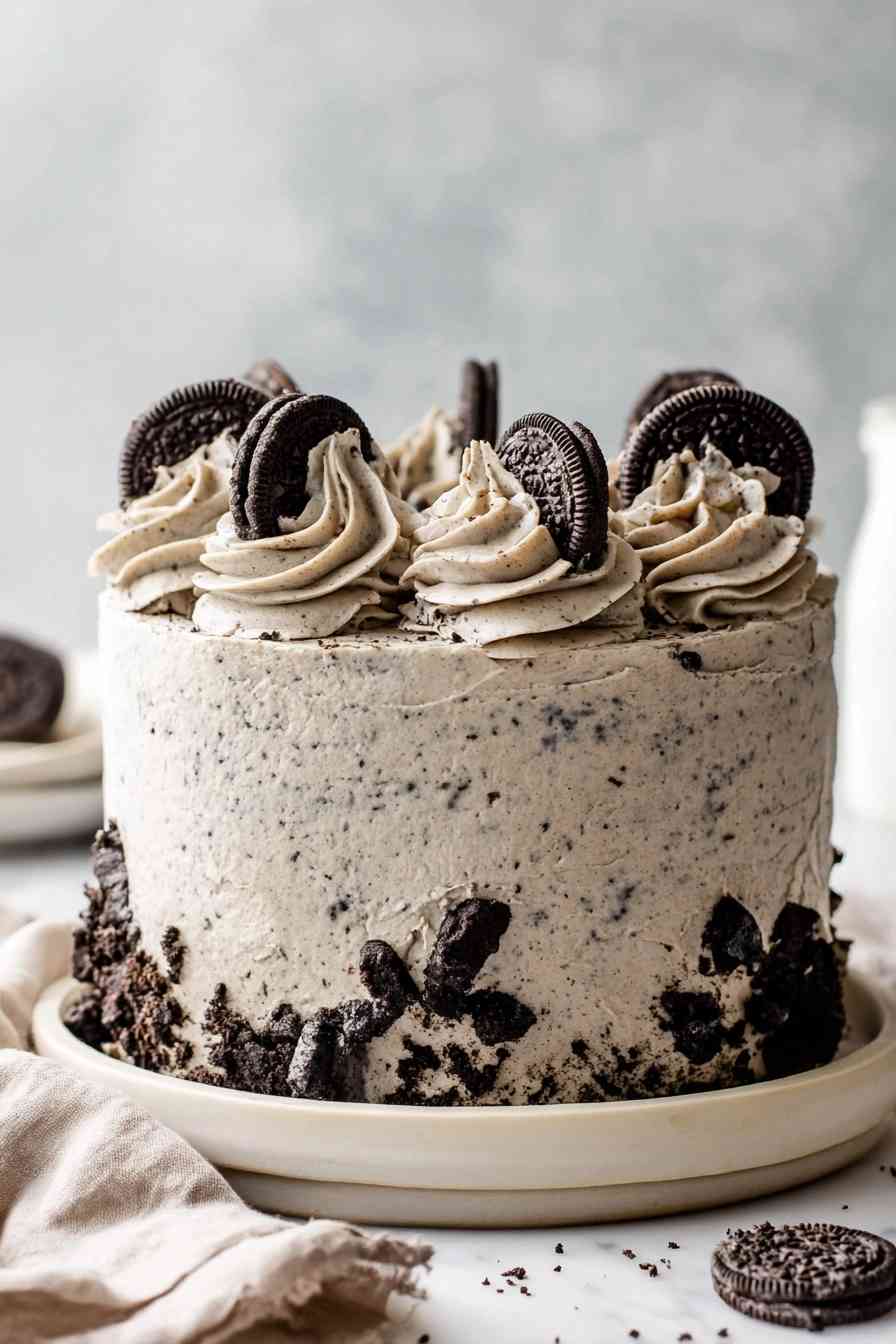
The cake itself is soft and moist, thanks to buttermilk, vegetable oil, and a splash of hot coffee that blooms the cocoa without leaving any coffee flavor behind. The buttercream is rich but not cloying, speckled with cookie crumbs that add texture and nostalgia in equal measure. Decorating with whole and chopped Oreos in a mosaic pattern gives the finished cake a dramatic, bakery-worthy look that’s easier to pull off than it appears.
If you’ve ever wanted to make a cake that tastes exactly like the cookie it’s inspired by, this one does the job without any guesswork.
What Goes Into This Oreo Layer Cake
Building this cake means working with two main components: the black velvet cake layers and the cookies and cream buttercream. Each ingredient plays a specific role in flavor, texture, or structure.
- Black cocoa powder – delivers the deep black color and authentic Oreo shell flavor that regular cocoa can’t match.
- All-purpose flour – provides structure without making the cake dense or heavy.
- White granulated sugar – sweetens the cake and helps create a tender crumb.
- Baking soda and baking powder – work together to give the cake a light, airy rise.
- Vegetable oil – keeps the cake moist and soft for days after baking.
- Buttermilk – adds tanginess and richness while tenderizing the crumb.
- Hot coffee – blooms the cocoa powder to intensify chocolate notes without adding coffee flavor.
- Eggs and vanilla extract – bind the batter and add depth to the overall flavor.
- Unsalted butter – forms the creamy, smooth base of the buttercream.
- Powdered sugar – sweetens and thickens the frosting to a pipeable consistency.
- Oreo cookies – ground finely for the buttercream, then used whole and chopped for decoration.
- Whole milk – loosens the buttercream to a spreadable texture.
How to Build an Oreo Layer Cake, Step by Step
STEP 1: Preheat your oven to 350ºF and prepare three 6-inch or two 8-inch cake pans by spraying the sides with cooking spray and lining the bottoms with parchment circles.
STEP 2: Combine the flour, sugar, black cocoa powder, baking soda, baking powder, and salt in a stand mixer bowl, stirring on low for 30 seconds to blend. Add the vegetable oil, eggs, vanilla, and buttermilk, mixing on low until just combined. Slowly stream in the hot coffee while the mixer runs on low, then increase to medium speed and beat for 2 minutes until the batter is smooth and uniform.
STEP 3: Divide the batter among the prepared pans, filling each no more than two-thirds full. Bake for 32 to 36 minutes, until a toothpick inserted into the center comes out clean. Let the cakes cool completely in the pans before attempting to level or frost them.
STEP 4: Pulse 13 Oreo cookies in a food processor until they form fine, uniform crumbs with no large chunks remaining. Beat the room-temperature butter in a stand mixer fitted with the paddle attachment on medium-high speed for about 5 minutes, until it’s pale and creamy.
STEP 5: Add the powdered sugar a few cups at a time, mixing on low and scraping down the bowl between additions. Add the vanilla, milk, and a pinch of salt, mixing on low for 1 to 2 minutes until fully incorporated. Fold in the finely ground Oreo crumbs on low speed until they’re evenly dispersed throughout the buttercream.
STEP 6: Level the cooled cake layers to your desired height. Place a swipe of buttercream on a cardboard cake circle, then set the first layer on top. Spread buttercream between each layer, stacking them evenly. Apply a thin crumb coat over the entire cake, then refrigerate for 15 to 20 minutes to let the frosting firm up.
STEP 7: Frost the chilled cake with the remaining buttercream, smoothing it into a clean finish. Reserve 8 whole Oreos for the top, then chop the rest into irregular pieces. Press the chopped cookies onto the bottom third of the cake in a mosaic pattern for a textured, bakery-style look.
Secrets for the Best Oreo Cake Texture and Look
- Grind the Oreo crumbs as finely as possible if you plan to pipe swirls or rosettes on top, since large chunks will clog piping tips and make decorating frustrating.
- Let the cake layers cool completely before leveling or frosting. Warm cake will tear, crumble, and make the buttercream melt into a slippery mess.
- Don’t skip the crumb coat and chill step. That thin layer of frosting traps loose crumbs and gives you a smooth, professional base for the final coat.
- If your buttercream feels too stiff, add milk one teaspoon at a time until it reaches a spreadable consistency. If it’s too loose, refrigerate it for 10 minutes to firm up before frosting.
Serving Ideas for Oreo Layer Cake
Serve this cake with a glass of cold milk for a nostalgic touch, or offer vanilla ice cream on the side to balance the sweetness. Fresh berries, especially raspberries or strawberries, add a bright, tart contrast that cuts through the buttercream without competing with the Oreo flavor. The richness of the cake pairs well with simple, complementary sides that let the cookies and cream flavor shine.
Oreo Layer Cake: Troubleshooting & Answers
Can I use regular cocoa powder instead of black cocoa powder?
You can, but the cake won’t have the same deep black color or authentic Oreo shell flavor. Regular Dutch-processed cocoa will give you a chocolate cake with a lighter brown tone. Black cocoa powder is what makes this cake taste like an actual Oreo, so it’s worth tracking down if you want the full effect.
What’s the best way to get even cake layers?
Weigh your batter and divide it evenly among the pans before baking. Use a kitchen scale to ensure each pan gets the same amount, which prevents lopsided layers. Once baked and cooled, level the tops with a serrated knife or cake leveler to create flat, stackable surfaces that won’t lean or slide.
How do I keep the buttercream from being too sweet?
Add a pinch of salt to the buttercream and taste as you go. The Oreo crumbs also help cut the sweetness slightly, but if it still feels too sugary, reduce the powdered sugar by half a cup and add an extra tablespoon of milk to maintain the right consistency.
Can I make the cake or buttercream in advance?
Yes, both components hold well. Bake the cake layers up to two days ahead, wrap them tightly in plastic wrap, and store them at room temperature. Make the buttercream up to a week in advance and refrigerate it in an airtight container, then bring it to room temperature and rewhip before using.
Is it possible to turn this into cupcakes instead of a layer cake?
Absolutely. Divide the batter among lined cupcake tins, filling each about two-thirds full, and bake at 350ºF for 18 to 22 minutes. Let them cool completely, then frost with the cookies and cream buttercream and top each one with a mini Oreo or a sprinkle of cookie crumbs.
Storing and Freezing Your Oreo Layer Cake
Store the assembled cake in an airtight container or under a cake dome at room temperature for up to two days, or refrigerate it for up to five days. The buttercream will firm up in the fridge, so let the cake sit at room temperature for 30 minutes before serving to bring back its soft, creamy texture.
To freeze, wrap individual slices or the whole cake tightly in plastic wrap, then cover with aluminum foil. Freeze for up to three months. Thaw in the refrigerator overnight, then bring to room temperature before serving. The cake layers also freeze beautifully on their own before frosting, which makes it easy to prep ahead for a celebration.
Oreo Layer Cake
Ingredients
Equipment
Method
- Preheat your oven to 350ºF (177ºC). Grease three 6-inch or two 8-inch cake pans and line the bottoms with wax paper or parchment rounds.
- In a stand mixer bowl, combine flour, sugar, cocoa powder, baking soda, baking powder, and salt. Mix on low speed for 30 seconds to blend.
- Add vegetable oil, eggs, vanilla extract, and buttermilk to the bowl. Mix on low until just incorporated.
- With the mixer on low speed, gradually pour in the hot coffee or hot water. Increase speed to medium and beat for about 2 minutes, until the batter is smooth.
- Divide the batter evenly among prepared pans, filling each no more than two-thirds full. Bake for 32–36 minutes, or until a toothpick comes out clean from the center.
- Allow the cakes to cool completely in the pans before removing.
- While the cakes cool, pulse 13 Oreo cookies in a food processor until you have fine crumbs.
- In a stand mixer fitted with a paddle attachment (or using a hand mixer), beat the butter on medium-high until pale and creamy, about 5 minutes.
- Gradually add powdered sugar to the butter, pausing to scrape down the bowl as needed. With the mixer on low, add vanilla extract, milk, and salt, mixing until thoroughly combined and smooth (about 1–2 minutes).
- Mix in the Oreo crumbs on low speed until the buttercream is evenly speckled.
- Once cakes are fully cooled, trim the tops to level if needed. Spread a thin layer of buttercream onto a cake board and place the first cake round on top. Layer with buttercream between each cake, stacking them.
- Apply a light crumb coat over the cake and chill for 15–20 minutes to set.
- Frost the chilled cake with a final layer of buttercream, smoothing the sides and top.
- Reserve 8 whole Oreo cookies for the top of the cake. Roughly chop the remaining Oreos and press them decoratively onto the bottom third of the cake as a garnish.