
Why You’ll Love this Teriyaki Glaze
Whether you’re looking to elevate your weeknight dinner or impress guests at a gathering, this homemade teriyaki glaze is about to become your new secret weapon.
I’ve tested dozens of versions to perfect this recipe, and trust me, it strikes that ideal balance of sweet, savory, and umami that makes teriyaki so irresistible.
What makes this glaze special? It’s incredibly versatile (try it on salmon, chicken, or tofu), takes just minutes to prepare, and uses pantry staples you likely already have.
No more store-bought bottles with questionable ingredients. And the best part? You can easily customize it—make it spicier, sweeter, or thinner depending on your preference.
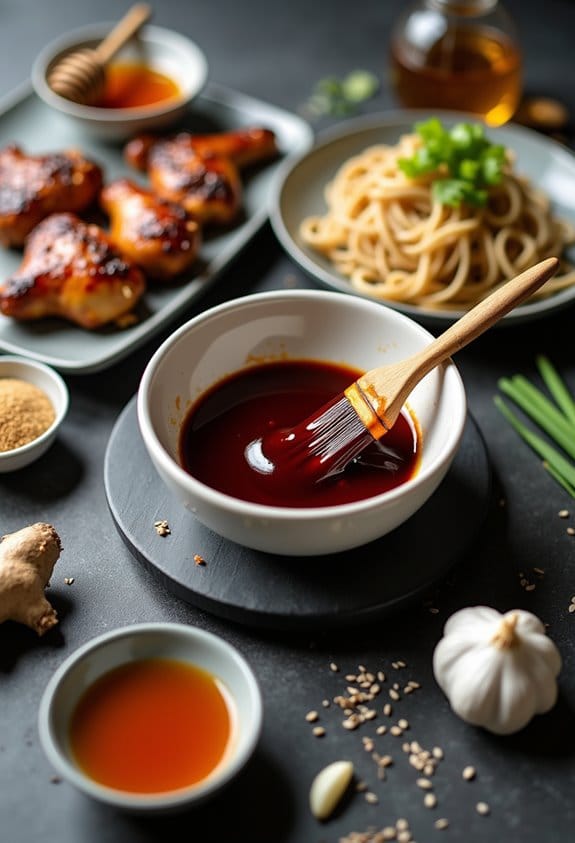
What Ingredients are in Teriyaki Glaze?
The beauty of teriyaki glaze lies in its perfect balance of salty, sweet, and umami flavors that can transform even the most basic proteins into something special. This traditional Japanese sauce relies on a handful of simple ingredients that work together to create that distinctive glossy, sticky coating we all love. Once you see how easy it’s to make at home, you might never go back to the bottled stuff again.
- ½ cup low-sodium soy sauce (or tamari)
- ½ cup water
- ¼ cup packed brown sugar
- 1 tablespoon honey
- 1 tablespoon rice vinegar (or mirin)
- 1 teaspoon freshly grated ginger
- 1 small garlic clove, grated
- 2 teaspoons cornstarch mixed with 2 teaspoons cold water (for thickening)
- 1 teaspoon toasted sesame oil (optional)
- Pinch of red pepper flakes (optional)
A few notes about these ingredients: if you’re using mirin instead of rice vinegar, you’ll want to reduce the brown sugar by 1-2 teaspoons since mirin already contributes sweetness. For a gluten-free version, just make sure you’re using certified gluten-free tamari and cornstarch. And don’t skip the fresh ginger and garlic—they’re what give this sauce its aromatic depth that you just can’t get from powdered versions. Want to customize? Try the pineapple variation by replacing half the water with unsweetened pineapple juice, or double up on the ginger and garlic for an extra-punchy version.
How to Make this Teriyaki Glaze

Making teriyaki glaze at home is surprisingly simple and follows a three-step process that yields that perfect glossy, sticky sauce we all crave.
Start by combining ½ cup low-sodium soy sauce, ½ cup water, ¼ cup packed brown sugar, 1 tablespoon honey, 1 tablespoon rice vinegar, 1 teaspoon freshly grated ginger, and 1 small grated garlic clove in a small saucepan. Bring this mixture to a gentle simmer over medium heat and let it cook for about 3 minutes, making sure to stir occasionally to help the sugar dissolve completely. This brief simmer allows all those wonderful flavors to meld together while the heat starts to slightly reduce and concentrate the sauce.
Now comes the magic that transforms this liquid into that signature thick, glossy glaze. Whisk together 2 teaspoons of cornstarch with 2 teaspoons of cold water until completely smooth—this is called a slurry, and it’s essential there are no lumps.
While whisking the simmering sauce constantly (this prevents lumps), stream in your cornstarch slurry and continue cooking for another 1-2 minutes. You’re looking for that perfect nappe consistency, which means the sauce should coat the back of a spoon nicely. Once you’ve reached that beautiful thickness, remove the pan from heat and, if desired, stir in 1 teaspoon of toasted sesame oil for an extra dimension of nutty flavor.
The versatility of this glaze is what makes it so wonderful in the kitchen. You can brush it generously over cooked salmon, chicken thighs, tofu steaks, or roasted vegetables during the last few minutes of cooking, allowing it to create that signature lacquered finish.
Or toss it with hot stir-fried noodles and vegetables for an instant flavor upgrade. Keep in mind the sauce will thicken slightly as it cools, so don’t panic if it seems a touch thin when hot.
And remember, this recipe is forgiving—if your glaze ends up too salty, simply whisk in 2-4 tablespoons of water and simmer for another minute. Too thick? A splash of water thins it right out. Too sweet? Just balance it with an additional teaspoon of vinegar or a bright squeeze of lemon juice.
Teriyaki Glaze Substitutions and Variations
Now that you’ve mastered the basic teriyaki glaze technique, let’s explore some creative variations that can completely transform this already delicious sauce.
For a tropical twist, try replacing half the water with pineapple juice—it adds a sweet-tangy dimension that’s divine with grilled chicken.
Need a gluten-free option? Simply swap in tamari for soy sauce, and you’re good to go.
I love doubling the ginger and garlic when I’m craving something punchier.
And when using it as a marinade? Just skip the cornstarch, let your protein soak up those flavors, then boil the leftover liquid for a perfect finishing sauce.
What to Serve with Teriyaki Glaze
While teriyaki glaze shines on its own, pairing it with the right accompaniments elevates your meal from simple to spectacular.
I love serving teriyaki-glazed proteins with fluffy jasmine rice or brown rice to soak up that savory-sweet sauce. Can’t beat that combination, right?
For vegetables, steamed broccoli is my go-to, but don’t overlook bok choy, snow peas, or bell peppers. A sprinkle of toasted sesame seeds and thinly sliced scallions adds the perfect finishing touch.
Trust me, that pop of color and texture makes all the difference. For a complete meal, consider adding a simple cucumber salad with rice vinegar on the side.
Final Thoughts
After experimenting with this teriyaki glaze recipe countless times in my kitchen, I’ve come to appreciate its incredible versatility and foolproof nature.
The beauty of homemade teriyaki is how easily you can adjust it to your taste—a little more ginger for zing, less sugar if you prefer it savory, or a splash of pineapple juice for tropical flair.
Why buy bottled sauce when this takes just minutes to make? Store leftovers in the fridge for up to two weeks, and you’ll always have liquid gold ready for quick dinners.
Trust me, once you master this recipe, you’ll never go back.
Homemade Teriyaki Glaze
Ingredients
Equipment
Method
- In a small saucepan, combine soy sauce, water, brown sugar, honey, rice vinegar, grated ginger, and grated garlic.
- Bring the mixture to a gentle simmer over medium heat. Cook for about 3 minutes, stirring occasionally to help dissolve the sugar completely.
- In a small bowl, whisk together cornstarch and cold water until completely smooth to create a slurry.
- While whisking the simmering sauce constantly, stream in the cornstarch slurry and continue cooking for another 1-2 minutes until the sauce thickens to a glossy consistency that coats the back of a spoon.
- Remove from heat and stir in the toasted sesame oil and red pepper flakes if using.
- Allow to cool slightly before using as a glaze for salmon, chicken, tofu, or vegetables.