
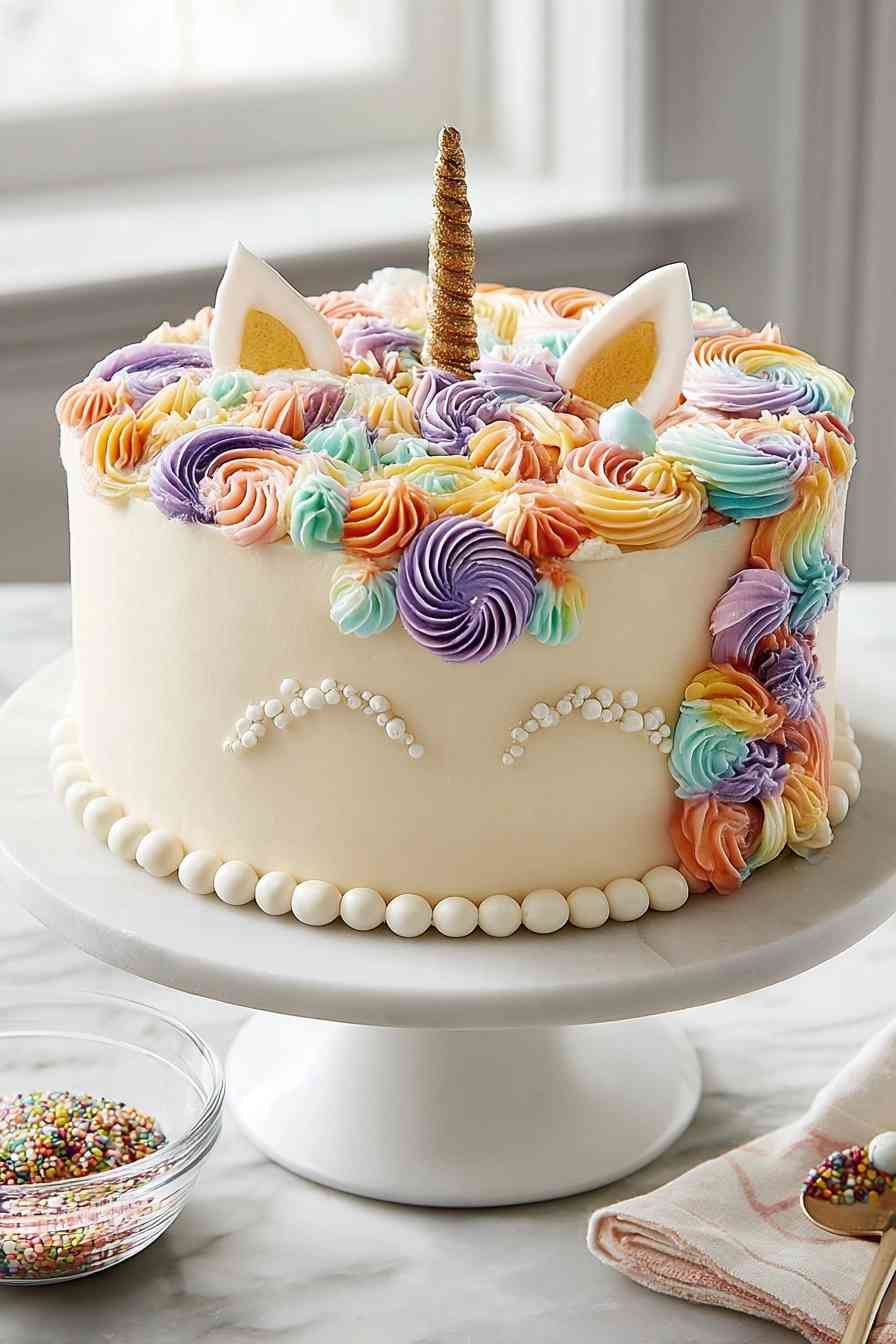
A unicorn cake with rainbow layers delivers pure birthday magic through four distinct colored cake layers stacked beneath whimsical buttercream flowers.
This showstopper looks wildly impressive but relies on straightforward techniques any baker can master. You’ll color standard cake mix batters in red, yellow, green, and blue, stack them with vanilla buttercream, then transform the top into a unicorn face using a sugar cone horn and cake scrap ears. The real visual payoff comes from piping gradient buttercream flowers around the horn to create a flowing rainbow mane.
The decorating process feels more like craft time than advanced pastry work. You’re essentially building with frosting, sprinkles, and a little imagination, which means the pressure stays low even when the wow-factor runs high.
Everything You Need for a Unicorn Cake with Rainbow Layers
The ingredient list stays refreshingly short, leaning on boxed cake mix and buttercream as your foundation while food coloring and simple decorations handle the magic.
- Vanilla cake mix – provides the neutral base that takes on vibrant colors without competing flavors.
- Assorted food coloring – transforms plain batter into four distinct rainbow layers with bold, eye-catching hues.
- Vanilla buttercream – acts as both the stacking glue and the smooth canvas for decorating, plus colors beautifully for the mane.
- Black gel icing – creates crisp, defined unicorn eyes that won’t bleed or fade into the frosting.
- Sugar cone – becomes the unicorn horn when frosted and rolled in sprinkles for texture and sparkle.
- Sprinkles – add festive detail to the horn and ear interiors, reinforcing the playful birthday vibe.
How to Build a Show-Stopping Unicorn Cake (Step by Step)
STEP 1: Preheat your oven to 350°F, then grease and line two 9-inch round cake pans with parchment paper.
STEP 2: Prepare one box of cake mix according to package directions, divide the batter evenly between two bowls, and color one red and the other yellow using food coloring. Pour each into its prepared pan and bake for 9-inch rounds, usually around 22 minutes.
STEP 3: Repeat with the second cake mix using green and blue food coloring, then bake those layers. Allow all four cakes to cool completely on wire racks.
STEP 4: While the cakes cool, prepare one full recipe of vanilla buttercream. Level each cooled cake carefully with a serrated knife, slicing off any domed tops, and reserve some cake scraps for shaping the unicorn ears.
STEP 5: Stack the layers starting with purple on the bottom, spreading a thick layer of buttercream between each tier, then continue with blue, yellow, and red. Spread a thin coating of frosting over the entire cake to lock in crumbs, then cut two ear shapes from the reserved cake scraps and pierce the bottom of each with toothpicks for stability.
STEP 6: Frost the ears lightly, frost a sugar cone and roll it in sprinkles to form the horn, then refrigerate the cake, ears, and horn for 15 minutes to firm up the frosting.
STEP 7: Apply a final smooth layer of buttercream over the entire cake and ears, carefully cover the inside of each ear with sprinkles, then position the horn and ears on top of the cake.
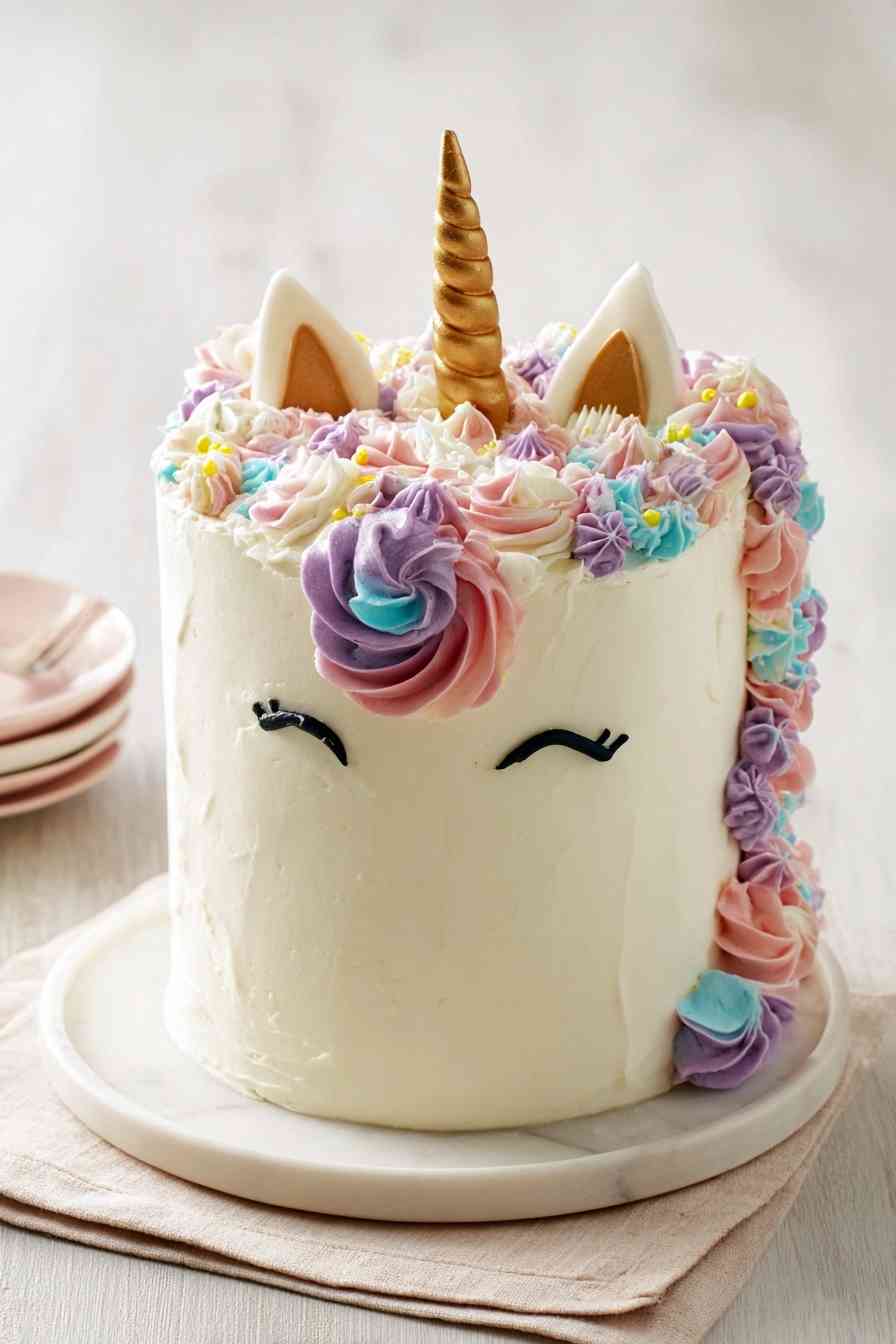
STEP 8: Prepare a second batch of buttercream and divide it between four small bowls, coloring each bowl a different shade for the mane. Spoon one color at a time into a piping bag fitted with a star tip, then pipe buttercream flowers around the horn and ears to create the flowing mane, allowing colors to blend slightly for a gradient effect as you work. Use black gel icing to pipe two simple eyes on the front of the cake.
Unicorn Cake Decorating and Baking Tips
- Divide batter precisely – use a kitchen scale to split each prepared cake mix evenly between bowls so your layers bake at the same height and stack cleanly without wobbling.
- Chill before final frosting – that 15-minute refrigeration after the crumb coat firms up the buttercream enough to prevent smearing when you apply the final smooth layer, which keeps your unicorn looking polished instead of patchy.
- Secure ears with toothpicks – pierce the bottom of each ear shape deeply with toothpicks before inserting them into the top of the cake, which prevents them from sliding or toppling as the frosting softens at room temperature.
Best Party Pairings for Your Rainbow Unicorn Cake
Serve slices with vanilla ice cream or whipped cream to balance the buttercream richness. Fresh berries or a simple fruit salad add brightness and cut through the sweetness for guests who want something lighter. Milk, lemonade, or sparkling water refresh the palate between bites without overwhelming the vanilla and buttercream flavors.
Unicorn Cake with Rainbow Layers: Your Questions Answered
Can I use homemade cake batter instead of cake mix?
Absolutely, just use a sturdy vanilla cake recipe that holds up well to stacking and divide the batter into four equal portions before coloring. Homemade batter may bake slightly differently than boxed mix, so watch your layers closely and test doneness with a toothpick to avoid overbaking or underbaking any tier.
How do I get vibrant rainbow colors without the cake tasting artificial?
Use gel food coloring instead of liquid drops, which delivers bold hues without adding extra moisture or chemical aftertaste to the batter. Start with a small amount and add more gradually until you reach the intensity you want, keeping in mind that colors often deepen slightly as the cake bakes and cools.
What’s the best way to make the unicorn horn stay upright?
Press the sugar cone firmly into the top of the chilled cake so the frosting grips the base, then refrigerate the assembled cake for at least 20 minutes before serving. The cold buttercream acts like glue, holding the horn steady even as the cake comes to room temperature.
Can I make the cake layers or decorations ahead of time?
Yes, bake and cool the layers up to two days in advance, wrapping each tightly in plastic wrap and storing at room temperature. You can also shape the ears and horn a day ahead, keeping them refrigerated until assembly time, which spreads out the work and reduces day-of stress.
How do I prevent the cake from drying out after decorating?
Keep the cake covered loosely with plastic wrap or under a cake dome once decorated, avoiding tight wrapping that could smudge the frosting. The buttercream layers act as moisture barriers that protect the cake itself, but storing the finished cake in the fridge for more than a day can make the layers slightly firm, so bring it to room temperature 30 minutes before serving for the best texture.
How to Store Your Unicorn Cake (and Keep It Magical)
Store the decorated cake in the refrigerator for up to three days, covering it loosely with plastic wrap or placing it under a large cake dome to protect the frosting without crushing the mane. Let the cake sit at room temperature for about 30 minutes before slicing to soften the frosting and bring out the cake’s tender crumb.
Wrap individual slices in plastic wrap and refrigerate for up to four days. The rainbow layers hold up well to chilling, though the buttercream may lose a bit of its smooth finish as condensation forms when the cake warms up.
Freezing the assembled cake isn’t ideal because the decorations can shift and the buttercream may separate slightly upon thawing. You can freeze unfrosted cake layers wrapped tightly in plastic wrap and foil for up to two months, then thaw them at room temperature before stacking and decorating.
Unicorn Cake with Rainbow Layers
Ingredients
Equipment
Method
- Preheat your oven to 350°F (175°C).
- Grease two 9-inch round cake pans and line them with parchment paper.
- Prepare one box of vanilla cake mix according to package instructions.
- Divide this batter equally into two bowls.
- Dye one portion of batter red and the other yellow using food colouring.
- Pour each colored batter into its own prepared cake pan. Bake as directed for two 9-inch rounds.
- Repeat with the second cake mix, this time colouring half the batter green and the other half blue. Bake as before.
- Let all cake layers cool completely.
- Meanwhile, make one batch of vanilla buttercream.
- Carefully trim the top of each cake layer to level them. Save some of the cake scraps to use for making ears.
- Place the purple (or your darkest coloured) cake layer on a serving plate and spread a generous layer of buttercream over the top.
- Stack the blue layer on top, frost, then repeat with yellow and then red layers, layering buttercream between each and finishing with more on top.
- Lightly frost the sides of the cake in a thin layer to create a crumb coat, smoothing it out.
- Shape the reserved cake scraps into two ear forms, inserting a toothpick into each base to help anchor them to the cake. Cover the ear shapes with a light coating of frosting.
- Frost the sugar cone lightly and then roll it in sprinkles to create the unicorn horn.
- Chill the assembled cake, prepared ears, and horn in the refrigerator for 15 minutes to allow the icing to set.
- Remove from the fridge and cover the cake and ear shapes with the remaining buttercream, smoothing well.
- Decorate the inner part of each ear with sprinkles to create colorful details.
- Carefully position the horn and ears on the top of the cake.
- Mix a second recipe of buttercream and divide it evenly among four small bowls.
- Tint each bowl of buttercream with a different color of your choice for the mane.
- One color at a time, transfer the tinted buttercream into a piping bag fitted with your desired tip.
- Pipe colorful buttercream flowers around the base of the horn and ears to form the unicorn's mane, switching or layering colors for a gradient effect.
- With the black gel icing, pipe closed eyes onto the front of the cake to complete the unicorn look.
- Slice and enjoy your rainbow unicorn cake!