Why You’ll Love this Oatmeal Cookie Jar Mix
Whether you’re hunting for a homemade gift idea or just want to stock your pantry with a ready-to-go treat, this Oatmeal Cookie Jar Mix is about to become your new best friend.
I’m obsessed with how it combines practicality with that heartwarming homemade touch.
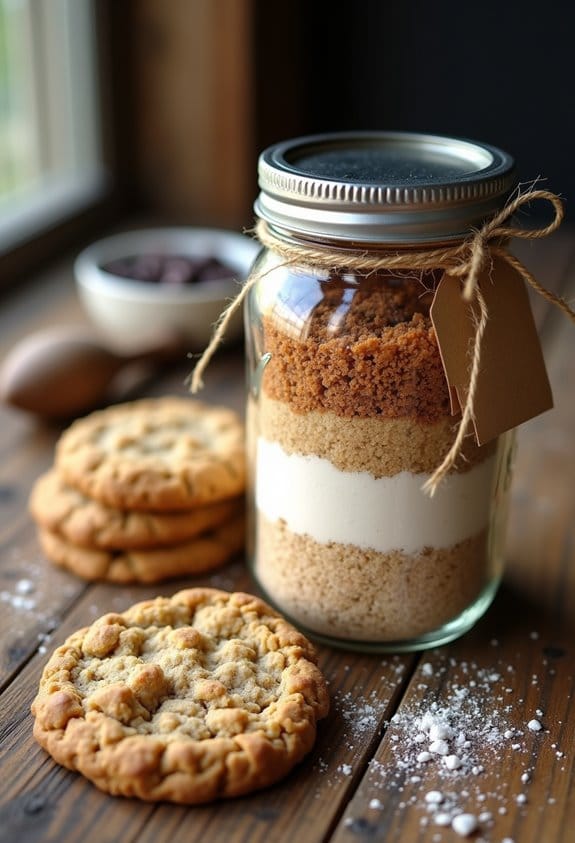
The beautiful layers create an Instagram-worthy presentation that makes gift-giving a breeze. Who doesn’t appreciate something both pretty and delicious?
Plus, it’s incredibly versatile—add chocolate chips, nuts, or keep it classic. With a shelf life of six months, you can whip up warm, chewy cookies whenever the craving strikes. No measuring required, just add butter and an egg.
What Ingredients are in Oatmeal Cookie Jar Mix?
The beauty of this oatmeal cookie jar mix lies in its simplicity. I’ve always believed that the best recipes combine pantry staples in just the right proportions to create something magical.
This mix uses everyday ingredients that, when layered together, create not just a practical baking shortcut but also a visually stunning gift that anyone would be thrilled to receive.
- 1 cup old-fashioned rolled oats (not quick oats)
- 3/4 cup all-purpose flour (95 g)
- 1/2 teaspoon baking soda
- 1/2 teaspoon ground cinnamon
- 1/2 cup packed brown sugar (100 g)
- 1/2 cup granulated sugar (100 g)
- 1/4 teaspoon fine sea salt (optional, but recommended to boost flavor)
When selecting your ingredients, quality matters, especially for a gift. Fresh oats make all the difference in texture—stick with old-fashioned rolled oats rather than quick oats, which can turn mushy.
The optional sea salt might seem like a small addition, but it’s what separates good cookies from great ones, enhancing all the other flavors.
And remember, whoever receives this mix will need to add their own butter, egg, and vanilla, plus any mix-ins they fancy like chocolate chips or nuts. That customization is part of what makes this gift so special.
How to Make this Oatmeal Cookie Jar Mix
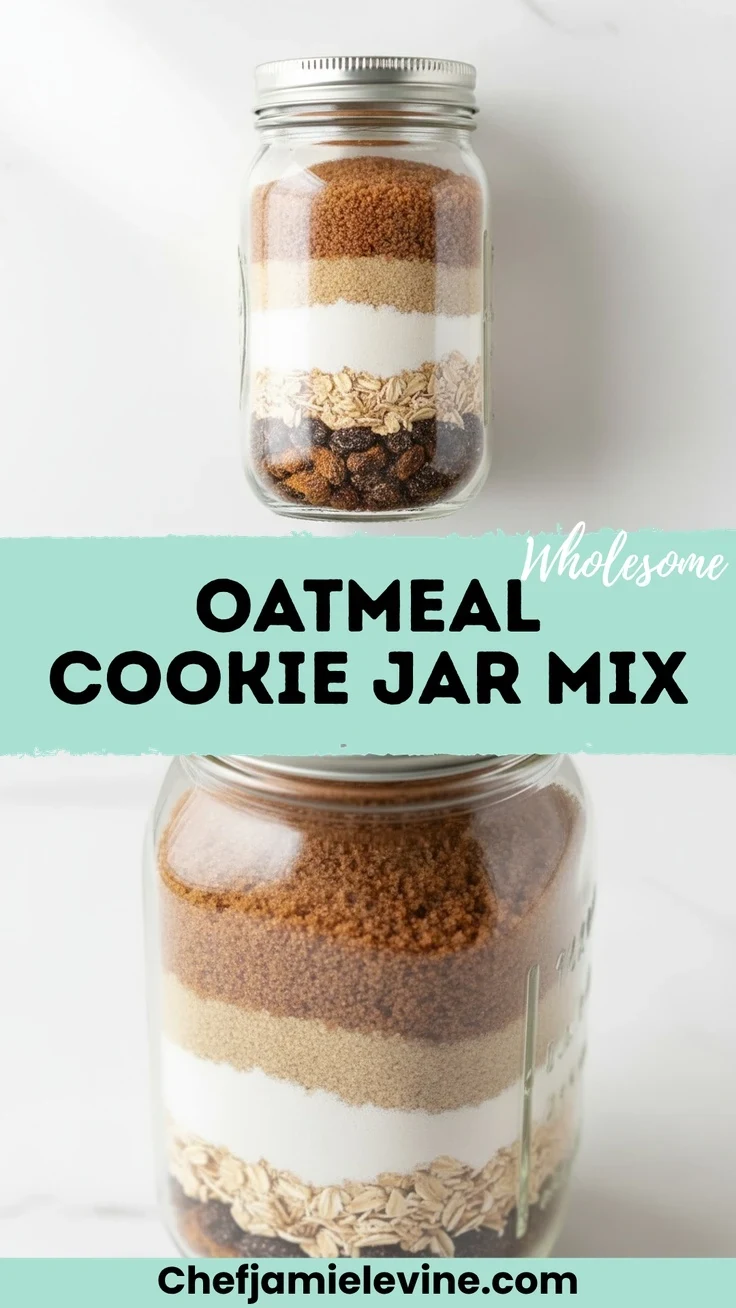
Assembling this oatmeal cookie jar mix is almost as satisfying as eating the cookies themselves. I find something deeply therapeutic about creating those perfect, colorful layers in a glass jar. The key to success is layering the ingredients in the right order to create distinct stripes that look beautiful on display.
You’ll need a 1-quart (32 oz) mason jar as your canvas—anything smaller and you’ll be playing an impossible game of ingredient Tetris.
Start by adding 1 cup of old-fashioned rolled oats to the bottom of your jar. These create a lovely, textured foundation layer. Next, carefully add your ½ cup packed brown sugar (100g), pressing it down lightly to create a defined layer—this gentle pressing is essential for visual appeal without compacting ingredients too much. Follow with ½ cup granulated sugar (100g), which creates a clean white stripe.
For the next layer, you’ll want to combine ¾ cup all-purpose flour (95g), ½ teaspoon baking soda, and ½ teaspoon ground cinnamon in a separate bowl first, whisking them together thoroughly. This pre-mixing guarantees even distribution of leavening and spice throughout the cookies. Once mixed, pour this flour mixture into the jar. If you’re using the optional ¼ teaspoon sea salt (and really, why wouldn’t you?), sprinkle it on top as the final touch.
Seal the jar tightly, and your mix will stay fresh for up to 6 months when stored in a cool, dry place.
If you’re giving this as a gift, don’t forget to attach baking instructions. Whoever receives this lovely jar will need to know they should cream ½ cup softened unsalted butter with the sugars from the jar, then beat in 1 large egg and 1 teaspoon vanilla extract.
After that, they’ll stir in the remaining dry ingredients just until combined, and fold in optional mix-ins like chocolate chips or nuts if desired. The cookies bake at 350°F for 10-12 minutes—just until the edges set while centers remain slightly soft. Can you imagine a more thoughtful homemade gift? The recipient gets not just ingredients but the promise of warm, fresh-baked cookies whenever they choose.
Oatmeal Cookie Jar Mix Substitutions and Variations
Now that you’ve mastered the basic jar assembly, let’s explore how to customize this oatmeal cookie mix to suit different tastes and dietary needs.
I’ve tried countless variations over the years, and trust me, this recipe is incredibly forgiving.
For gluten-free friends, simply swap the all-purpose flour with a cup-for-cup GF blend and use certified gluten-free oats.
Going dairy-free? Plant butter works beautifully, though you might need a splash of non-dairy milk if the dough seems dry.
My personal favorite? Adding a pinch of cardamom to the dry mix and folding in dried cranberries with white chocolate chips. Divine.
What to Serve with Oatmeal Cookie Jar Mix
Perfectly baked oatmeal cookies deserve thoughtful accompaniments that enhance their homey, comforting appeal. I love serving mine with a glass of cold milk—dairy or plant-based—for that classic dunking experience we all crave.
For afternoon tea, I’ll arrange them on a platter with sliced apples and a wedge of sharp cheddar. The sweet-savory contrast? Heavenly.
For dessert, transform these humble cookies into an impressive treat by sandwiching vanilla ice cream between two cooled cookies.
Or crumble them over yogurt with a drizzle of honey.
Final Thoughts
While cookie jar mixes might seem like just another gift idea, I’ve found they create moments of connection that last far longer than the cookies themselves.
There’s something magical about knowing someone is baking your recipe in their kitchen, perhaps thinking of you as the aroma fills their home.
Whether you’re making these as holiday gifts, thank-you presents, or just-because tokens, they carry a bit of your care in every jar.
The beauty lies in their simplicity—a few basic ingredients layered prettily, offering both visual appeal and practical deliciousness.
Sometimes the most memorable gifts are the ones that bring comfort, one cookie at a time.
Oatmeal Cookie Jar Mix
Ingredients
Equipment
Method
- Add 1 cup of old-fashioned rolled oats to the bottom of a 1-quart (32 oz) mason jar to create the foundation layer.
- Carefully add 1/2 cup packed brown sugar on top of the oats, pressing down lightly to create a defined layer without compacting too much.
- Add 1/2 cup granulated sugar as the next layer, creating a clean white stripe.
- In a separate bowl, whisk together 3/4 cup all-purpose flour, 1/2 teaspoon baking soda, and 1/2 teaspoon ground cinnamon until thoroughly combined.
- Pour the flour mixture into the jar as the next layer.
- If using, sprinkle 1/4 teaspoon sea salt on top as the final touch.
- Seal the jar tightly. The mix will stay fresh for up to 6 months when stored in a cool, dry place.
- Attach baking instructions: Cream 1/2 cup softened unsalted butter with the sugars from the jar, then beat in 1 large egg and 1 teaspoon vanilla extract. Stir in remaining dry ingredients just until combined. Fold in optional mix-ins if desired. Bake at 350°F for 10-12 minutes until edges are set but centers remain slightly soft.

