
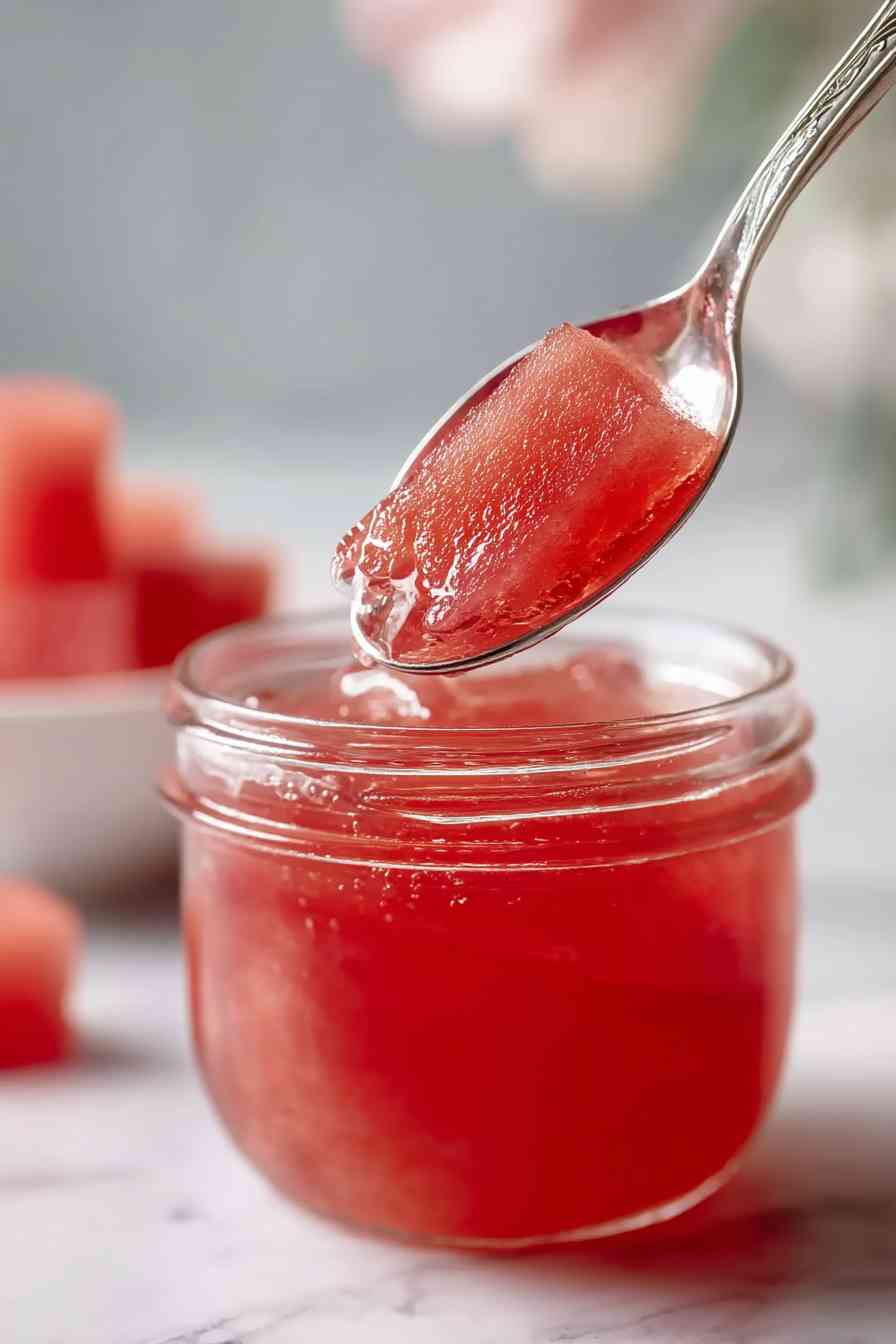
Simple Watermelon Jelly transforms fresh watermelon juice into a shelf-stable preserve with bright pink color and refreshing flavor.
There’s something deeply satisfying about turning a slice of juicy summer watermelon into jars of glossy, spreadable jelly. The process feels a bit like magic, watching that blended and strained watermelon juice bubble away on the stove until it reaches the exact temperature where pectin and sugar lock into a perfect gel. You end up with something that captures the essence of watermelon in a form that lasts well beyond the season, ready to spread on toast or swirl into yogurt whenever the mood strikes.
This recipe walks you through the full canning process, from sterilizing jars to performing the wrinkle test on a chilled plate. The technique is straightforward, but it does require attention to detail, especially when monitoring temperature and checking for proper gel. If you’ve never made jelly before, the steps might feel a bit involved at first, but the rhythm becomes clear once you’re in the middle of it. The reward is five half-pint jars of homemade preserves that you actually made yourself, which feels pretty great.
The key to success here is understanding a few critical moments: whisking pectin with sugar before it hits the hot liquid, boiling the mixture to exactly 220°F, and testing for doneness before you pull it off the heat. Get those right, and you’ll have jelly that sets beautifully and holds its shape on a spoon.
What You’ll Need for Simple Watermelon Jelly
This jelly relies on a handful of ingredients that work together to create the right balance of sweetness, acidity, and structure.
- Watermelon juice – the star ingredient, providing the base flavor and that distinctive pink color.
- Sugar – not just for sweetness, but essential for helping the pectin gel and preserving the jelly.
- Pectin – the gelling agent that transforms liquid juice into spreadable jelly when heated to the right temperature.
- Lemon juice – adds brightness and the necessary acidity to help pectin activate and gel properly.
- Salt – a small amount that enhances the watermelon flavor without making the jelly taste salty.
- Butter – reduces foam during cooking, resulting in clearer, more attractive jelly.
Jelly Success Secrets: Pectin, Foam, and More
- Always whisk pectin with sugar first. This prevents clumping when the pectin hits the hot liquid. The sugar acts as a buffer, distributing the pectin evenly so your jelly gels consistently throughout the batch.
- Use a candy thermometer and trust it. Reaching exactly 220°F is the critical moment where sugar concentration and pectin reach the proper balance to gel. Eyeballing it or guessing based on time alone can leave you with jelly that’s too runny or overcooked.
- Don’t skip the wrinkle test. Even with a thermometer, testing a spoonful on a chilled plate gives you visual confirmation that the jelly is ready. If it wrinkles when you push it and doesn’t flow back together, you’re good to go.
- Skim foam thoroughly before jarring. That foamy layer on top can make your finished jelly look cloudy. A few seconds with a clean spoon makes a noticeable difference in clarity.
Step-by-Step Guide: Making Watermelon Jelly at Home
STEP 1: Sterilize five half-pint jars and lids by running them through a hot dishwasher cycle or boiling them in water for 10 minutes. While the jars are sterilizing, measure out all your ingredients so everything is ready when you need it.
STEP 2: In a small bowl, whisk together the sugar and pectin until well combined. This prevents the pectin from clumping when it hits the hot liquid and ensures even distribution throughout the batch.
STEP 3: Pour the watermelon juice and lemon juice into a large, heavy-bottomed pot with at least 8-quart capacity. Add the salt and butter, then stir in the sugar-pectin mixture, stirring constantly until fully dissolved. Bring to a rolling boil over high heat.
STEP 4: Maintain a vigorous rolling boil and monitor the temperature with a candy thermometer. Cook for 15 to 30 minutes until the mixture reaches exactly 220°F. Before removing from heat, perform the wrinkle test by placing a small spoonful of hot jelly on a chilled plate. If it wrinkles when pushed and doesn’t flow back together, it’s ready.
STEP 5: Remove the pot from heat and skim off any foam from the surface. Working quickly while the jelly is still hot, ladle it into the sterilized jars, leaving 1/4 inch of headspace at the top. Wipe the rim of each jar with a clean, damp cloth, place the lids on top, and screw the bands until finger-tight.
STEP 6: Place the filled jars into a boiling water canner and process for 10 minutes to create a proper seal. Remove the jars using jar tongs and place them upright on a clean towel, spacing them a few inches apart. As they cool, you’ll hear a gentle pop sound as the lids seal. Let the jars sit undisturbed for at least 12 hours before testing the seals.
Tasty Ways to Use Watermelon Jelly
- Spread it on buttered toast or warm biscuits for a breakfast that tastes like summer, even in the middle of winter.
- Swirl a spoonful into plain yogurt or oatmeal for a subtle sweetness that doesn’t overpower the base.
- Use it as a glaze for grilled chicken or pork, where the mild watermelon flavor adds an unexpected brightness without turning overly fruity.
Watermelon Jelly FAQ: Common Questions & Troubleshooting
Can I use bottled watermelon juice instead of fresh?
You can, but fresh juice gives you better flavor and color control. Bottled juice may contain added sugars or preservatives that can throw off the sugar-to-pectin ratio, potentially affecting how well the jelly sets. If you do use bottled, check the label carefully and adjust your sugar accordingly.
What if my jelly doesn’t set after cooling?
If your jelly stays runny after 24 hours, you likely didn’t reach 220°F or didn’t boil long enough. You can reprocess it by pouring the jelly back into a pot, adding a bit more pectin, and boiling again until it reaches the proper temperature and passes the wrinkle test.
Do I really need to use butter to reduce foaming?
It’s not strictly required, but it makes a noticeable difference. The butter significantly reduces foam during cooking, which means less skimming and clearer finished jelly. If you skip it, just be prepared to skim more thoroughly before jarring to avoid a cloudy appearance.
How do I know if my jars are properly sealed?
Press down on the center of each lid after the jars have cooled completely. If the lid doesn’t flex or pop, the jar is sealed. You can also check visually: a properly sealed lid will be slightly concave. Any jars that didn’t seal should go straight into the fridge.
Is this watermelon jelly safe to can with a water bath?
Yes, the combination of sugar and lemon juice creates enough acidity to make this jelly safe for water bath canning. The 10-minute processing time at a full boil is sufficient for half-pint jars at sea level. If you’re at higher altitude, you’ll need to adjust processing time accordingly.
How to Store Your Homemade Watermelon Jelly
Properly sealed jars can be stored in a cool, dark pantry for up to one year. The jelly will maintain its best flavor and color for about six months, though it remains safe to eat beyond that point as long as the seal stays intact. Once you open a jar, store it in the refrigerator and use within three weeks for optimal freshness.
Any jars that didn’t seal properly during the canning process should be refrigerated immediately and used within three weeks. You can also freeze opened or unsealed jars for up to six months if you want to extend their life, though the texture may soften slightly after thawing. When reheating or using jelly from the fridge, let it come to room temperature for the best spreadable consistency.
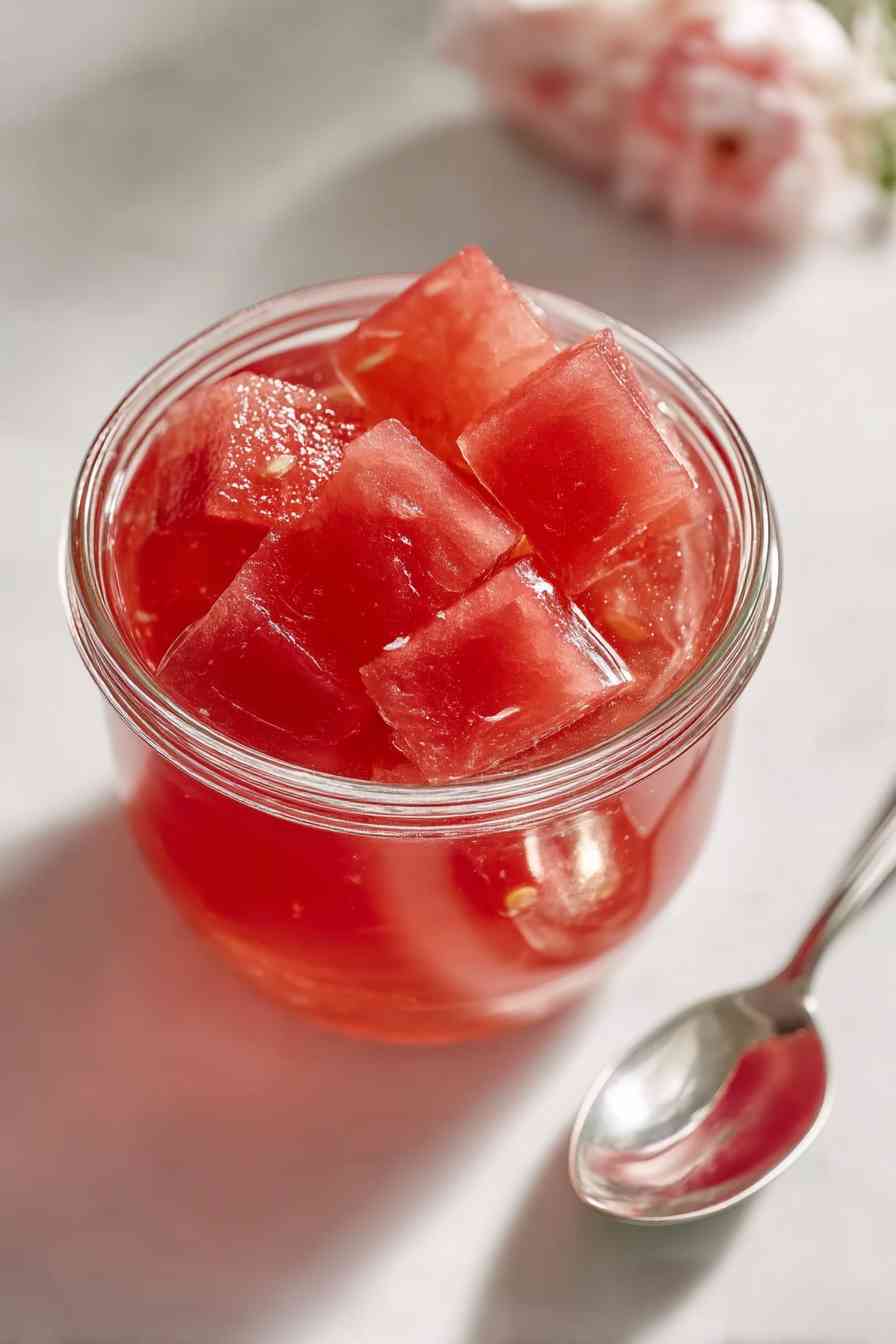
Simple Watermelon Jelly
Ingredients
Equipment
Method
- Prepare five half-pint jars and their lids for sterilization by running them through a hot dishwasher cycle or boiling them in water for 10 minutes to prevent contamination. While jars sterilize, gather and measure all ingredients including sugar, pectin, watermelon juice, lemon juice, salt, and butter so everything is ready when needed.
- Combine the sugar and pectin in a small bowl, whisking thoroughly until evenly mixed. This prevents clumping when added to hot liquid by allowing the sugar to distribute the pectin uniformly throughout the mixture for consistent gelling.
- Add watermelon juice and lemon juice to a large heavy-bottomed pot with at least 8-quart capacity. Stir in the salt and butter, then add the sugar-pectin mixture while stirring constantly until completely dissolved. Place over high heat and bring to a rolling boil, stirring occasionally.
- Keep the mixture at a vigorous rolling boil while monitoring temperature with a candy or instant-read thermometer. Continue cooking for 15 to 30 minutes until the jelly reaches exactly 220°F (104°C). Test readiness by spooning a small amount onto a chilled plate; if it wrinkles when pushed and holds its shape rather than flowing back together, it's done. If still liquid, cook another 2 to 3 minutes and test again.
- Take the pot off the heat and use a clean spoon to skim away any foam from the surface. Work quickly while jelly is hot, ladling it into the sterilized jars with 1/4 inch headspace at the top. Clean each jar rim with a clean damp cloth, place lids on top, and tighten the bands until finger-tight without over-tightening. Transfer filled jars immediately to a boiling water canner and process for 10 minutes.
- Use jar tongs to carefully lift the jars from the water canner and set them upright on a clean towel or cooling rack with a few inches of space between each jar for air circulation. Listen for the pop sound as lids seal during cooling. Allow jars to sit undisturbed at room temperature for at least 12 hours, preferably overnight, before checking seals. Refrigerate any jars that fail to seal properly and use within 3 weeks.